综合介绍
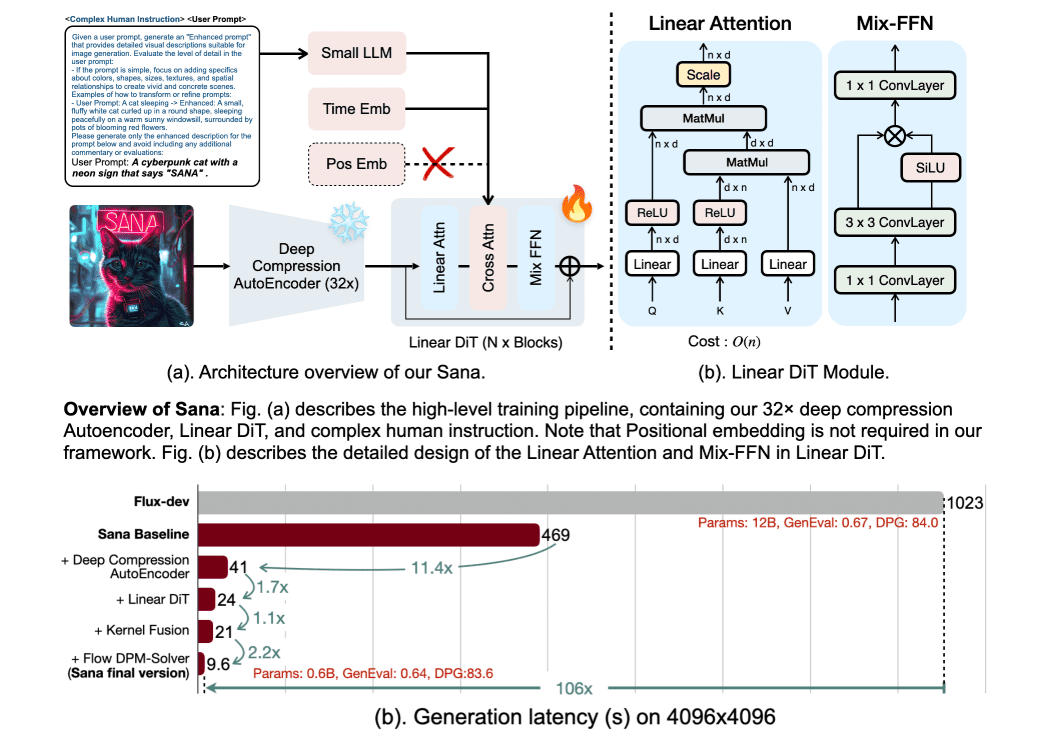
Sana 是由 NVIDIA 实验室开发的一种高效高分辨率图像生成框架,能够在几秒钟内生成最高 4096 × 4096 分辨率的图像。Sana 采用线性扩散变换器和深度压缩自编码器技术,显著提高了图像生成的速度和质量,同时降低了计算资源的需求。该框架支持在普通笔记本 GPU 上运行,适用于低成本的内容创作。
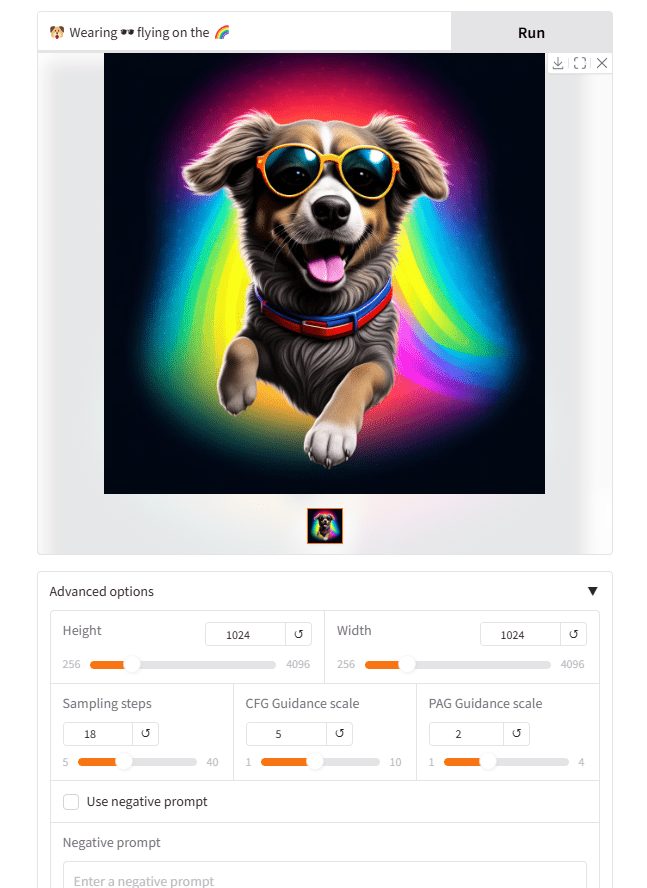
在线体验:https://nv-sana.mit.edu/
功能列表
- 高分辨率图像生成:支持生成最高 4096 × 4096 分辨率的图像。
- 线性扩散变换器:使用线性注意力机制,提高高分辨率图像生成的效率。
- 深度压缩自编码器:将图像压缩至 32 倍,减少潜在标记数量,提高训练和生成效率。
- 文本到图像转换:通过解码器仅文本编码器,增强图像与文本的对齐。
- 高效训练和采样:采用 Flow-DPM-Solver,减少采样步骤,加速收敛。
- 低成本部署:支持在 16GB 笔记本 GPU 上运行,生成 1024 × 1024 分辨率图像仅需不到 1 秒。
使用帮助
安装流程
- 确保 Python 版本 >= 3.10.0,推荐使用 Anaconda 或 Miniconda。
- 安装 PyTorch 版本 >= 2.0.1+cu12.1。
- 克隆 Sana 仓库:
git clone https://github.com/NVlabs/Sana.git cd Sana - 运行环境设置脚本:
./environment_setup.sh sana或者按照
environment_setup.sh中的步骤逐步安装各个组件。
使用方法
硬件要求
- 0.6B 模型需要 9GB VRAM,1.6B 模型需要 12GB VRAM。量化版本将需要少于 8GB 的显存进行推理。
快速开始
- 使用 Gradio 启动官方在线演示:
DEMO_PORT=15432 \ python app/app_sana.py \ --config=configs/sana_config/1024ms/Sana_1600M_img1024.yaml \ --model_path=hf://Efficient-Large-Model/Sana_1600M_1024px/checkpoints/Sana_1600M_1024px.pth - 运行推理代码生成图像:
import torch
from app.sana_pipeline import SanaPipeline
from torchvision.utils import save_image
device = torch.device("cuda:0" if torch.cuda.is_available() else "cpu")
generator = torch.Generator(device=device).manual_seed(42)
sana = SanaPipeline("configs/sana_config/1024ms/Sana_1600M_img1024.yaml")
sana.from_pretrained("hf://Efficient-Large-Model/Sana_1600M_1024px/checkpoints/Sana_1600M_1024px.pth")
prompt = 'a cyberpunk cat with a neon sign that says "Sana"'
image = sana(prompt=prompt, height=1024, width=1024, guidance_scale=5.0, pag_guidance_scale=2.0, num_inference_steps=18, generator=generator)
save_image(image, 'output/sana.png', nrow=1, normalize=True, value_range=(-1, 1))
训练模型
- 准备数据集,格式如下:
asset/example_data ├── AAA.txt ├── AAA.png ├── BCC.txt ├── BCC.png └── CCC.txt - 启动训练:
bash train_scripts/train.sh \
configs/sana_config/512ms/Sana_600M_img512.yaml \
--data.data_dir="asset/example_data" \
--data.type=SanaImgDataset \
--model.multi_scale=false \
--train.train_batch_size=32
© 版权声明
文章版权归 AI分享圈 所有,未经允许请勿转载。
Related posts

暂无评论...

