MoneyPrinterPlus: AI tool for generating short videos with one click, free batch mixing
General Introduction
MoneyPrinterPlus is an open source project designed to generate and mix all kinds of short videos with one click through AI technology and automatically publish them to multiple video platforms, such as Jieyin, Shutterbugs, Xiaohongshu, and Video Number. The tool supports local and cloud-based speech models, including chatTTS, fasterwhisper, GPTSoVITS, as well as Azure, AliCloud and Tencent Cloud speech services.MoneyPrinterPlus also integrates Stable Diffusion and comfyUI, which enables direct generation of AI images. This project makes batch generation and distribution of short videos easier and more efficient than ever.
Function List
- AI video batch generation: use AI big model technology to generate all kinds of short videos in one click.
- Video Mixing: Batch mix short videos to generate a large number of non-repeating video content.
- Automatic Video Publishing: Automatically publish videos to platforms such as Jieyin, Shutterbug, Xiaohongshu and Video Number.
- Supports a variety of speech models: including local and cloud-based chatTTS, fasterwhisper, GPTSoVITS, and so on.
- AI image generation: Integrate Stable Diffusion and comfyUI to generate AI images directly.
mounting
pre-conditions
- Make sure you have Python 3.10+ running. If it's windows, make sure the path to the installed python is added to the PATH.
- Make sure you have ffmpeg 6.0+ running. If it is windows, please make sure the path to the ffmpeg installation has been added to the PATH. For those who don't have ffmpeg installed, please run ffmpeg via the https://ffmpeg.org/ to install the corresponding version.
manual installation
If both python and ffmpeg environments are available. Then you can install the dependency packages via pip.
pip install -r requirements.txt
automatic installation
Go to the project directory and double click on it for windows to execute:
setup.bat
Execute under mac or linux:
bash setup.sh
(of a computer) run
Run the program with the following command.
streamlit run gui.py
automatic operation
If you are using an auto-installation script, then you can execute the following script to run it automatically.
Under Windows, double-click start.bat.
Execute under mac or linux:
bash start.sh
You can see the log information of the program running in the log file.
It contains the address of a browser, which can be opened to access the program.
Once you open it, you will see the following interface:
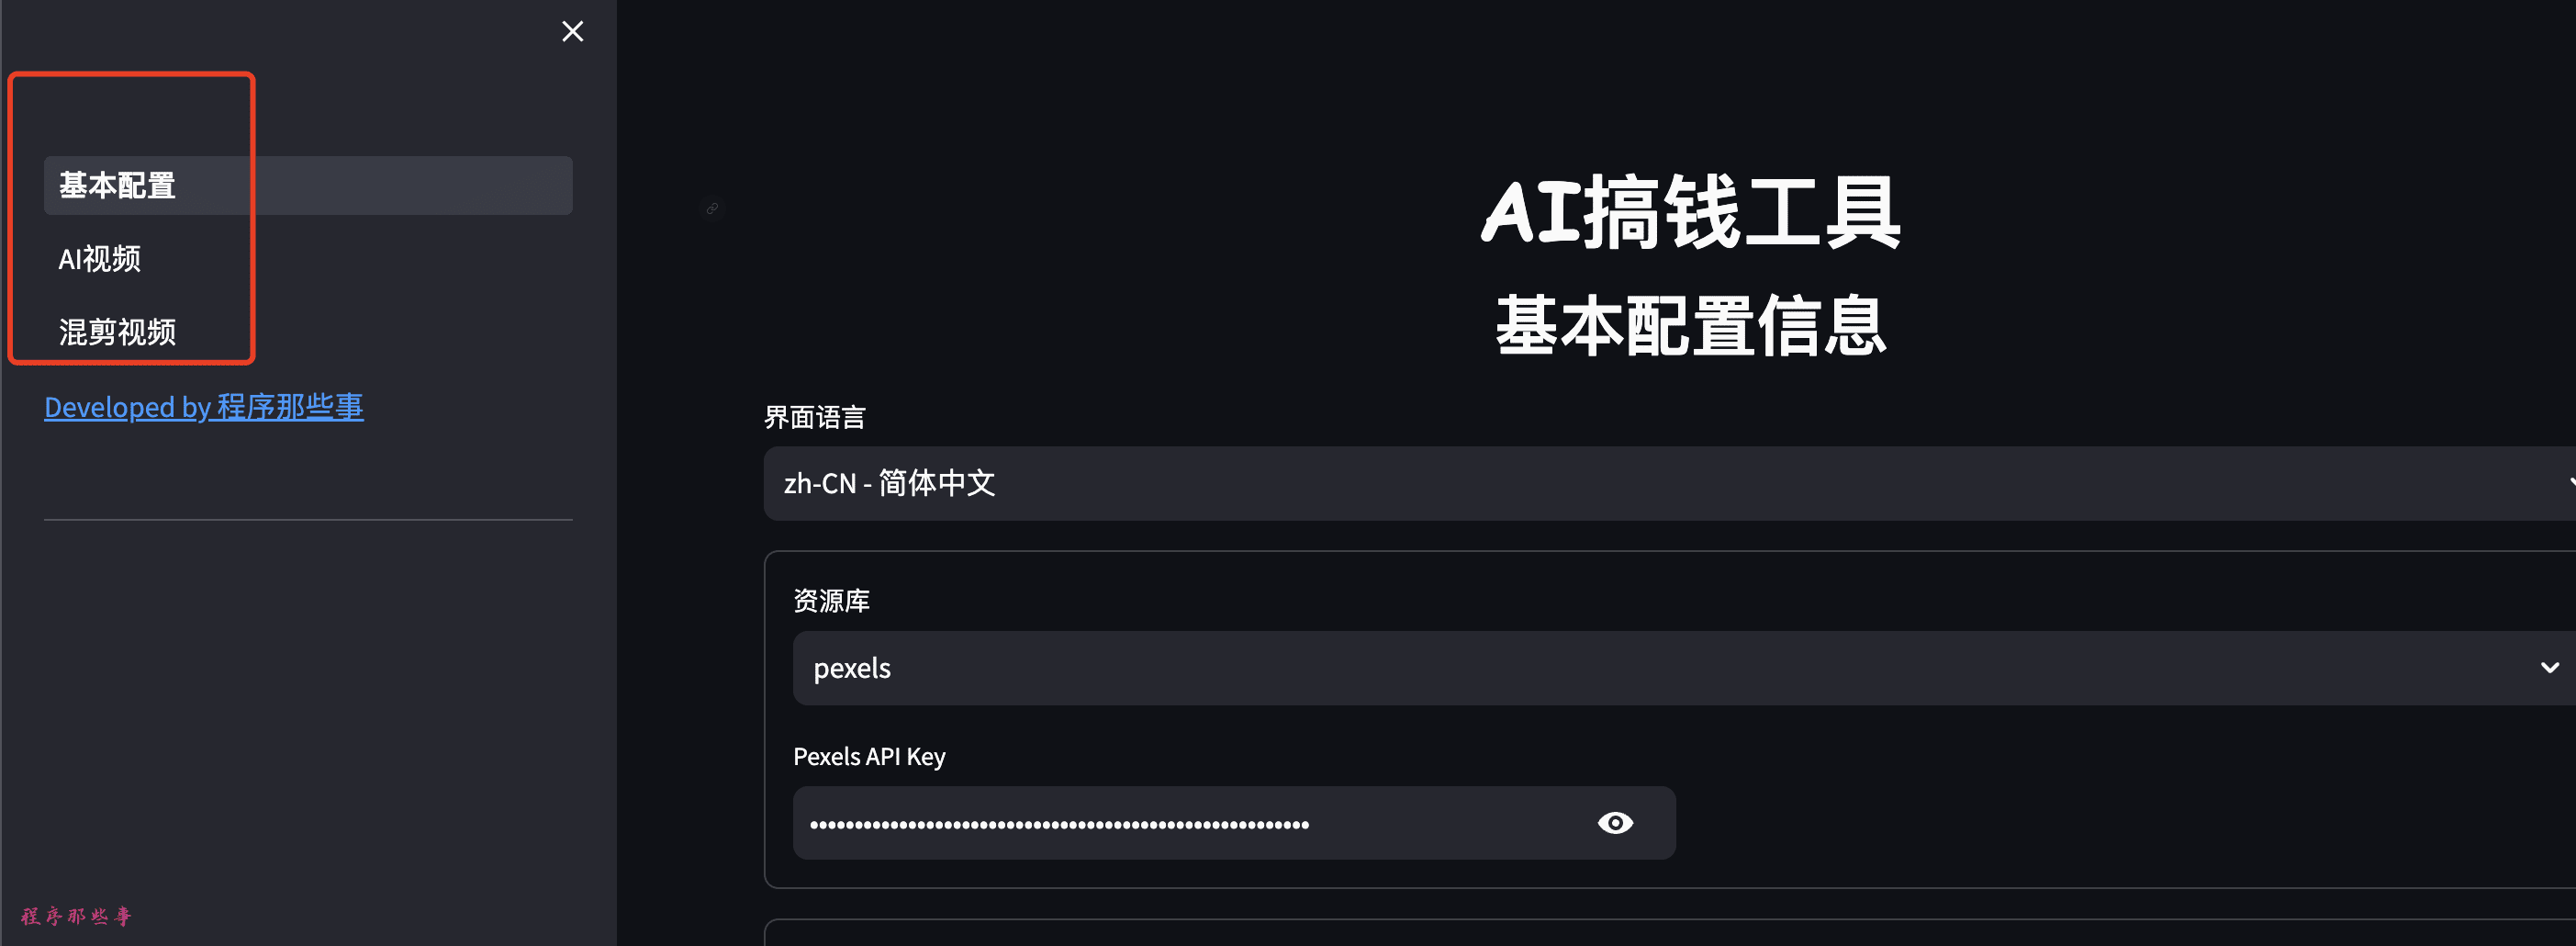
There are currently three configurations on the left side, Basic, AI Video and Mixed Video (in development).
Basic Configuration
1. Resource base
Current resource support:
- pexels. www.pexels.com Pexels It is a world famous website for free pictures, video clips.
- pixabay. pixabay.com
You need to register a key on the corresponding website to realize the API call.
Additional repositories will be added later. For example (videvo.net(math.) genusvideezy.com etc.)
2. Audio library
Text-to-speech and speech recognition features are currently supported:
- Azure's cognitive-services service.
- Intelligent Voice Interaction from AliCloud
- Tencent Cloud Voice Technology Features (https://console.cloud.tencent.com/asr)
- Azure:
Everyone needs to go to https://speech.microsoft.com/portal Register a key here.
Azure is free for 1 year for new users. The cost is also cheaper.
- Aliyun:
Everyone needs to go to https://nls-portal.console.aliyun.com/overview Open the service here and add a project.
You need to enable the AliCloud Intelligent Voice Interaction feature - you must enable the Speech Synthesis and Recorded File Recognition (Extreme Edition) features.
- Tencent Cloud:
Tencent Cloud Voice Technology Features (https://console.cloud.tencent.com/asr) Enable speech recognition and speech synthesis.
A large model of local speech recognition will be added later. But text-to-speech is still the best service from Microsoft.

3. LLM Large Model
Big Model Zone currently supports Moonshot, openAI, Azure openAI, Baidu Qianfan, Baichuan, Tongyi Qwen, DeepSeek.
Moonshot is recommended.
Other popular large models on the market will be added.
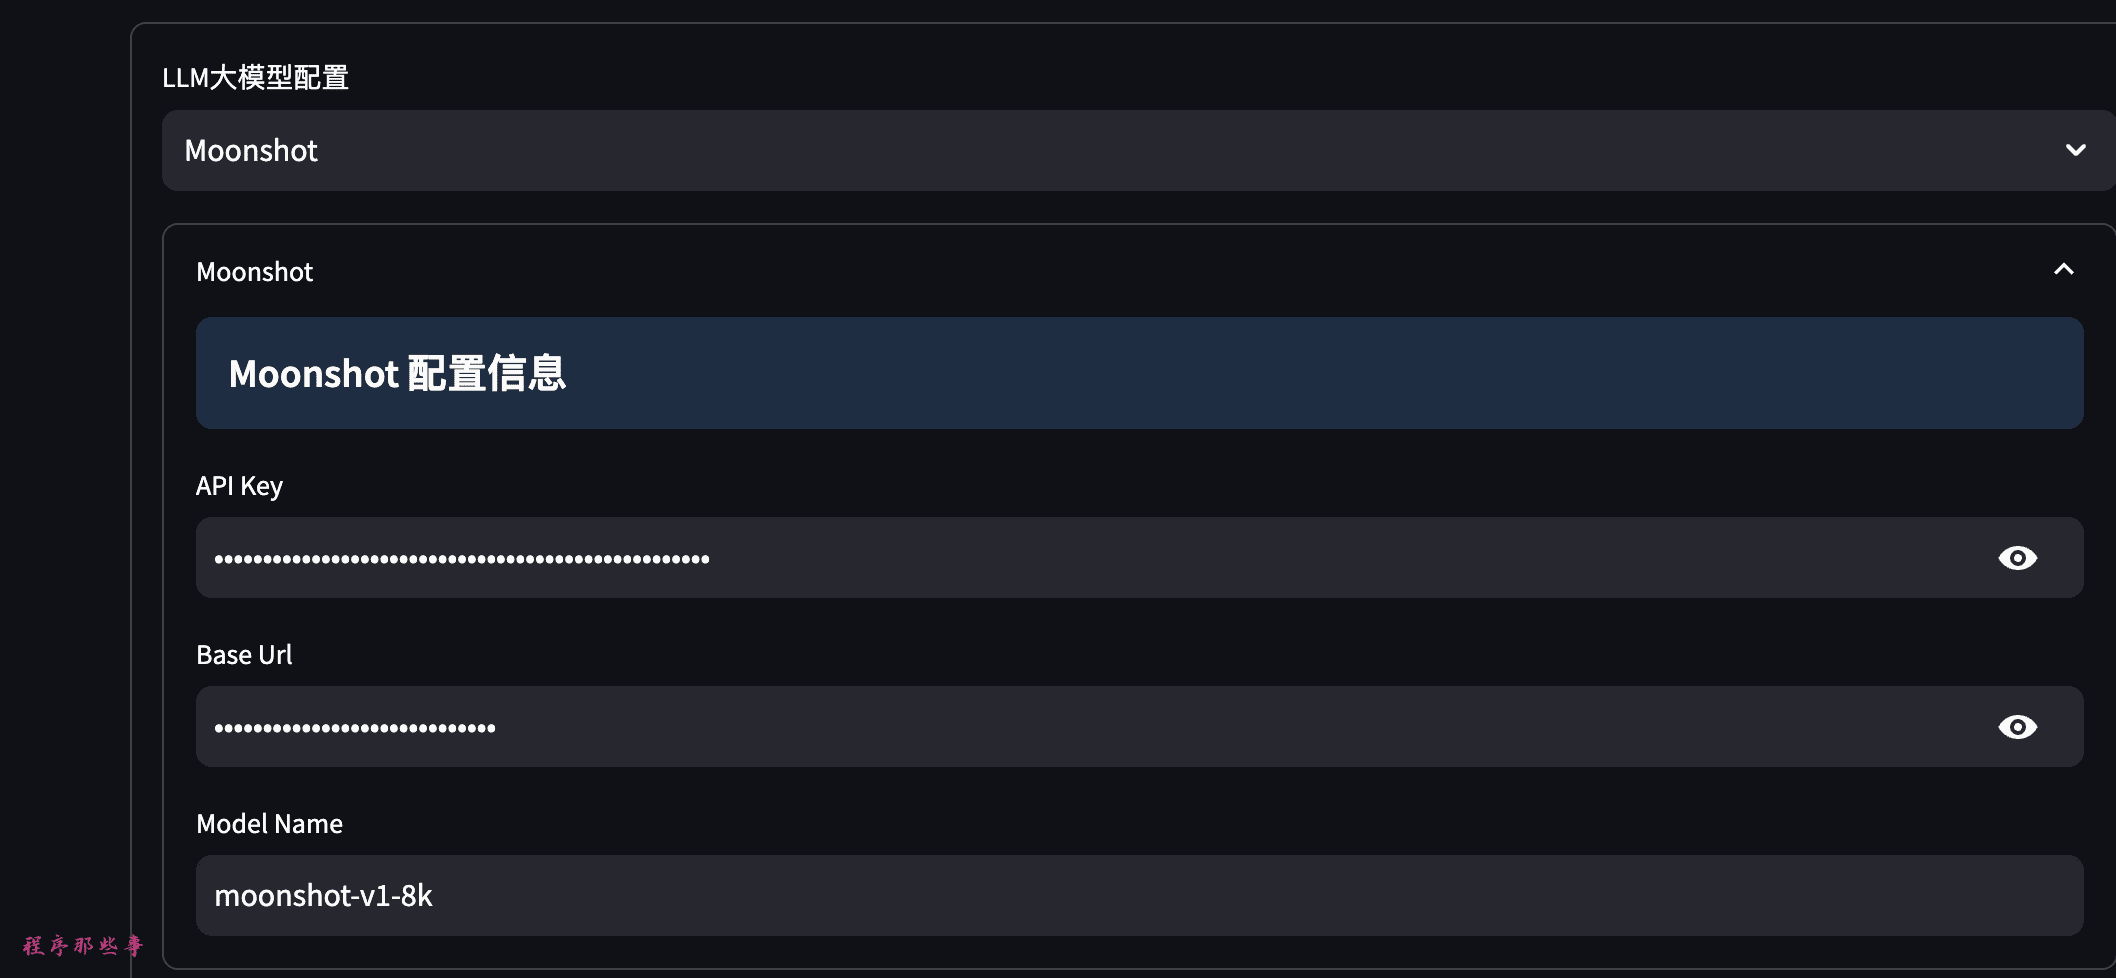
Moonshot API to get the address: https://platform.moonshot.cn/
baidu qianfan API get address:https://cloud.baidu.com/doc/WENXINWORKSHOP/s/yloieb01t
baichuan API to get the address: https://platform.baichuan-ai.com/
Ali tongyi qwen API get address: https://help.aliyun.com/document_detail/611472.html?spm=a2c4g.2399481.0.0
DeepSeek API Access. https://www.deepseek.com/
1. AI video
Once the basic configuration is set up. You can then access the AI video.
Generate video copy
First, we give a keyword and then use a big model to generate video copy:
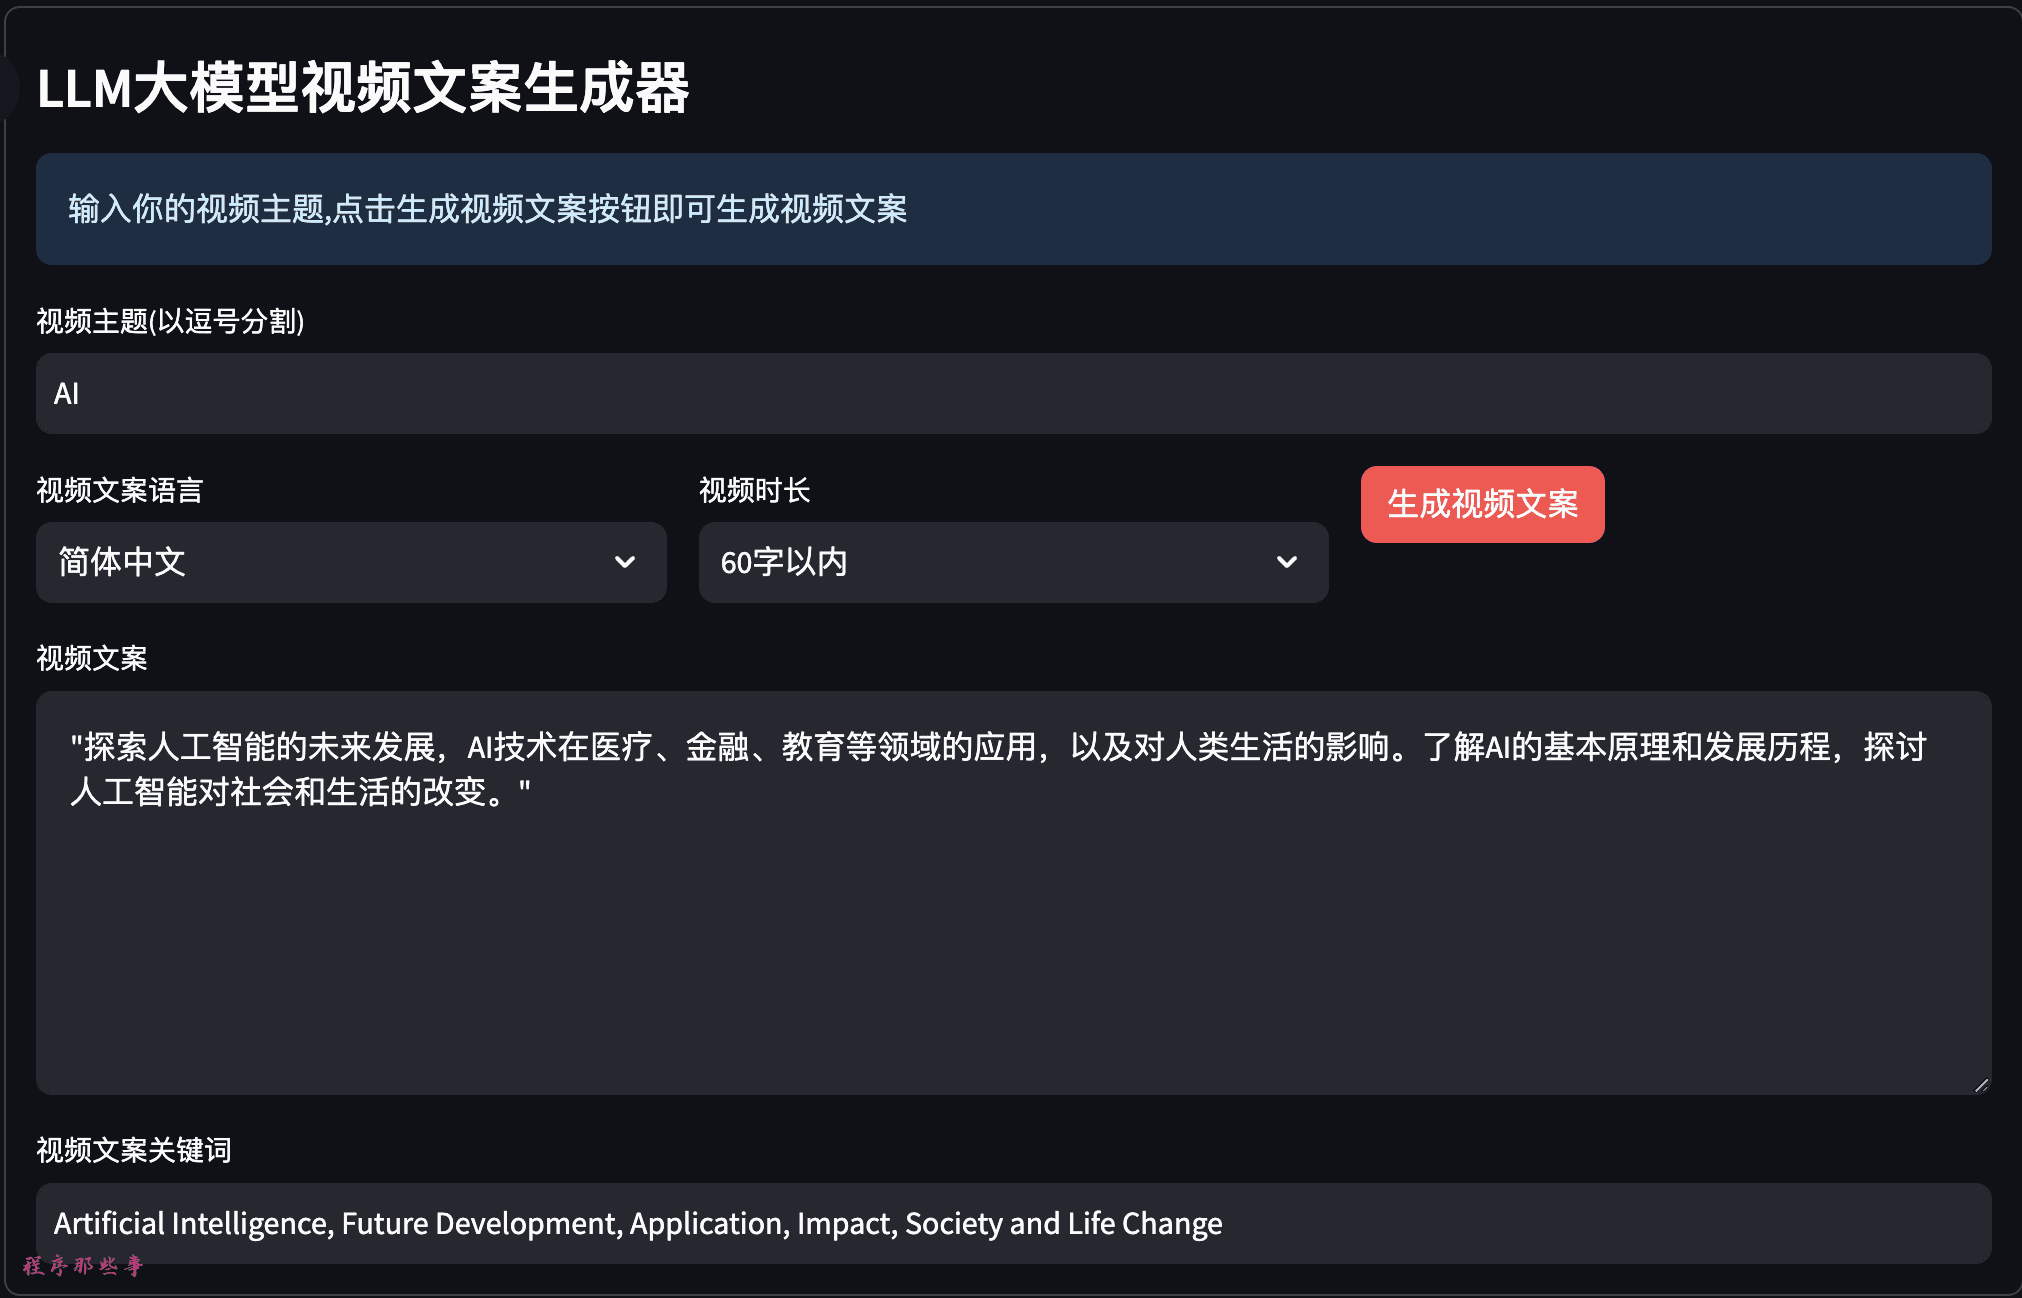
You can choose the copy language of the video, the length of the video.
If people are not happy with the video copy and keywords, they can change them manually.
Video dubbing and background music
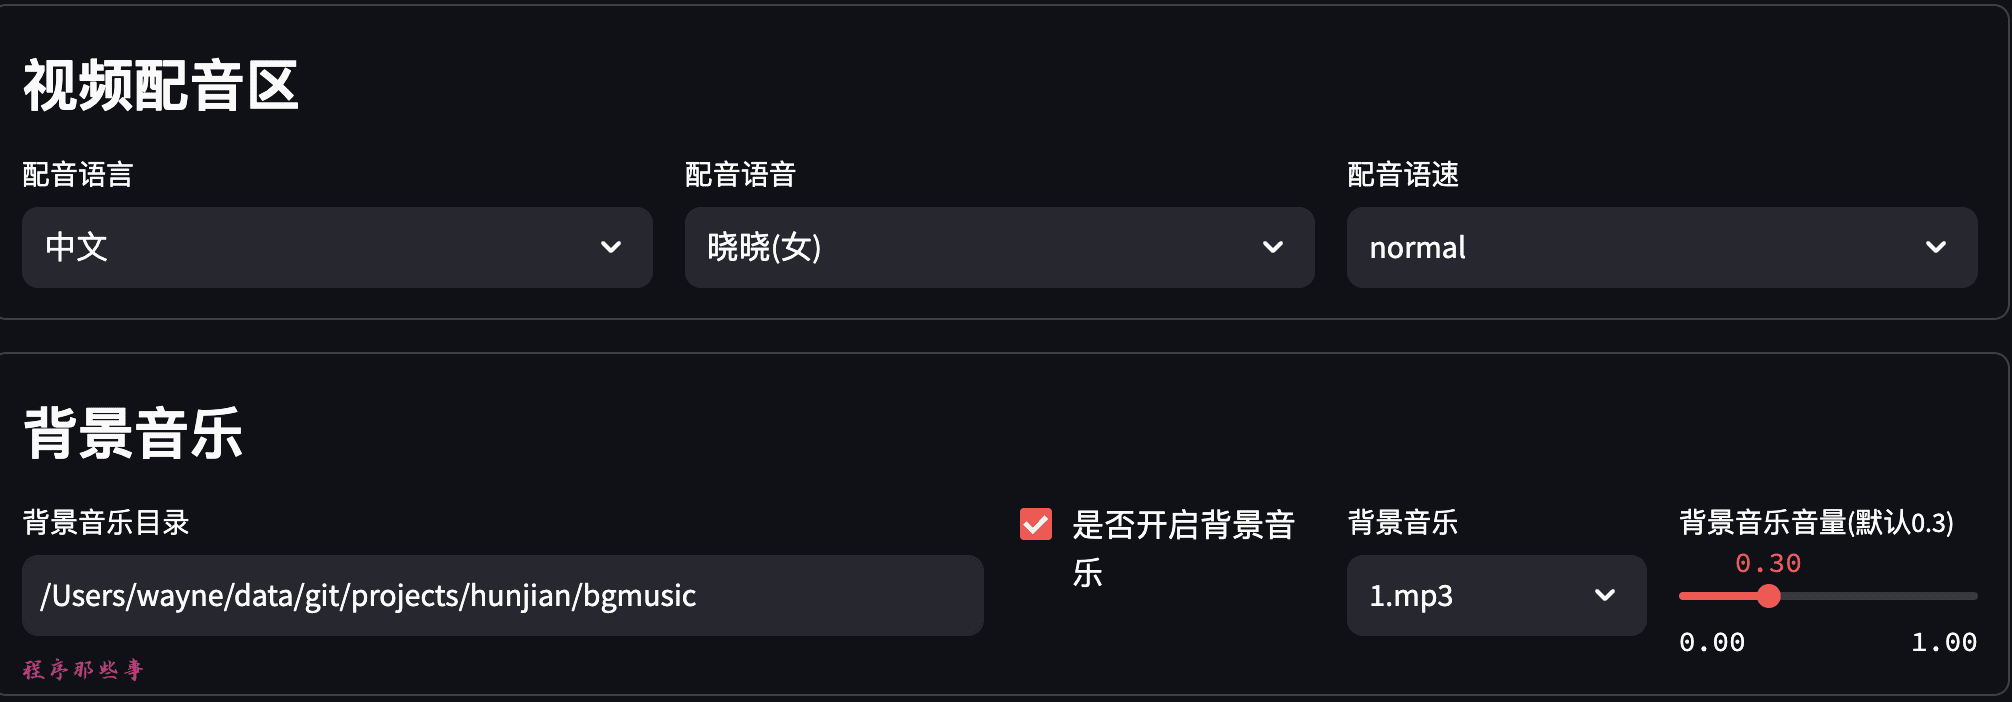
You can select the language of dubbing and the voice of dubbing.
It also supports dubbing speed adjustment.
The voice audition function will be supported later.
The background music is placed in the bgmusic folder of the project.
Currently there are only two background music in it. You can add your own background apps that you need.
Video Configuration
Video configuration area, you can choose the layout of the video, video frame rate, video size.
Minimum and maximum length of the video clip.
You can also turn on video transitions. Currently supports 30+ transitions.
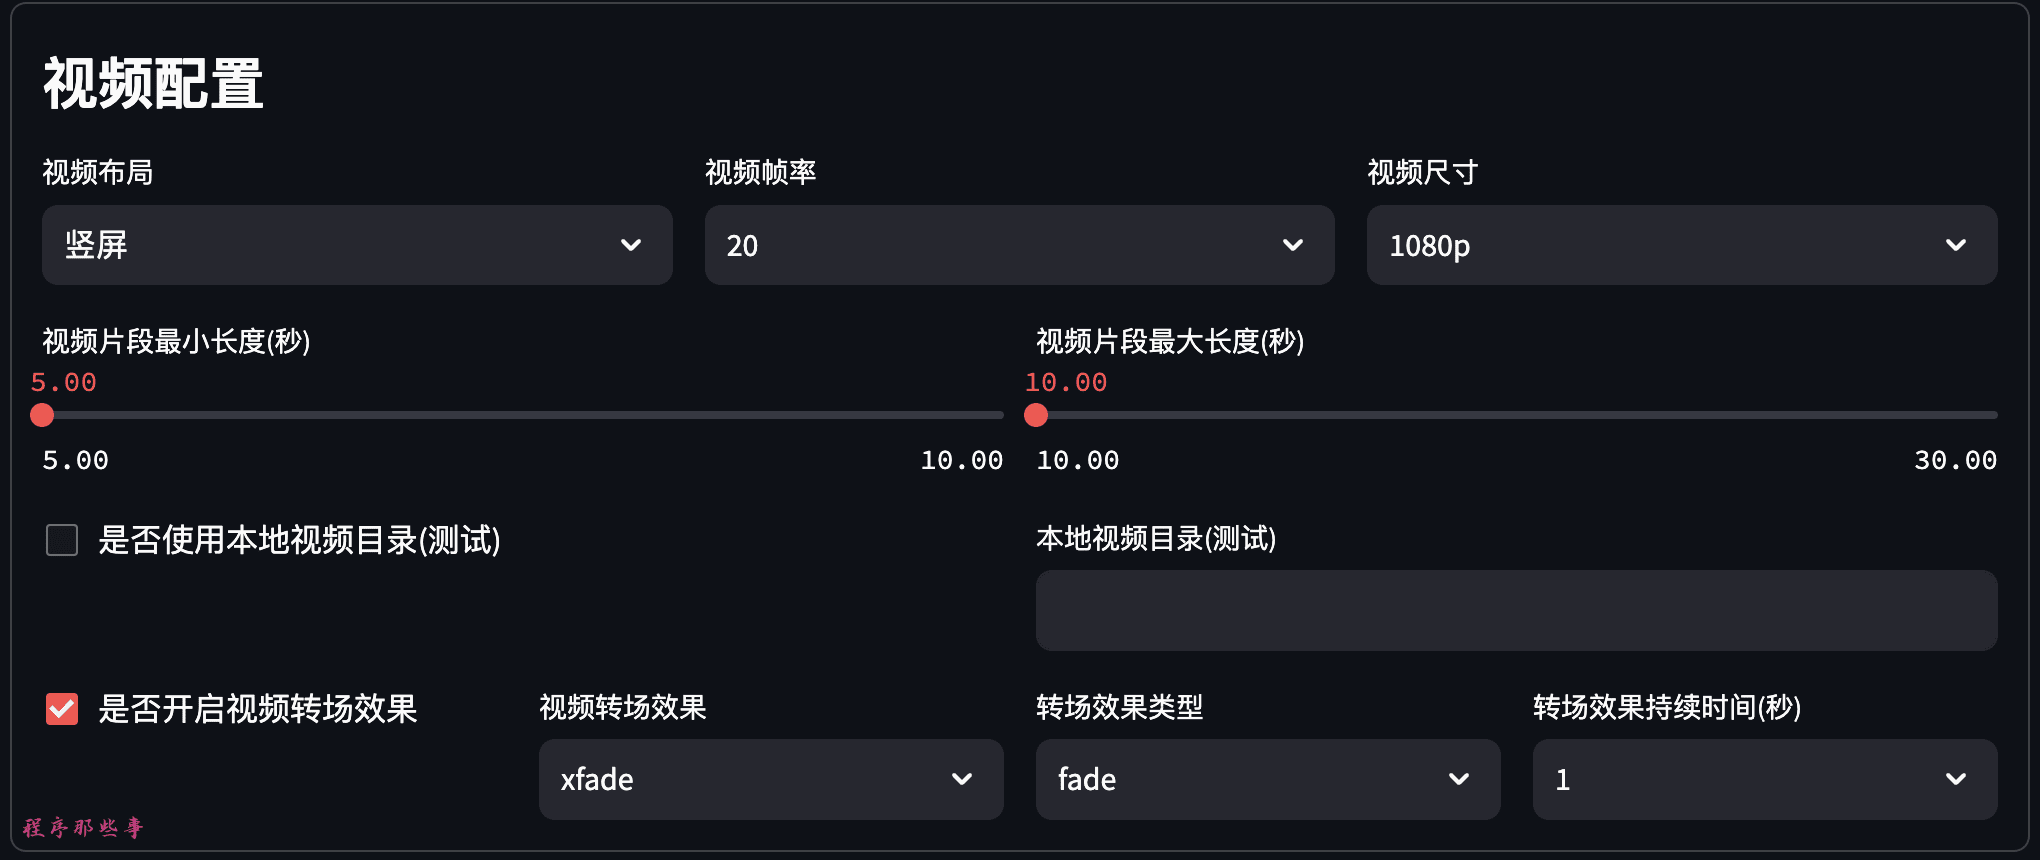
The ability to use local video sources will be added later.
Subtitle Configuration
Subtitle files are located in the fonts folder in the project root directory.
Two font collections, Song and Apple Square, are currently supported.
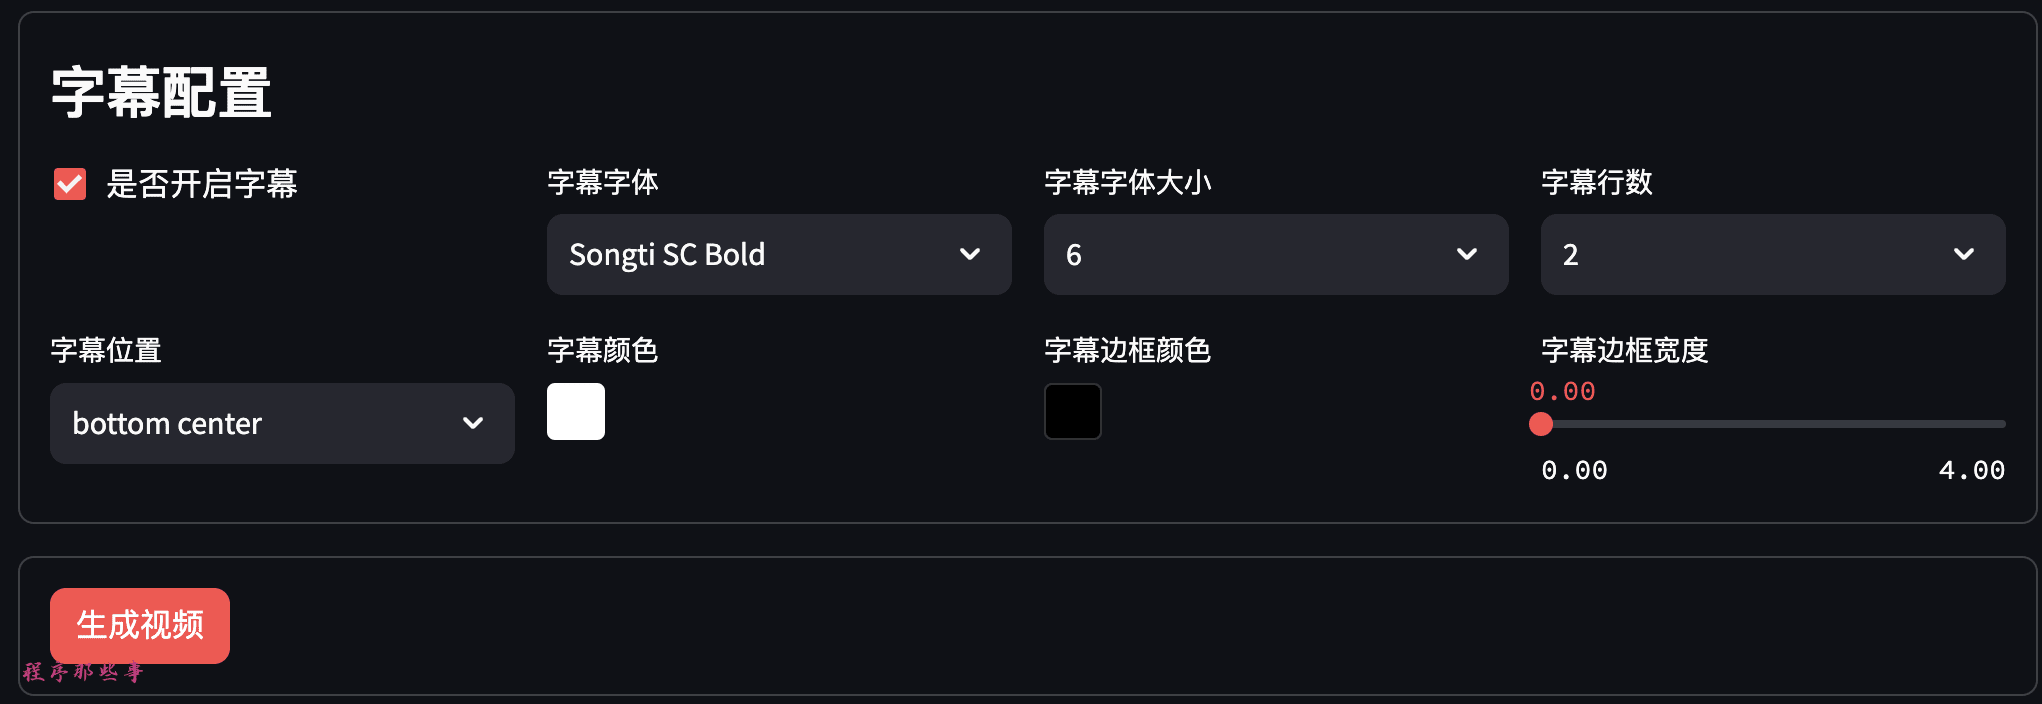
You can select subtitle position, subtitle color, subtitle border color and subtitle border width.
Generate Video
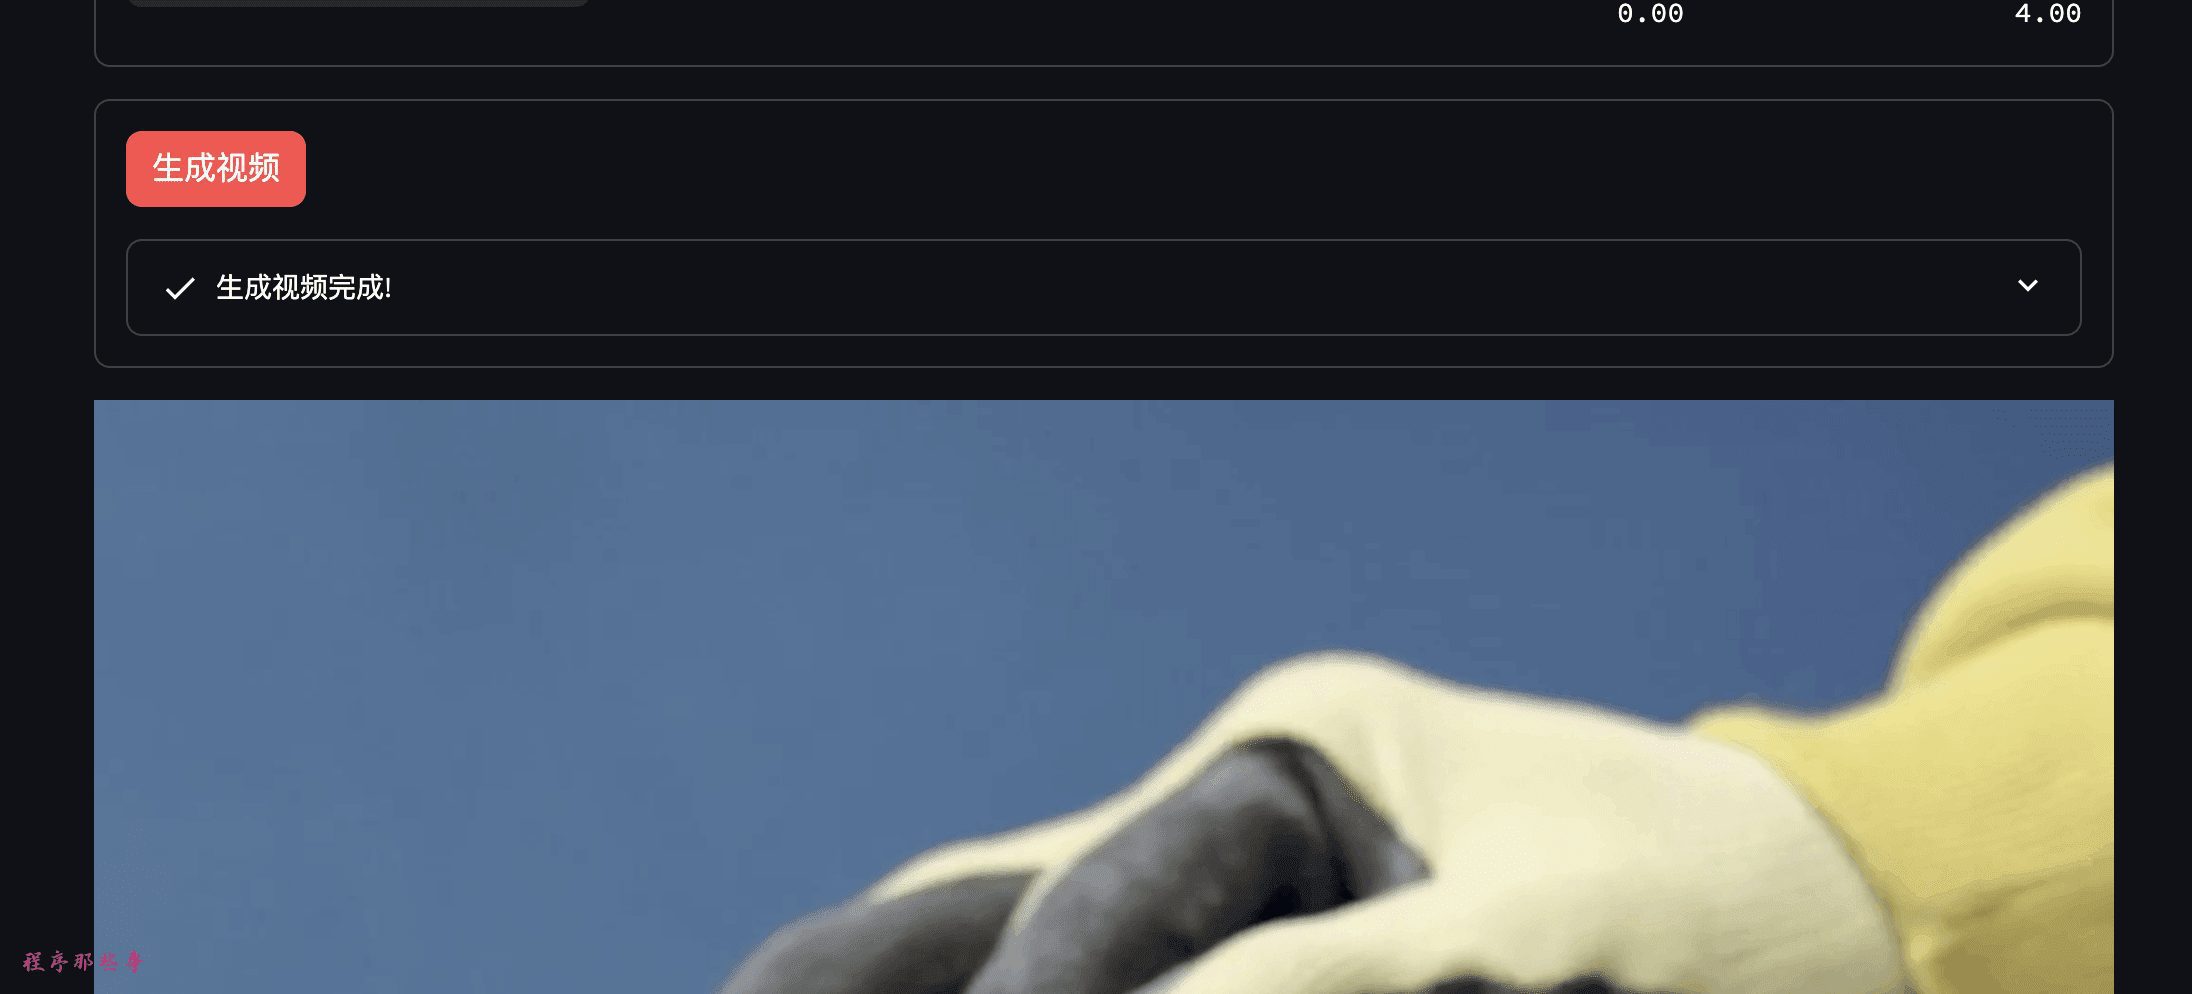
Finally, you can click Generate Video to generate the video.
Specific step names and progress will be listed on the page.
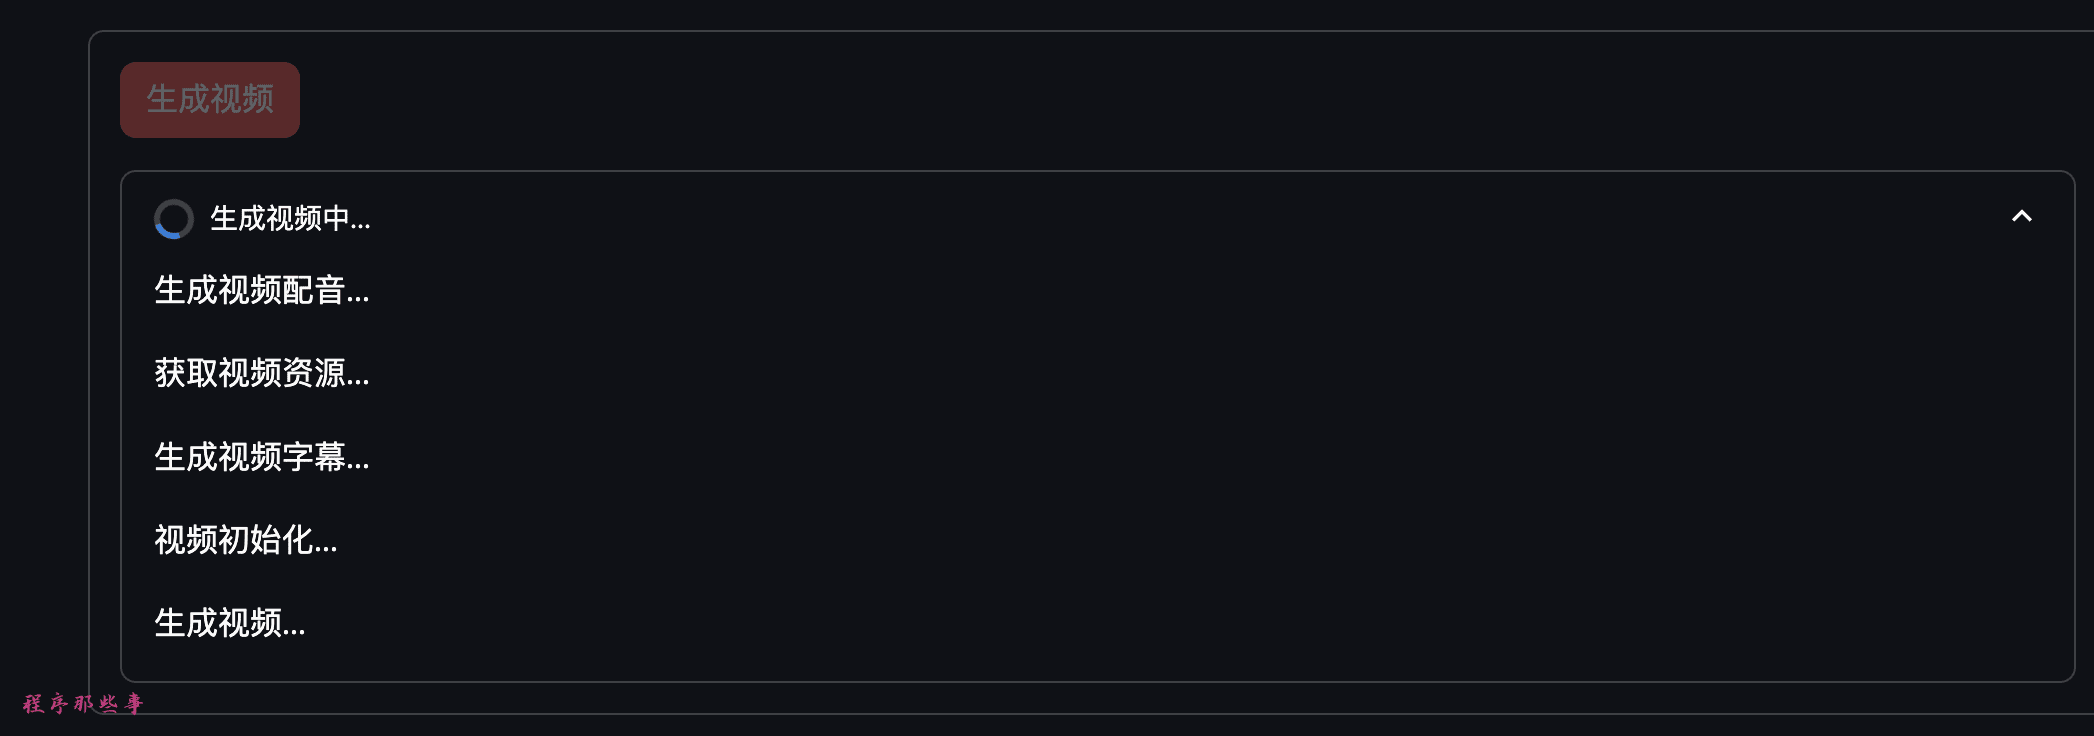
After the generation of the video is completed, the video will be displayed at the bottom, you can directly play to watch the effect.
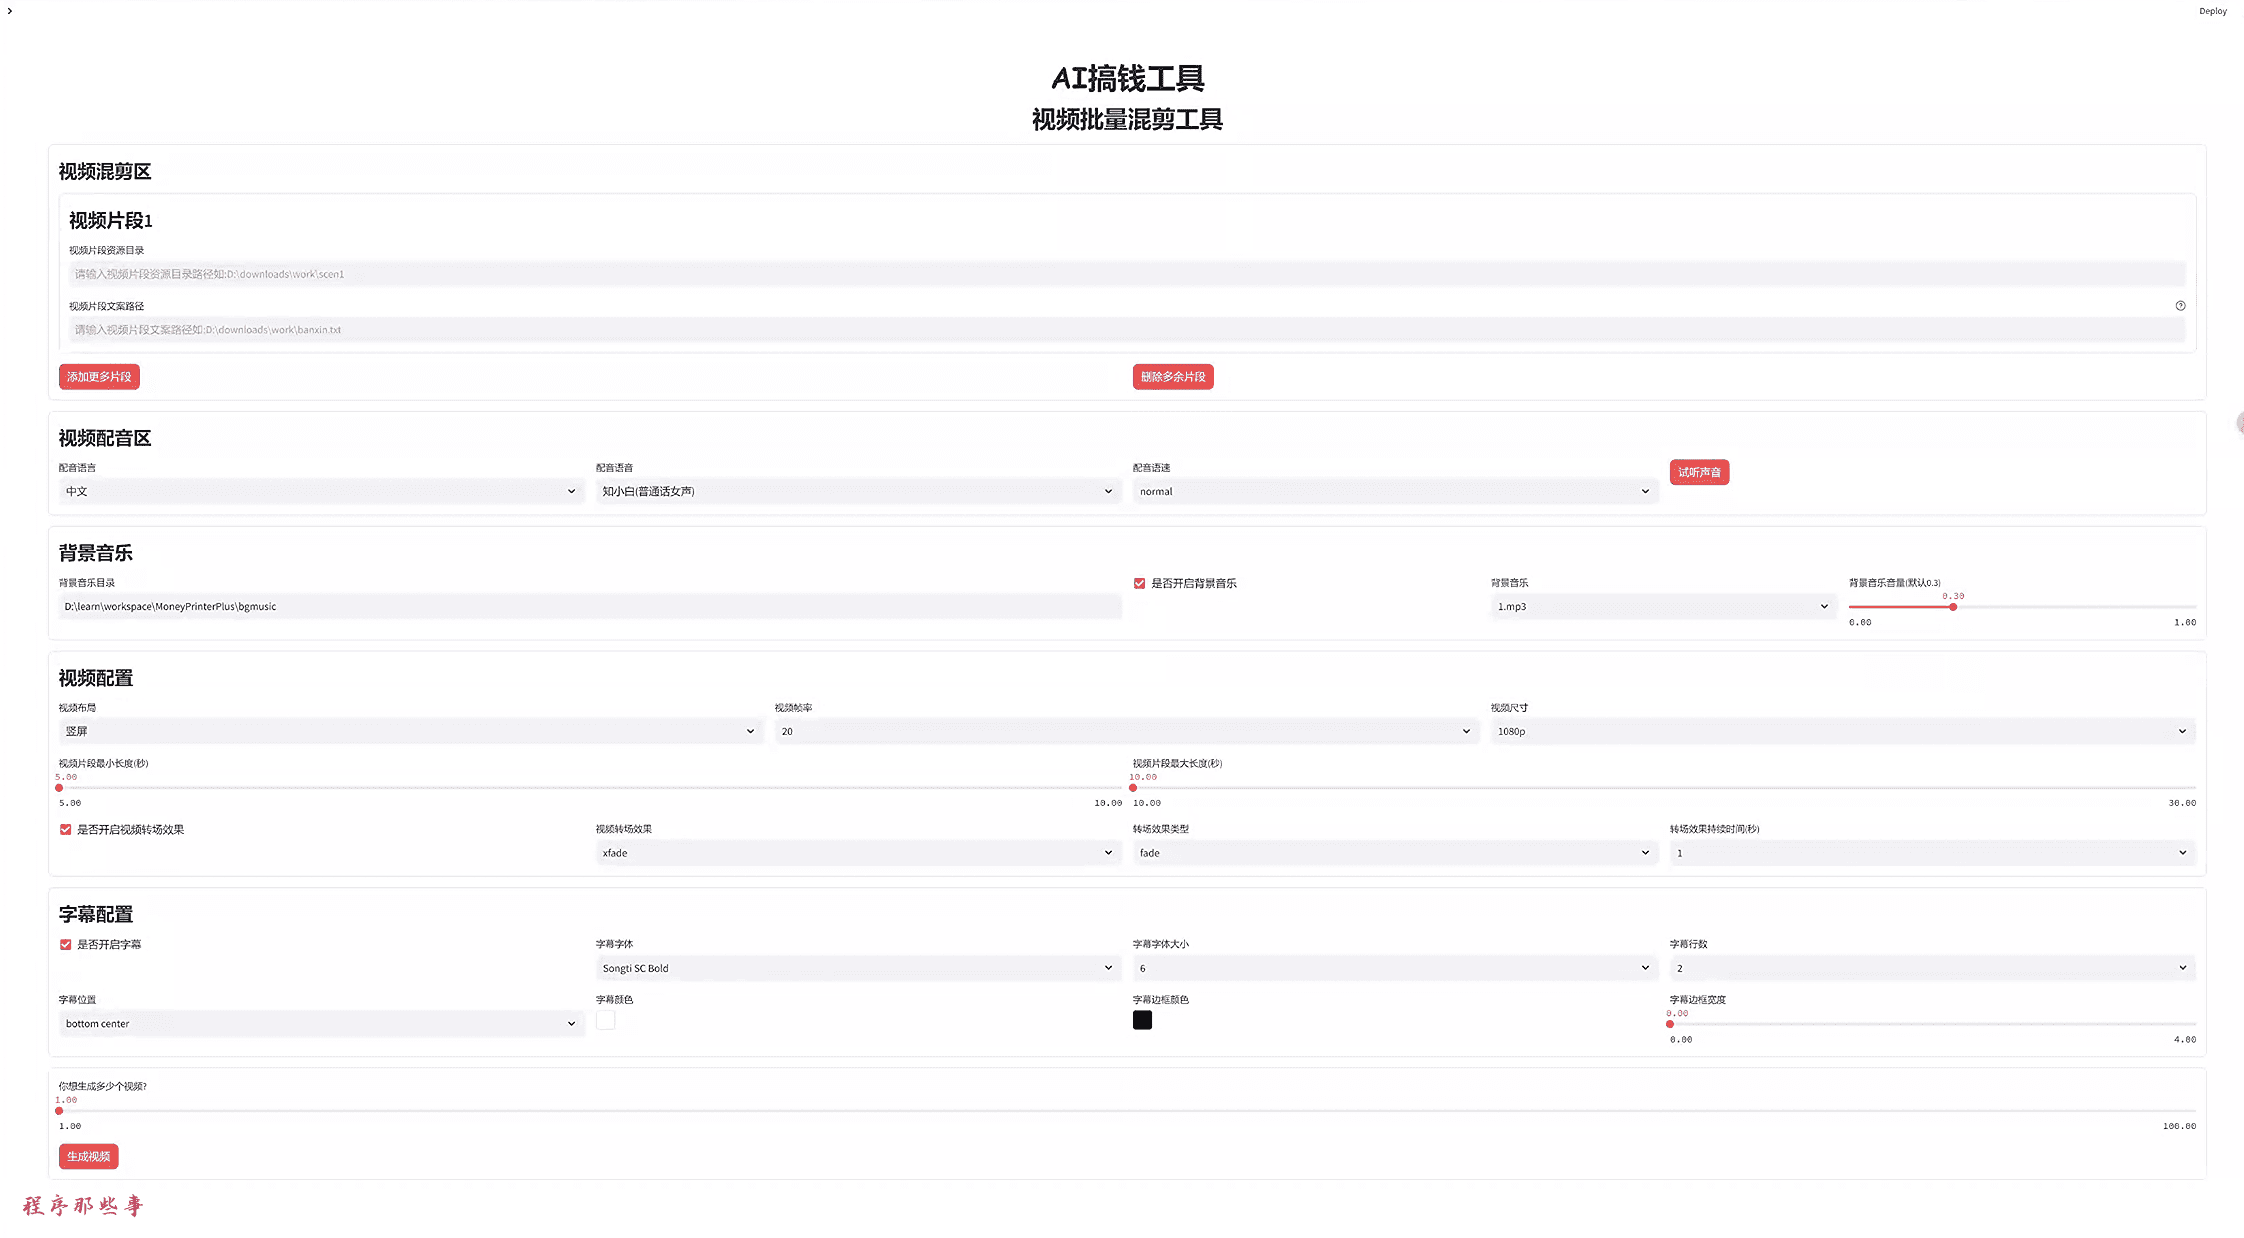
2. Batch video mixing
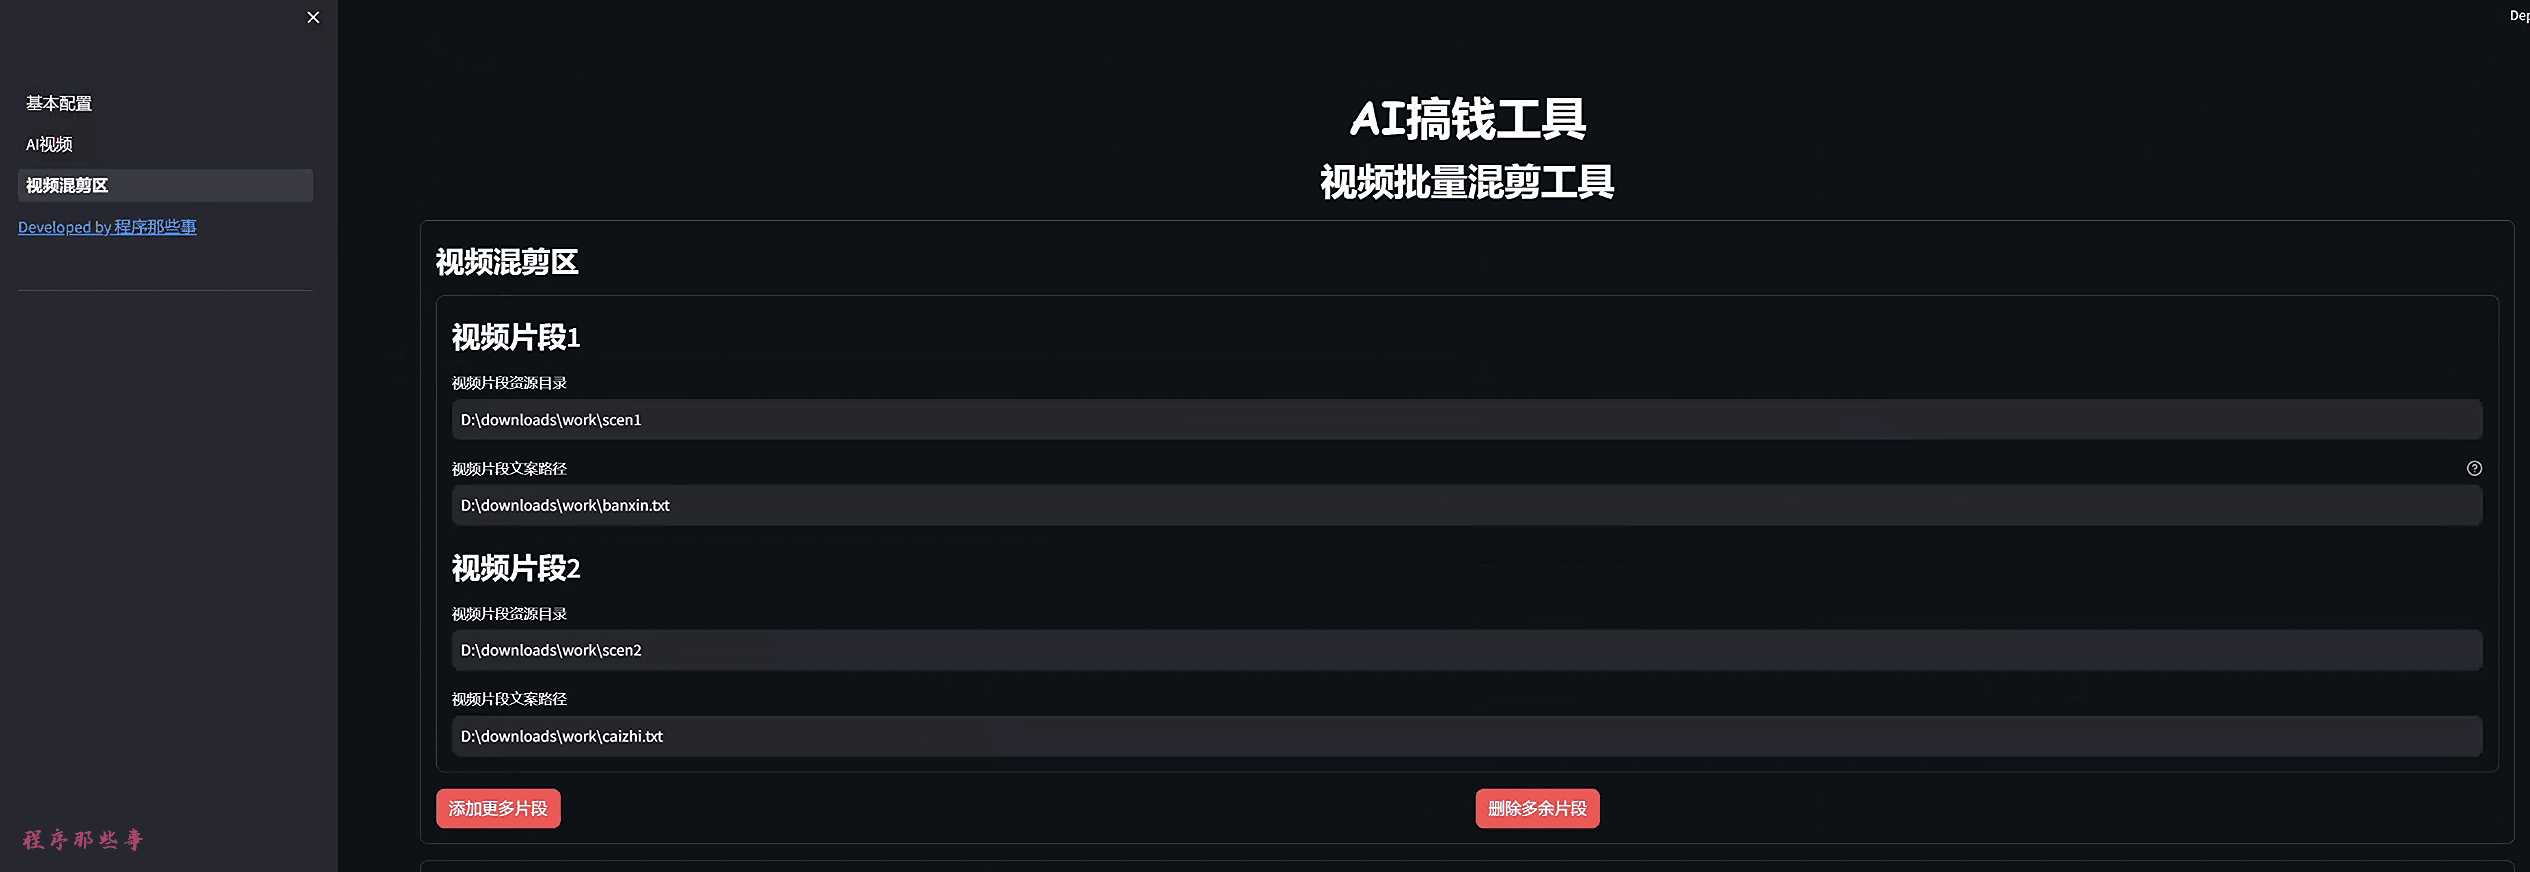
After launching the project, the video mixing area can be found in the upper left corner.
Click on it to go to the Video Batch Mixer tool page.
In the video mixing area, we can configure up to 5 video clips.
You can control how much of the clip area is available by clicking Add Clip or Delete Clip.
What is a video clip?
So some of you may ask, what is a video clip?
A long video, there can't be just one video topic in it, maybe the first half of your video is about the fit of the dress and the second half is about the material of the dress.
Then the shape of the dress is clip 1 and the material is clip 2.
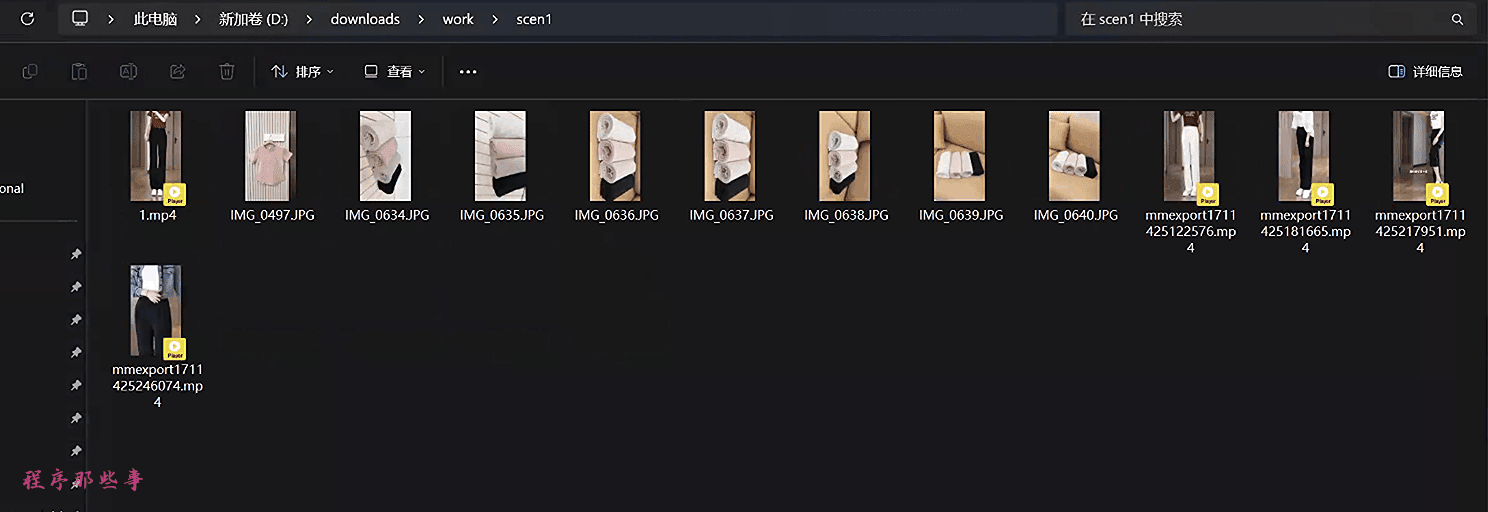
All we have to do is to collect the material for the dress pattern, either mp4 video or image resources such as jpg, png, etc. The resolution should be as big as possible, otherwise the quality of the video generated later will not be very good.
Then put the dress pattern material into the resource directory of video clip 1.
For example, in the resource catalog pictured above:
d:\downloads\work\scen1
Similarly, we put the material for the clothing material into the resource directory of video clip 2.
As shown below:
What is video resource copywriting?
Video resource copy is the text description you need to accompany this video clip.
You can prepare many pieces of copy for a clip and put them in a txt file. One piece of copy goes on one line in the txt file.
The system randomly picks a line from the txt file that best describes the text of the final video clip.
Below is an example of a copywriting document:
精准的剪裁,流畅的线条,这款马甲的版型设计,完美贴合身形,无论是宽松还是修身,都能展现你的优雅姿态。
我们的设计师们,将经典与现代完美融合。每一道线条,每一个剪裁,都是为了展现你的独特身形。
每一刀剪裁,都经过精心计算,只为打造最适合你身形的版型。从肩部线条到腰部剪裁,每一处都彰显着你的独特风格。
精准的剪裁,流畅的线条,这款马甲的版型设计,旨在让每一位穿着者都能感受到定制般的贴合。
精准剪裁流畅线条,马甲版型设计完美贴合身形,宽松或修身皆展现优雅姿态。
设计师将经典与现代融合,每道线条每个剪裁展现独特身形。
精心计算每一刀剪裁,打造适合身形的版型,肩部线条至腰部剪裁彰显独特风格。
剪裁精准流畅,马甲版型旨在定制般贴合,展现穿着者个性魅力。
面料精选剪裁精致,马甲版型以优雅线条展现身形,正式或休闲皆完美。
人体工学设计,马甲版型舒适透气,优雅线条展现身形,每次穿搭成焦点。
经典版型现代演绎,马甲独特剪裁设计,穿着成展现个性品味舞台。
细节精心打磨,马甲版型合体剪裁优雅设计,任何场合自信满满。
舒适型格并存,马甲版型精致剪裁舒适面料,工作休闲展现最佳状态。
时尚马甲版型多样,每款为你而生,经典剪裁现代设计,轻松驾驭各种风格。
优雅线条修身设计,马甲版型考究剪裁精致细节,任何场合成焦点,彰显个人风格。
Configure your video clips with video copy.
video dubbing area
In the video dubbing area, you can choose the dubbing language and the corresponding dubbing language, currently supporting 100+ dubbing languages.
Different dubbing speeds can also be selected to support different usage scenarios.

If you're not quite sure about the dubbing, you can click on Audition Sound to try out the corresponding dubbed voice.
background music (BGM)
The background music is placed under the bgmusic directory under the project, you can add your own background music files under that folder.

You can choose whether to turn on background music, and the default background music volume.
Video Configuration Area
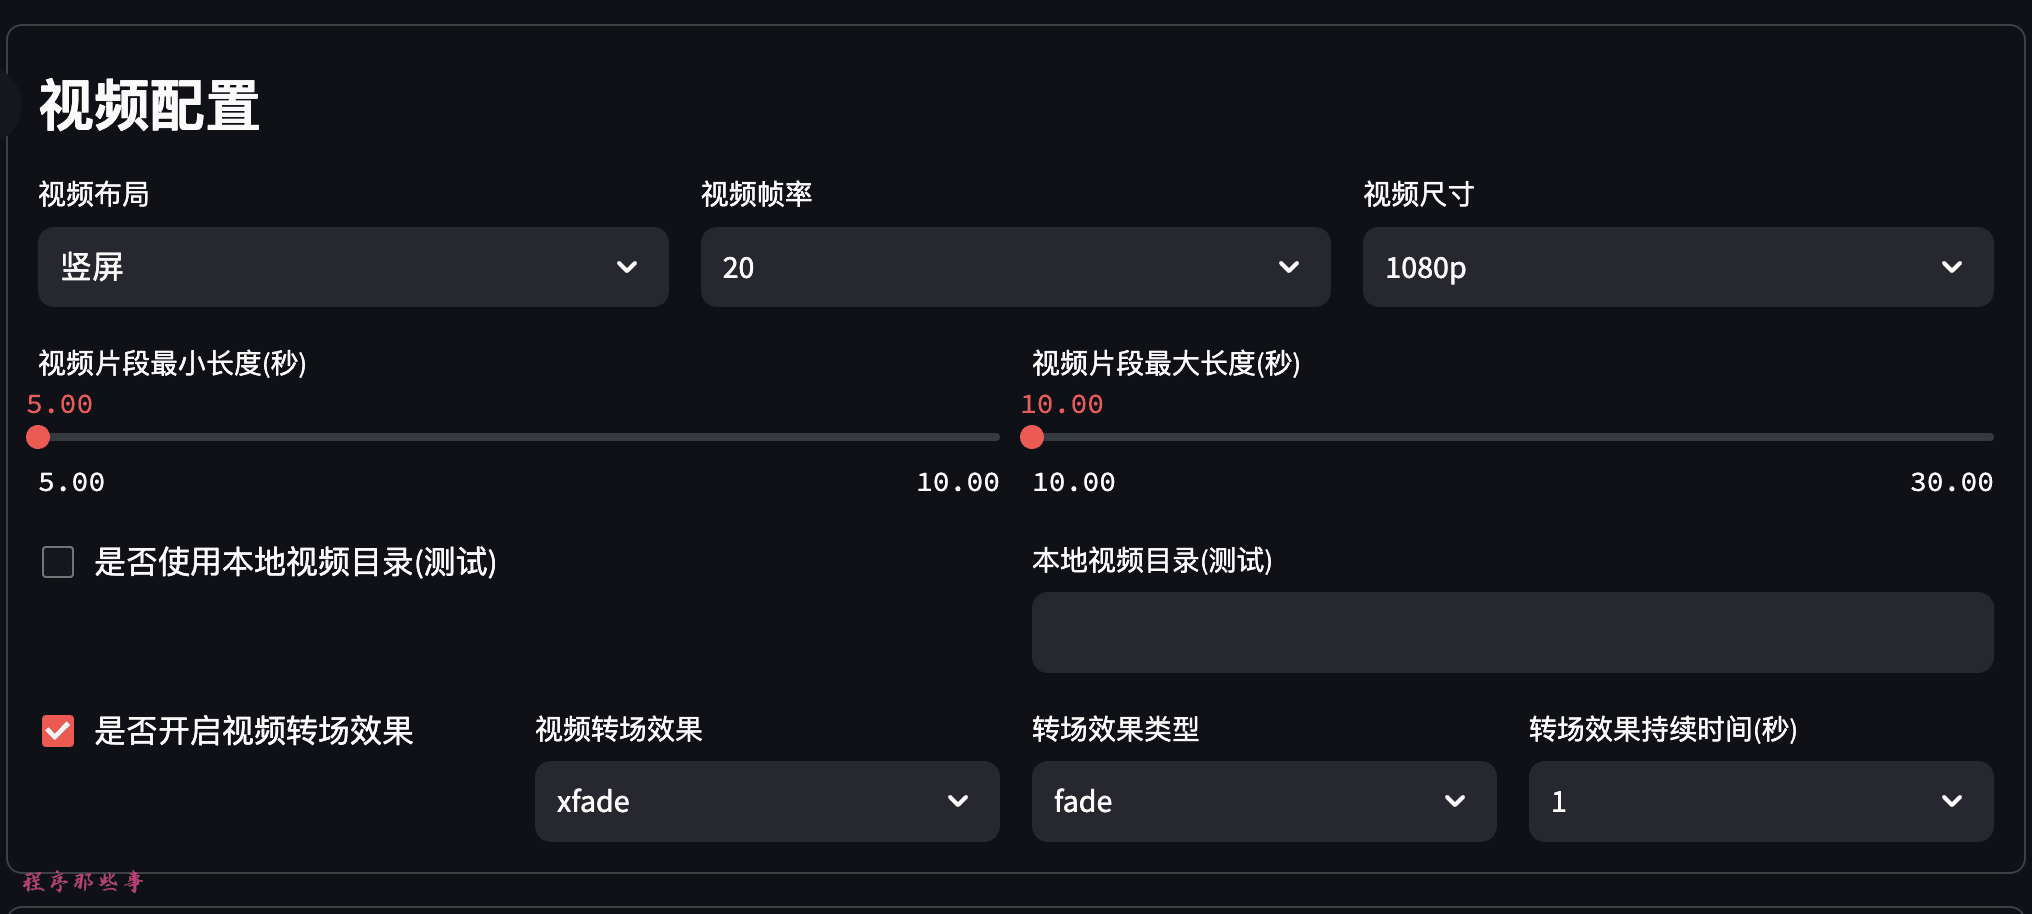
The video configuration area allows you to select the video layout: vertical, horizontal or square.
You can select the video frame rate, the size of the video.
The minimum and maximum length of each video clip can also be selected.
Most importantly, you can also turn on video transitions effects. Currently 30+ video transitions are supported.
Subtitle Configuration
If you need subtitles, then you can click on Turn on subtitles option to set subtitle font, subtitle font size and subtitle color etc.
If you don't know how to set it up, just choose default.

Final Video Generation
Currently the system supports batch generation of 100 videos at a time, adjust it according to your own needs.

Finally click on the Generate Video button to generate a video.
The page will be alerted to the progress accordingly.
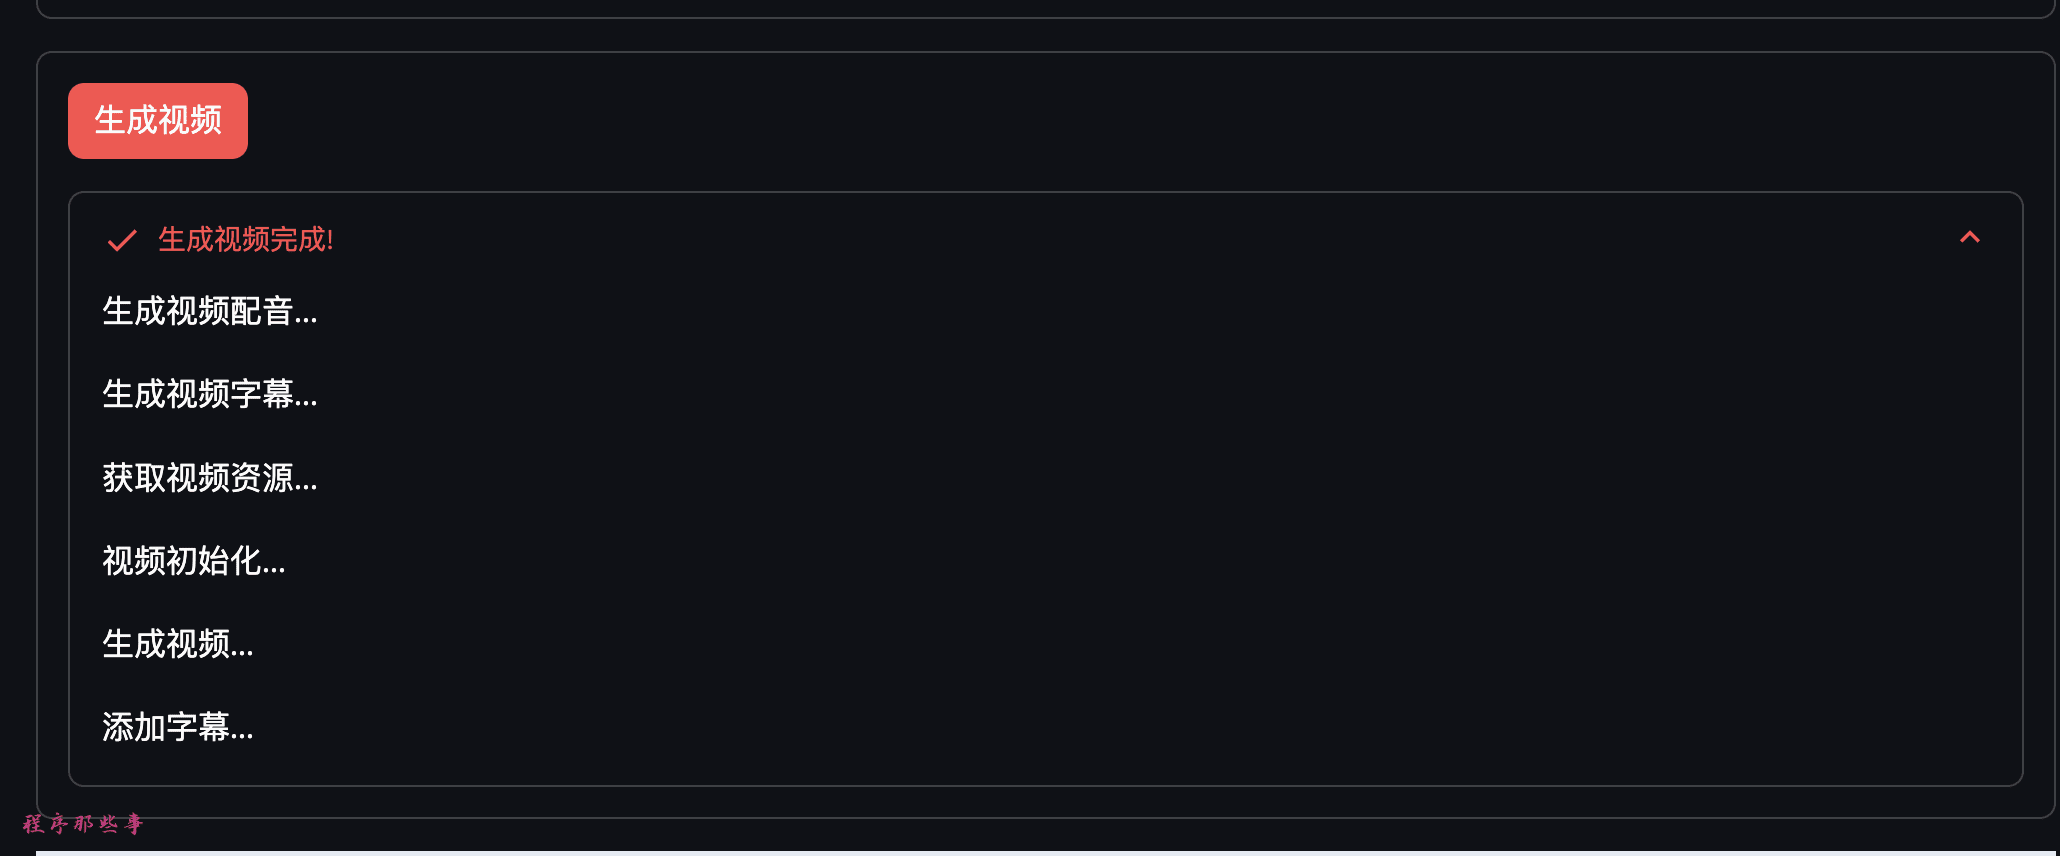
The final generated video will be displayed at the bottom of the page and you can play it by yourself.
If you generated more than one video, you can find the videos you generated in bulk in the final directory of your project folder.
3. Batch uploading of short videos
Working Principle
The automated publishing tool is essentially based on selenium, an automation framework.
By simulating manual clicking operation, it can accomplish most of the work that requires human hands to complete. Free everyone's hands.
There are two ways to implement this automation, one is to start a browser while running the program. The other is to attach to an existing browser to manipulate the pages of an existing browser.
This tool is chosen to attach to an existing browser.
The main reason is that some video platforms require a QR code to be scanned with a cell phone in order to log in. So it is difficult to simulate this login process in the program.
pre-conditions
Currently auto publish supports both chrome and firfox browsers. You can choose one by yourself according to your needs.
1. chrome configuration
Now the mainstream browser is definitely chrome without a doubt. So let's first chat about how to implement support for chrome.
- First you need to download and installChromeRemember your version number, you can download chrome from the official chrome website or you can go to this page to download it ChromeDriver download pageThe
- You need to start withChromeDriver download pageDownload the ChromeDriver that corresponds to your version of Chrome.Make sure you download the version that matches your operating system and Chrome version.
After downloading, extract chromeDriver to a local directory, the path of the directory is best not with Chinese. There is no guarantee that it will run properly.
- chrome starts in debug mode
If it's a mac, then you can first set an alias for chrome
alias chrome="/Applications/Google\ Chrome.app/Contents/MacOS/Google\ Chrome"
Start chrome in debug mode.
chrome --remote-debugging-port=9222
If you are windows, you can add it in the desktop shortcut of chrome, right click target:
--remote-debugging-port=9222
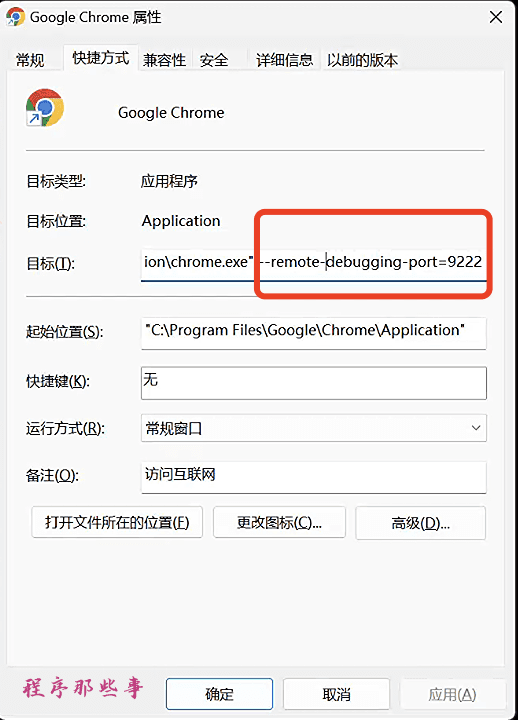
Then double click to open chrome in debug mode.
2. firefox configuration
Besides chrome, the most used would be firefox.
So we also provide support for firefox.
To use firefox, you need the following steps:
- Download and install FirefoxThe
- downloadinggeckodriver Driver. Download the geckodriver that corresponds to your Firefox browser version. make sure you download the one that matches your operating system and Firefox version.
After downloading, extract geckodriver to a local directory, the path of the directory is best not with Chinese. There is no guarantee that it will run properly.
- Start firefox in debug mode.
Similar to chrome, we add after the firefox startup command:
-marionette -start-debugger-server 2828
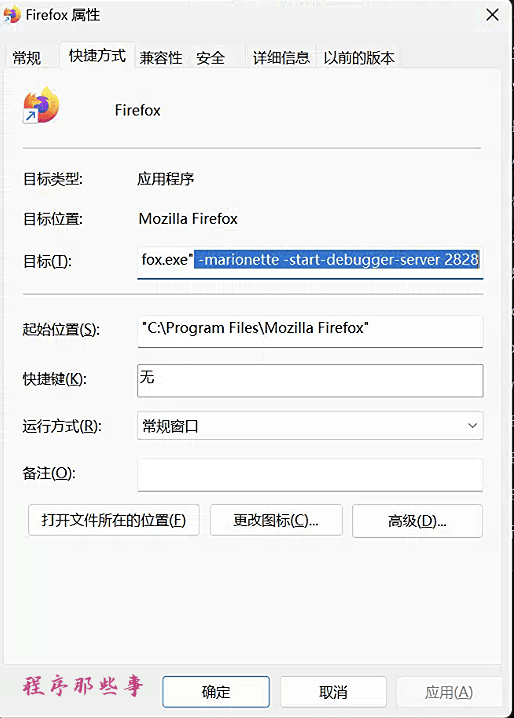
Note that the port here must be 2828, not customizable.
At this time if you open firefox, you will see the navigation bar turns red, indicating that you have started the remote debugging mode.

importationabout:config
You can see that the port for marionette.port is 2828.
start using
Windows environment, directly double-click start.bat to start.
For mac environment, just execute sh start.sh under the project root directory.
The browser will automatically open the MoneyPrinterPlus homepage.

Click on the Video Auto Publishing Tool on the left to see the Video Auto Publishing Tool page.
You can choose the driver type. chrome or firefox.
The driver location is the location of the previously downloaded chromedirver or geckodriver.
The directory where the video content is located is the directory of the video you want to publish.
After you modify the video directory, it will automatically list the video files and text files inside the video directory.
Where the video file is the content of the video you want to post.
What is a text file?
The text file is the textual content that accompanies the video.
For example, if I want to post a video about a Tang poem on my website, the corresponding text file would look like this:
王维:酬郭给事
洞门高阁霭馀辉,桃李阴阴柳絮飞。
禁里疏钟官舍晚,省中啼鸟吏人稀。
晨摇玉佩趋金殿,夕奉天书拜琐闱。
强欲从君无那老,将因卧病解朝衣。
Remember, everyone, the first line must be the title of the video.
The content of the other lines is free for everyone to decide.
Then we look at the following page:
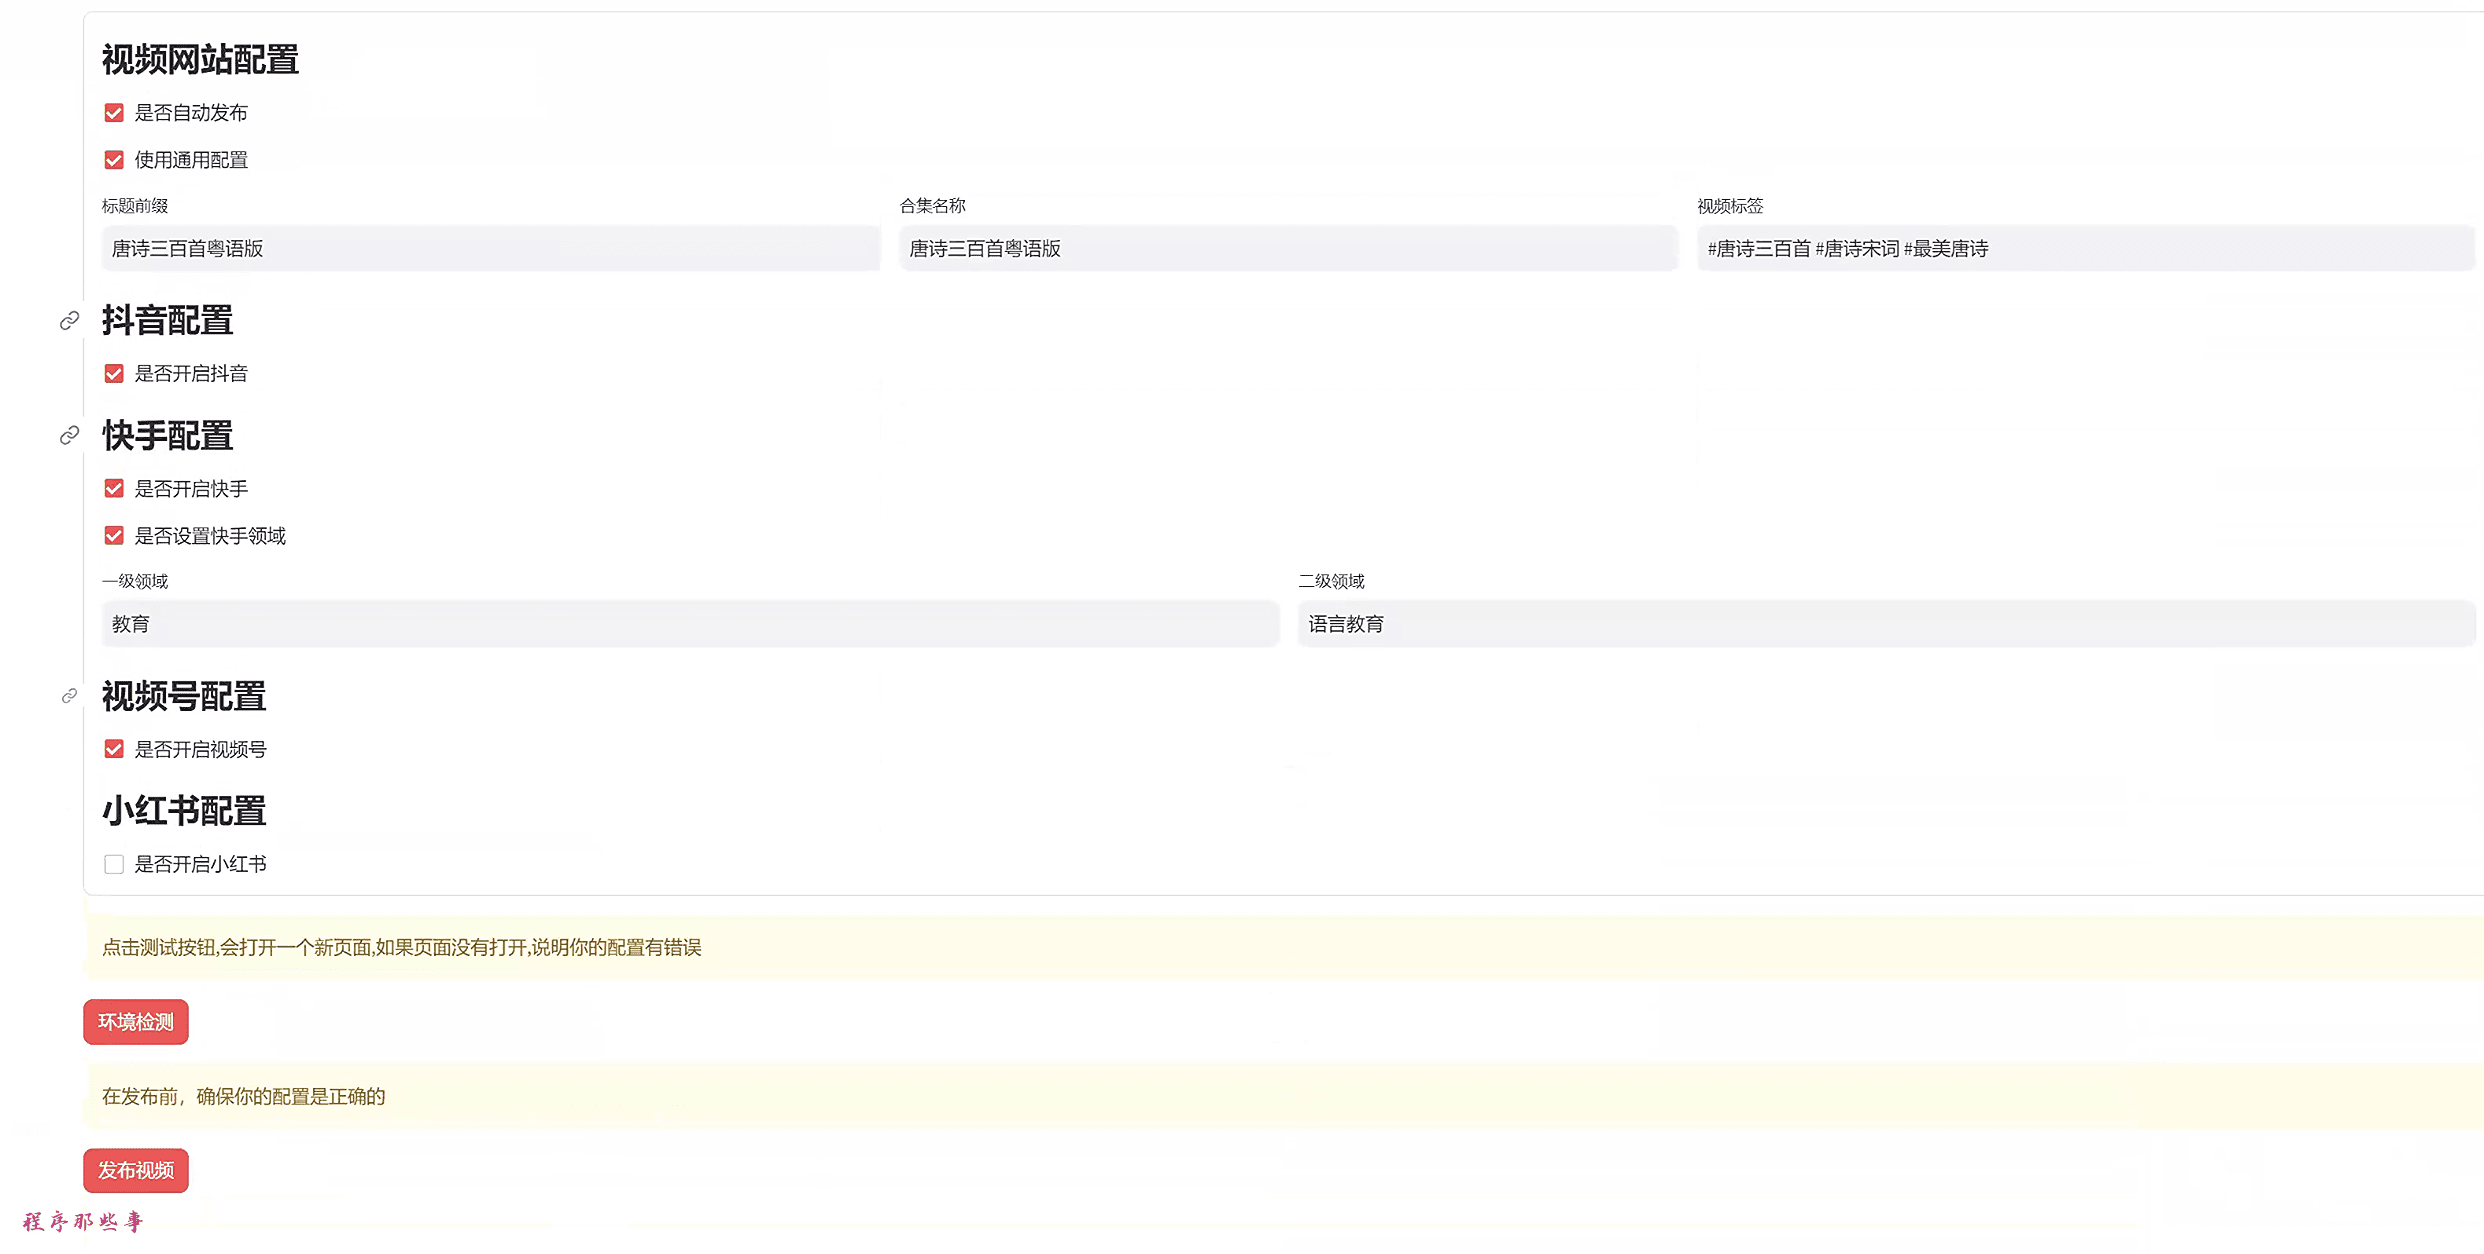
The video site configuration should be pretty straightforward, and anyone who went to kindergarten should be able to understand it.
Title Prefix: If you need to add some extra prefix to the video title, you can set it here.
Ensemble name: Some video sites need to select an ensemble. Here is the name of the compilation. (The program will not create the compilation for you, you need to create it yourself in advance on the site.)
Video tags: it's easy to understand, it's just tags, split by spaces.
Racer has an additional field configuration.
You can choose whether to turn on Jitterbug, Racer, Video Number or Little Red Book.
Environmental testing
Next you are ready to publish the video.
But before releasing it, you can tap on the environment test.
If it automatically opens my homepage, then your environment configuration is fine. The next step is to publish the video.
Post Video
This is because all video sites require a login. So before clicking on the publish video button, you need to open the corresponding website and log into your account first.
If you're all logged in, click the Publish Video button.
Start your journey to freedom.
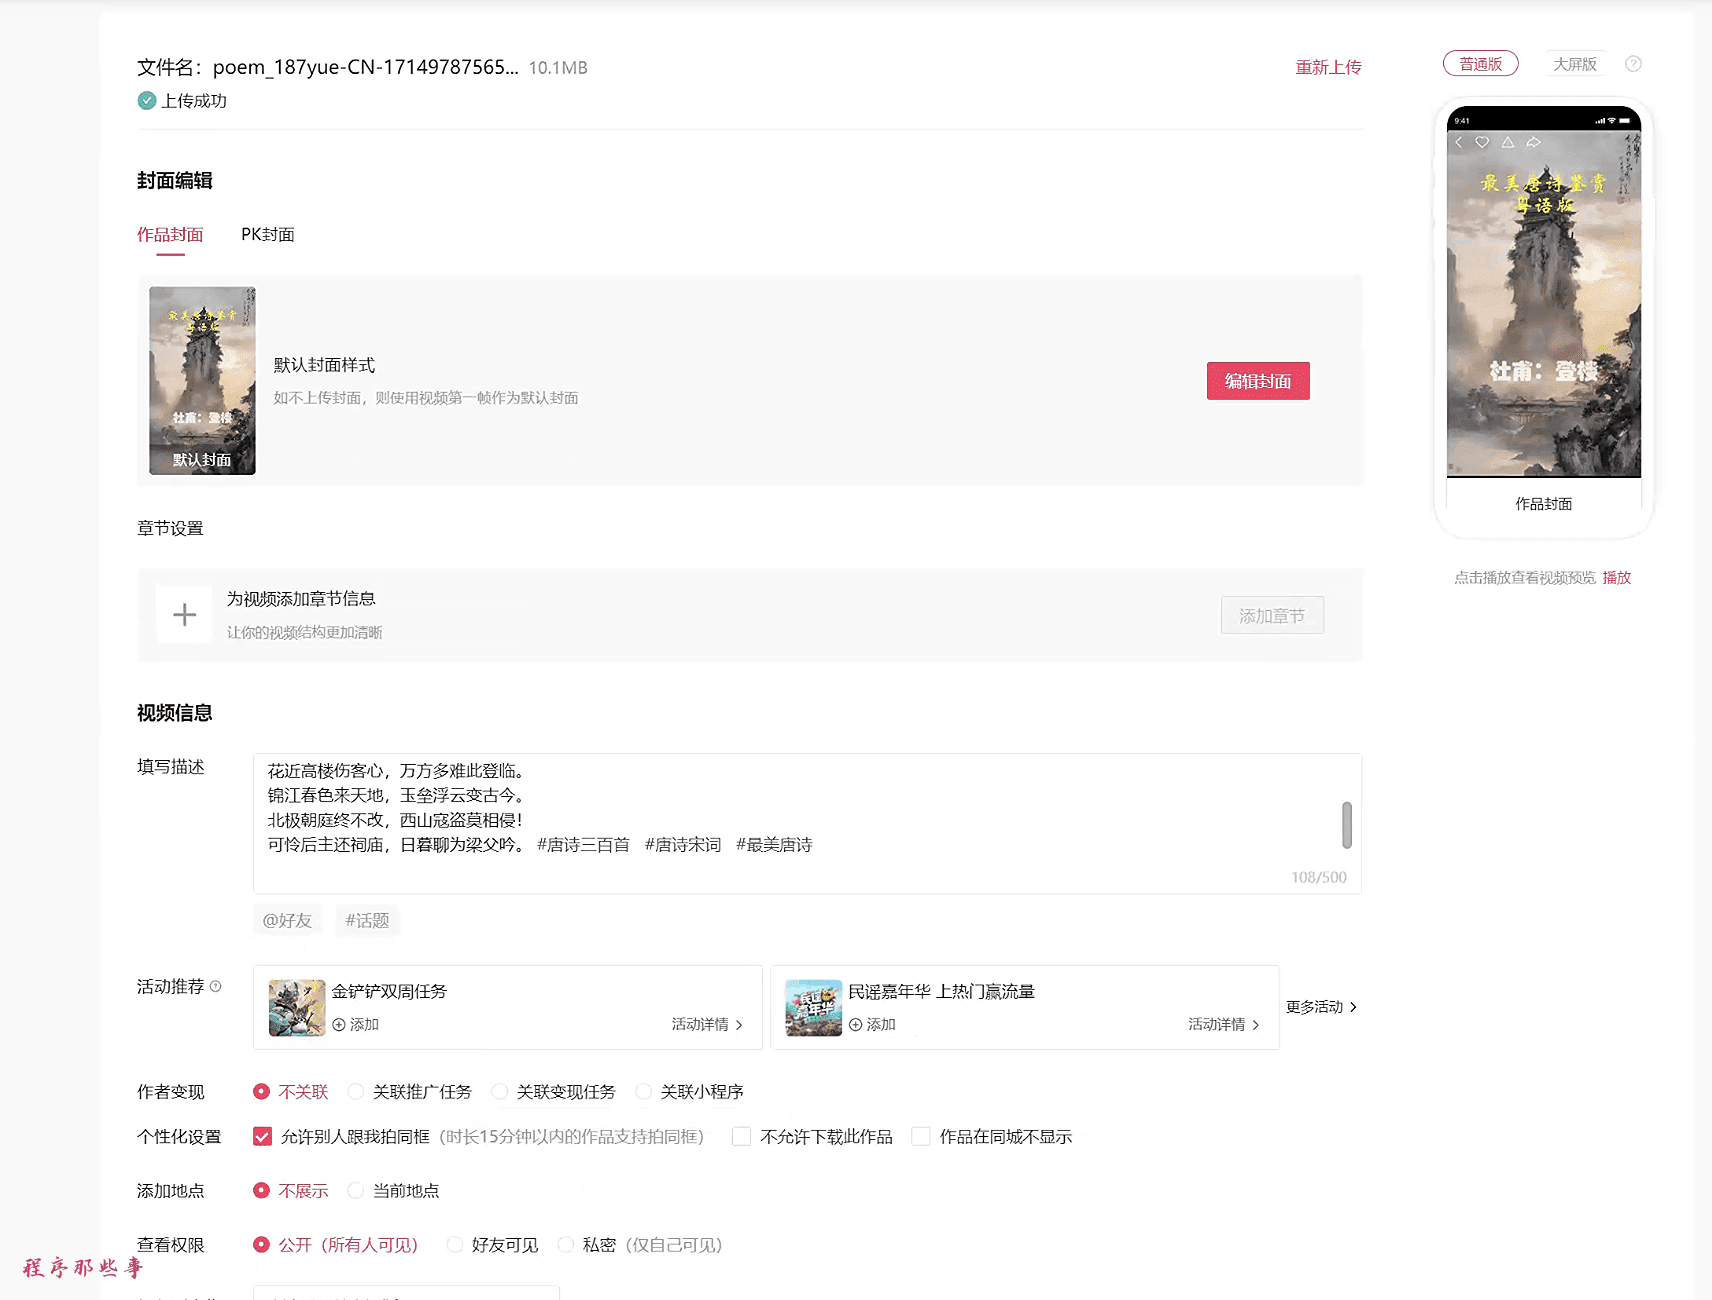
The interface to run is roughly as follows:
© Copyright notes
Article copyright AI Sharing Circle All, please do not reproduce without permission.
Related posts

No comments...

