Avatarify Python: Video calls with avatars in videoconferencing
General Introduction
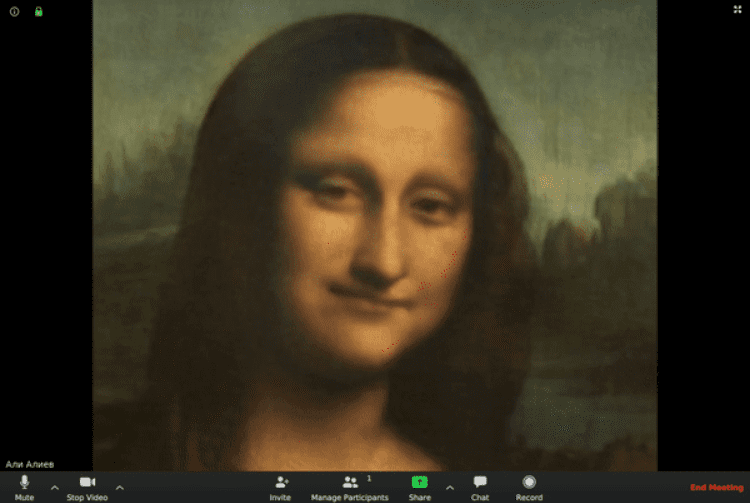
Avatarify Python is an open source artificial intelligence video conferencing tool based on First Order Motion Model technology that maps a user's facial expressions and movements to any avatar in real time. It supports use in various video conferencing software such as Zoom, Skype, Teams, etc., allowing users to make video calls with avatars instead of real camera feeds. The tool not only supports the use of preset celebrity avatars, but also allows users to add custom avatars and even use AI-generated avatars of virtual characters. The system creates a virtual webcam when it runs, which can be used in any application that supports a customized video input source.

Function List
- Real-time facial expressions and movements mapped to virtual avatars
- Supports a wide range of preset celebrity avatars and customized avatars
- Integration of StyleGAN-generated AI avatar avatars
- Provides camera screen zoom and position adjustment function
- Support avatar preview overlay for repositioning
- Ability to quickly switch between different avatars (shortcut keys 1-9)
- Supports mirrored preview and output screen
- Provides facial feature point display function to assist alignment
- Supported in all major video conferencing software
- Choice of local operation or remote GPU acceleration
Using Help
system requirements
- Basic configuration requirements:
- NVIDIA graphics card (recommended performance) is required for local operation:
- GeForce GTX 1080 Ti: 33 fps
- GeForce GTX 1070: 15 fps
- GeForce GTX 950: 9 frames/sec.
- If you don't have an NVIDIA graphics card, it's an option:
- Run remotely with Google Colab
- Using remote servers with GPUs
- Runs on CPU (lower performance, <1fps)
- NVIDIA graphics card (recommended performance) is required for local operation:
Installation steps
- Windows system installation:
- Installing Miniconda Python 3.8
- Installing Git
- Open the Anaconda Prompt and execute it:
git clone https://github.com/alievk/avatarify-python.git cd avatarify-python scripts\install_windows.bat - Download the model weights file into the avatarify-python directory.
- Installation of OBS Studio and VirtualCam plug-ins
- Linux system installation:
git clone https://github.com/alievk/avatarify-python.git cd avatarify-python bash scripts/install.sh - Mac system installation:
- Installing Miniconda Python 3.7
- Installing CamTwist
- Execute the installation script:
git clone https://github.com/alievk/avatarify-python.git
cd avatarify-python
bash scripts/install_mac.sh
Guidelines for use
- Start the program:
- Windows: Run
run_windows.bat - Linux: Running
bash run.sh - Mac: Follow Google Colab or Remote Server Instructions
- Windows: Run
- Operational Controls:
- Number keys 1-9: Quickly switch between the first 9 avatars
- Q key: Enable AI-generated random avatar avatars
- 0 key: Toggle show/hide avatar
- A/D key: switch previous/next avatar
- W/S key: Camera screen zoom in/out
- U/H/J/K keys: up/left/down/right to move the camera screen
- Z/C key: Adjust avatar overlay transparency
- X key: reset reference frame
- F key: Switch reference frame search mode
- O key: show/hide facial feature points
- ESC key: exit the program
- Avatar Driving Tips:
- Keep the position and proportions of the face in the camera frame as close to the target avatar as possible
- Match expressions using the transparency overlay function (Z/C key) or facial feature point display (O key)
- You can use the F key to have the software automatically find a better reference frame.
- Used in video conferencing software:
- Zoom: Settings -> Video -> Select Virtual Camera
- Skype: Settings -> Audio and Video -> Select Virtual Camera
- Teams: Profile Picture -> Settings -> Devices -> Select Virtual Camera
- Slack: Make a call -> Allow browser to use camera -> Settings -> Select virtual camera
© Copyright notes
Article copyright AI Sharing Circle All, please do not reproduce without permission.
Related posts

No comments...


