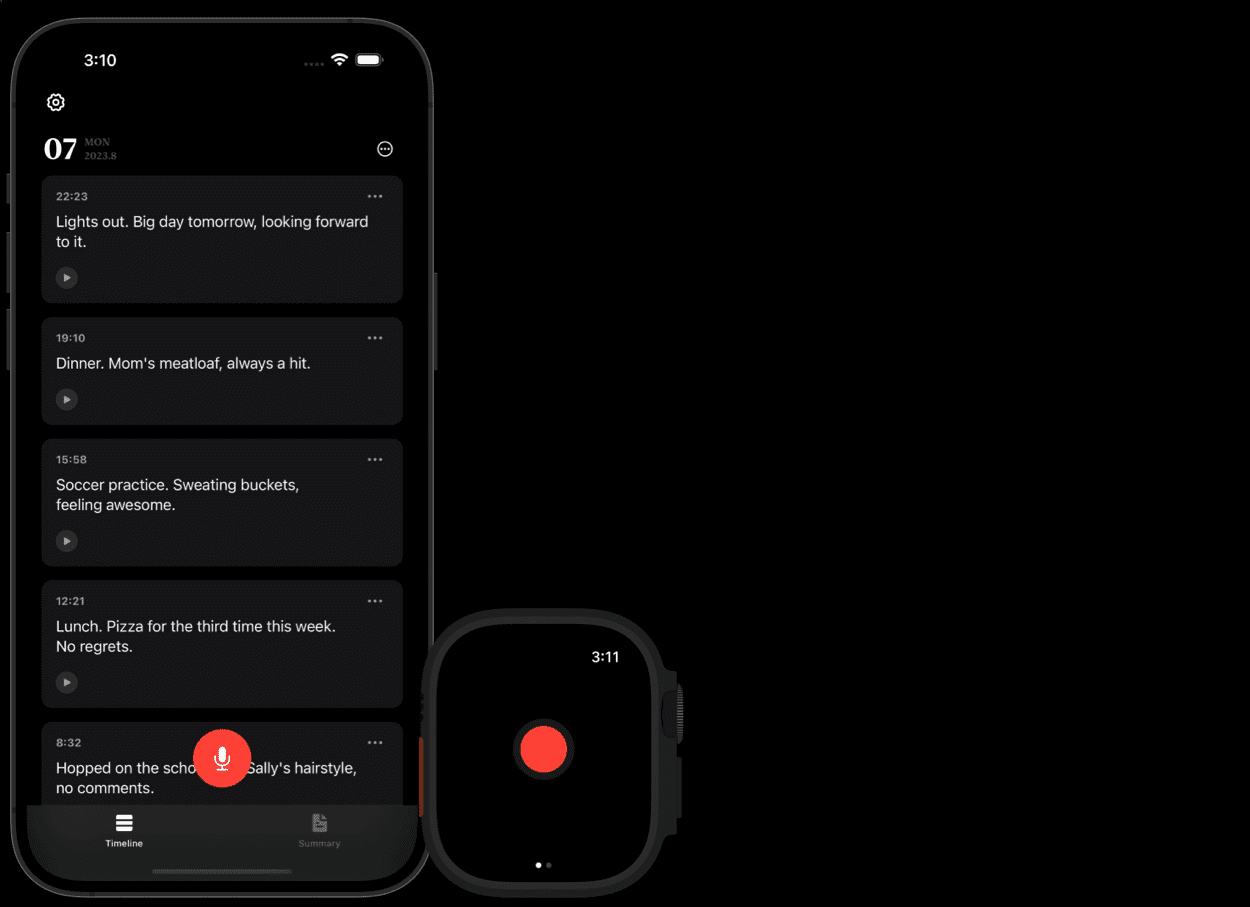
ALog: portable AI voice diary app with speech-to-text support.
General Introduction
ALog is an AI-based voice diary application designed to help users record their daily lives by voice. The project is developed by duxins and open-sourced on GitHub. Users can record diary through voice input, the application will automatically convert voice to text, and intelligent analysis and categorization. ALog supports multi-platform use, and provides a detailed installation and usage guide, so that users can get started quickly.
Deployment of the project consists of building the project and deploying the server-side code to Cloudflare. environment variables such as the OpenAI API key need to be set when configuring the worker on Cloudflare.

Function List
- Voice recording: Record diary contents by voice input
- Speech to text: automatically converts speech to text
- Intelligent analysis: Intelligent analysis and classification of diary content
- Multi-platform support: iOS and Android platforms are supported.
- Open source project: code open, users can freely modify and extend the function
Using Help
Installation process
- clone warehouse: First, clone ALog's GitHub repository.
git clone https://github.com/duxins/alog - Installation of dependencies: Install xcodegen with Homebrew.
brew install xcodegen - Installing Ruby gems: Run the following command in the project directory.
bundle install - Configuring Environment Variables: Reproduction
.env.examplefile and rename it.env, and then update the keys in it as needed.cp .env.example .env - Generate project files: Run xcodegen to generate the project file.
xcodegen
Usage Process
- launch an application: Open the generated Xcode project file, compile and run the application.
- voice recording: Tap the Record button within the app to start voice recording the contents of your diary.
- speech-to-text: When the recording is finished, the app automatically converts the voice to text and displays it in the diary list.
- intelligent analysis (religion): The app intelligently analyzes and categorizes diary content, and users can view different types of diary entries through categorized tags.
- Multi-platform useALog supports both iOS and Android platforms, allowing users to synchronize their devices.
Deploying server-side code to Cloudflare
- Creating a Cloudflare Worker: After logging into Cloudflare, navigate to the "Workers & Pages" section and click "Create Application" → "Create Worker". Rename the worker as needed and click "Deploy".
- Configuring the Worker: Once deployed, click on the "Quick Edit" button to move the
Server/src/worker.jsPaste the contents of the file into the Cloudflare Worker editor and click "Save and deploy". - Setting environment variables: Under the Worker's Settings tab, navigate to the Variables section and set the following variables:
OPENAI_KEY: Required, your OpenAI API key.HMAC_KEY: Optional, consistent with the key used by the client.AI_MODEL: Optional, default model.
- Updating the API base URL: Open
Constants.swiftfile, which willapi_base_urlConstants are updated to the URL of the deployed Cloudflare Worker.
© Copyright notes
Article copyright AI Sharing Circle All, please do not reproduce without permission.
Related posts

No comments...


