99AI: A commercialized web application integrating multimodal AI services (free and open source)
General Introduction
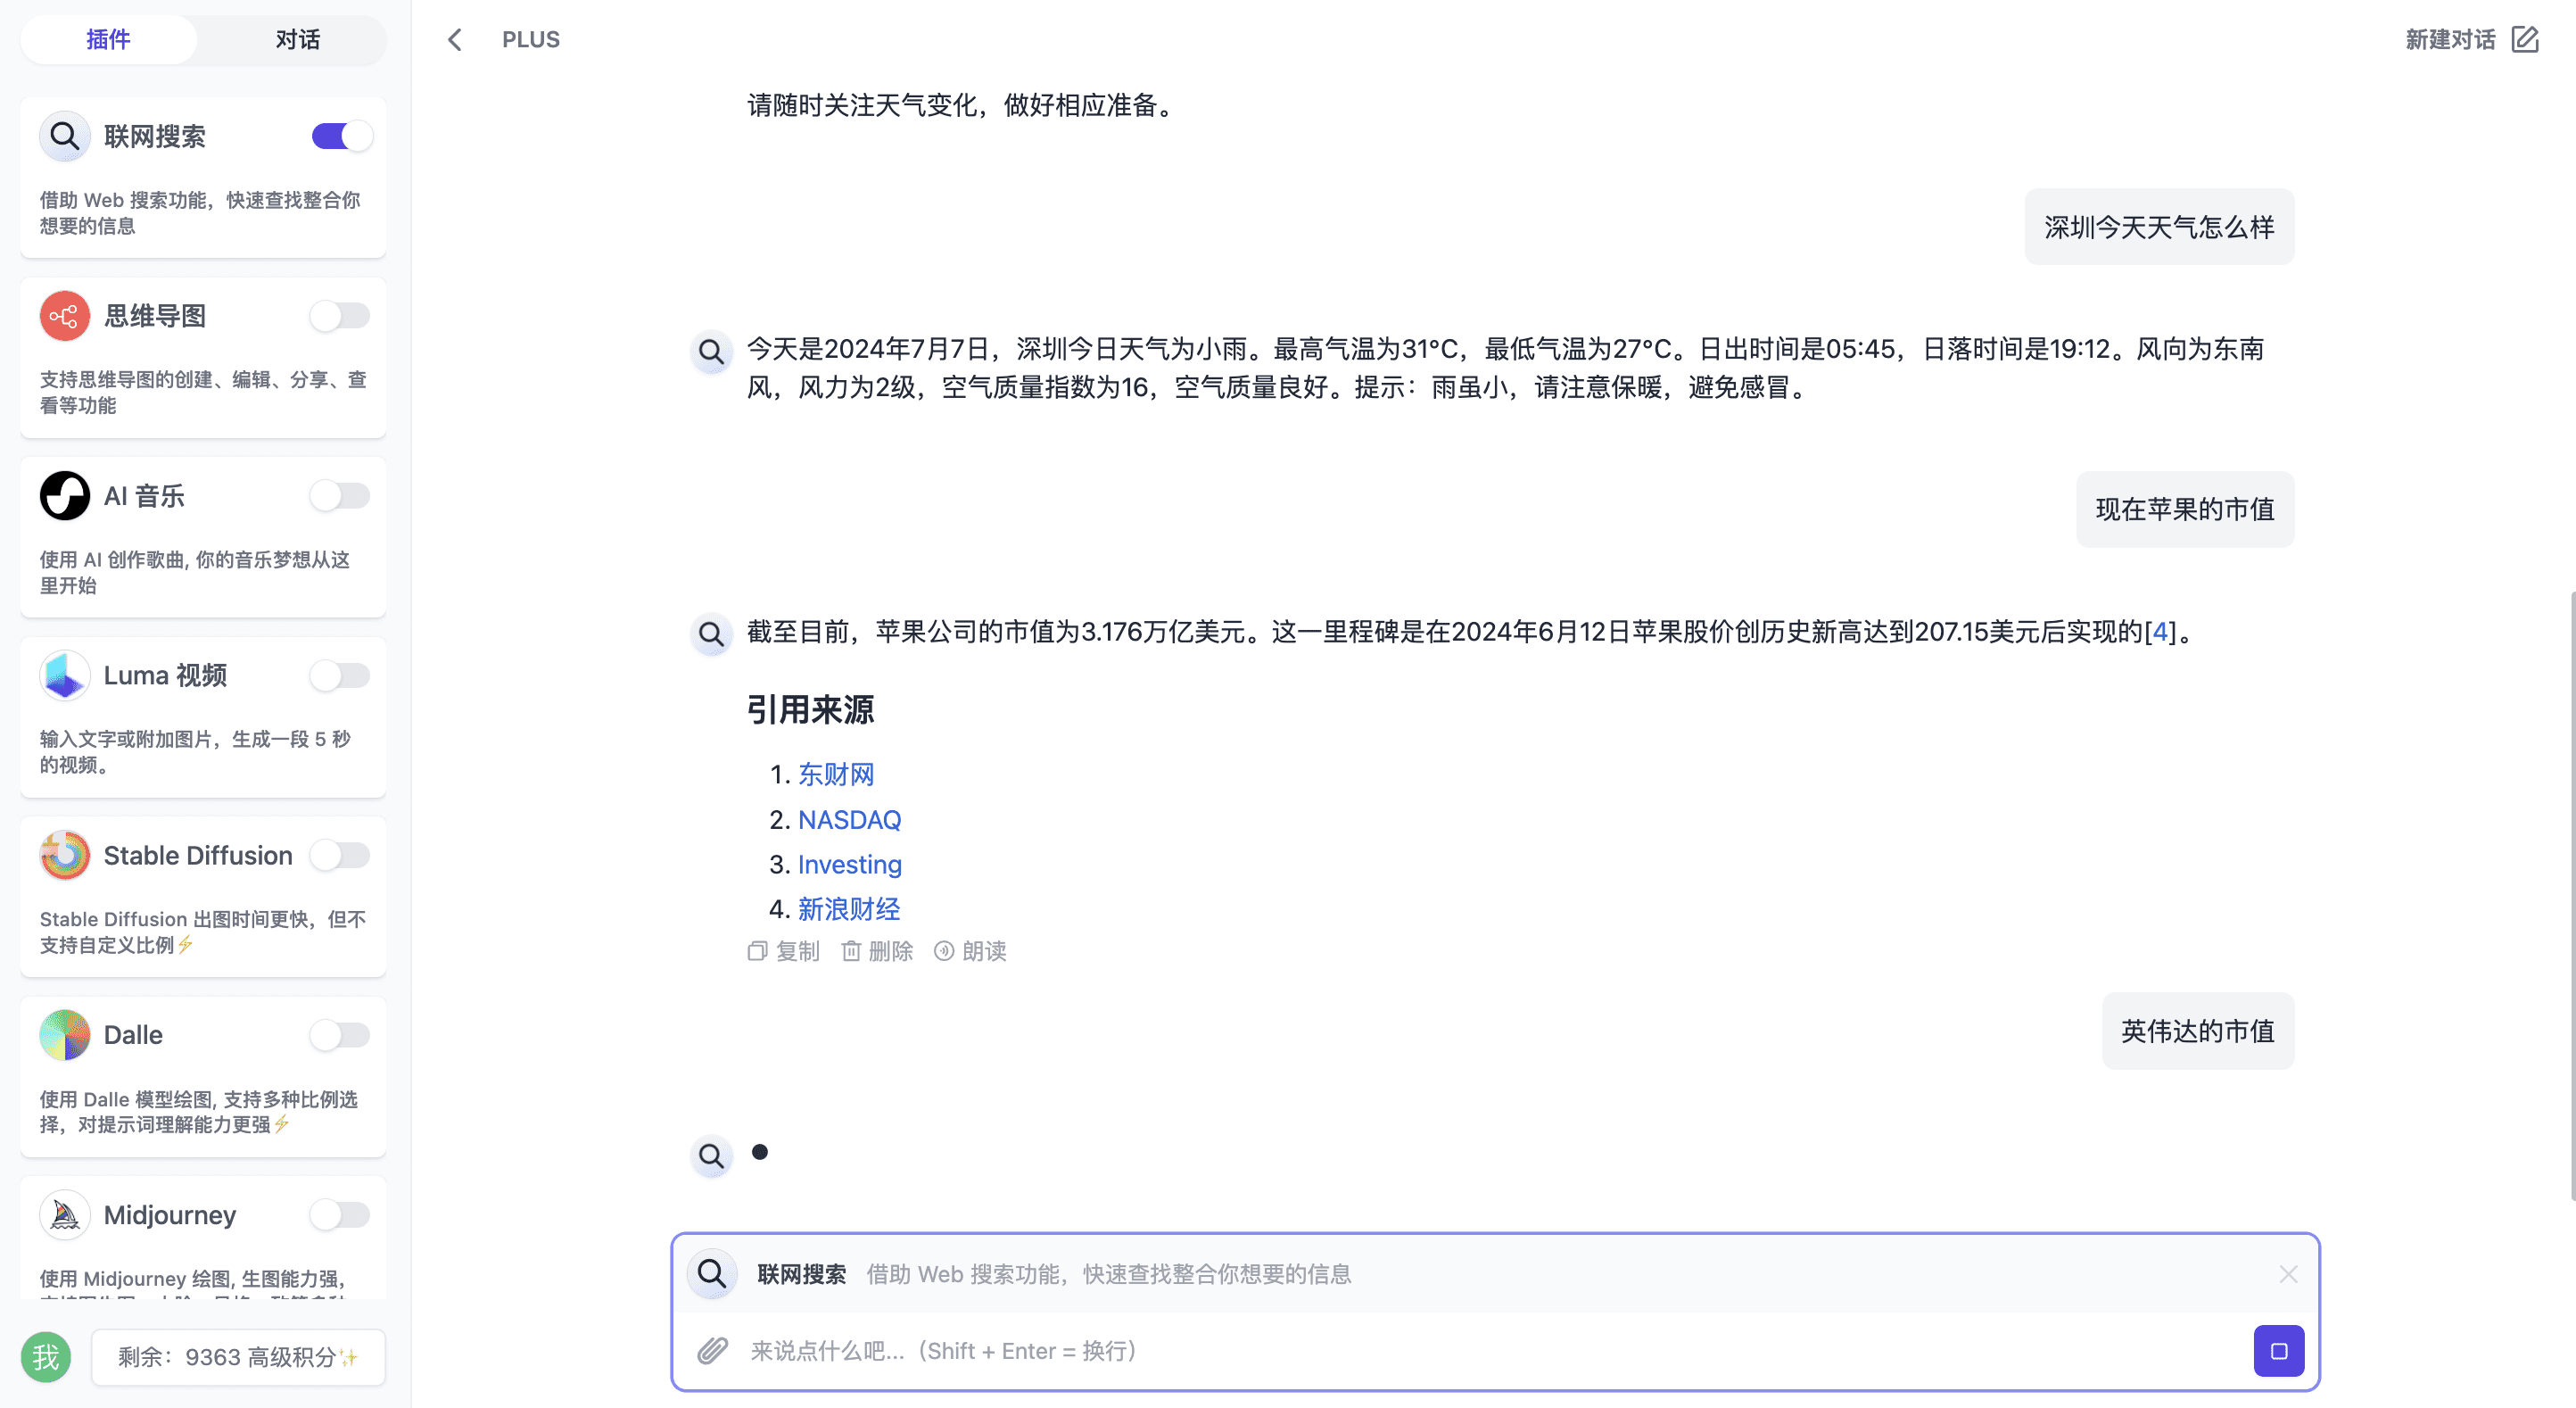
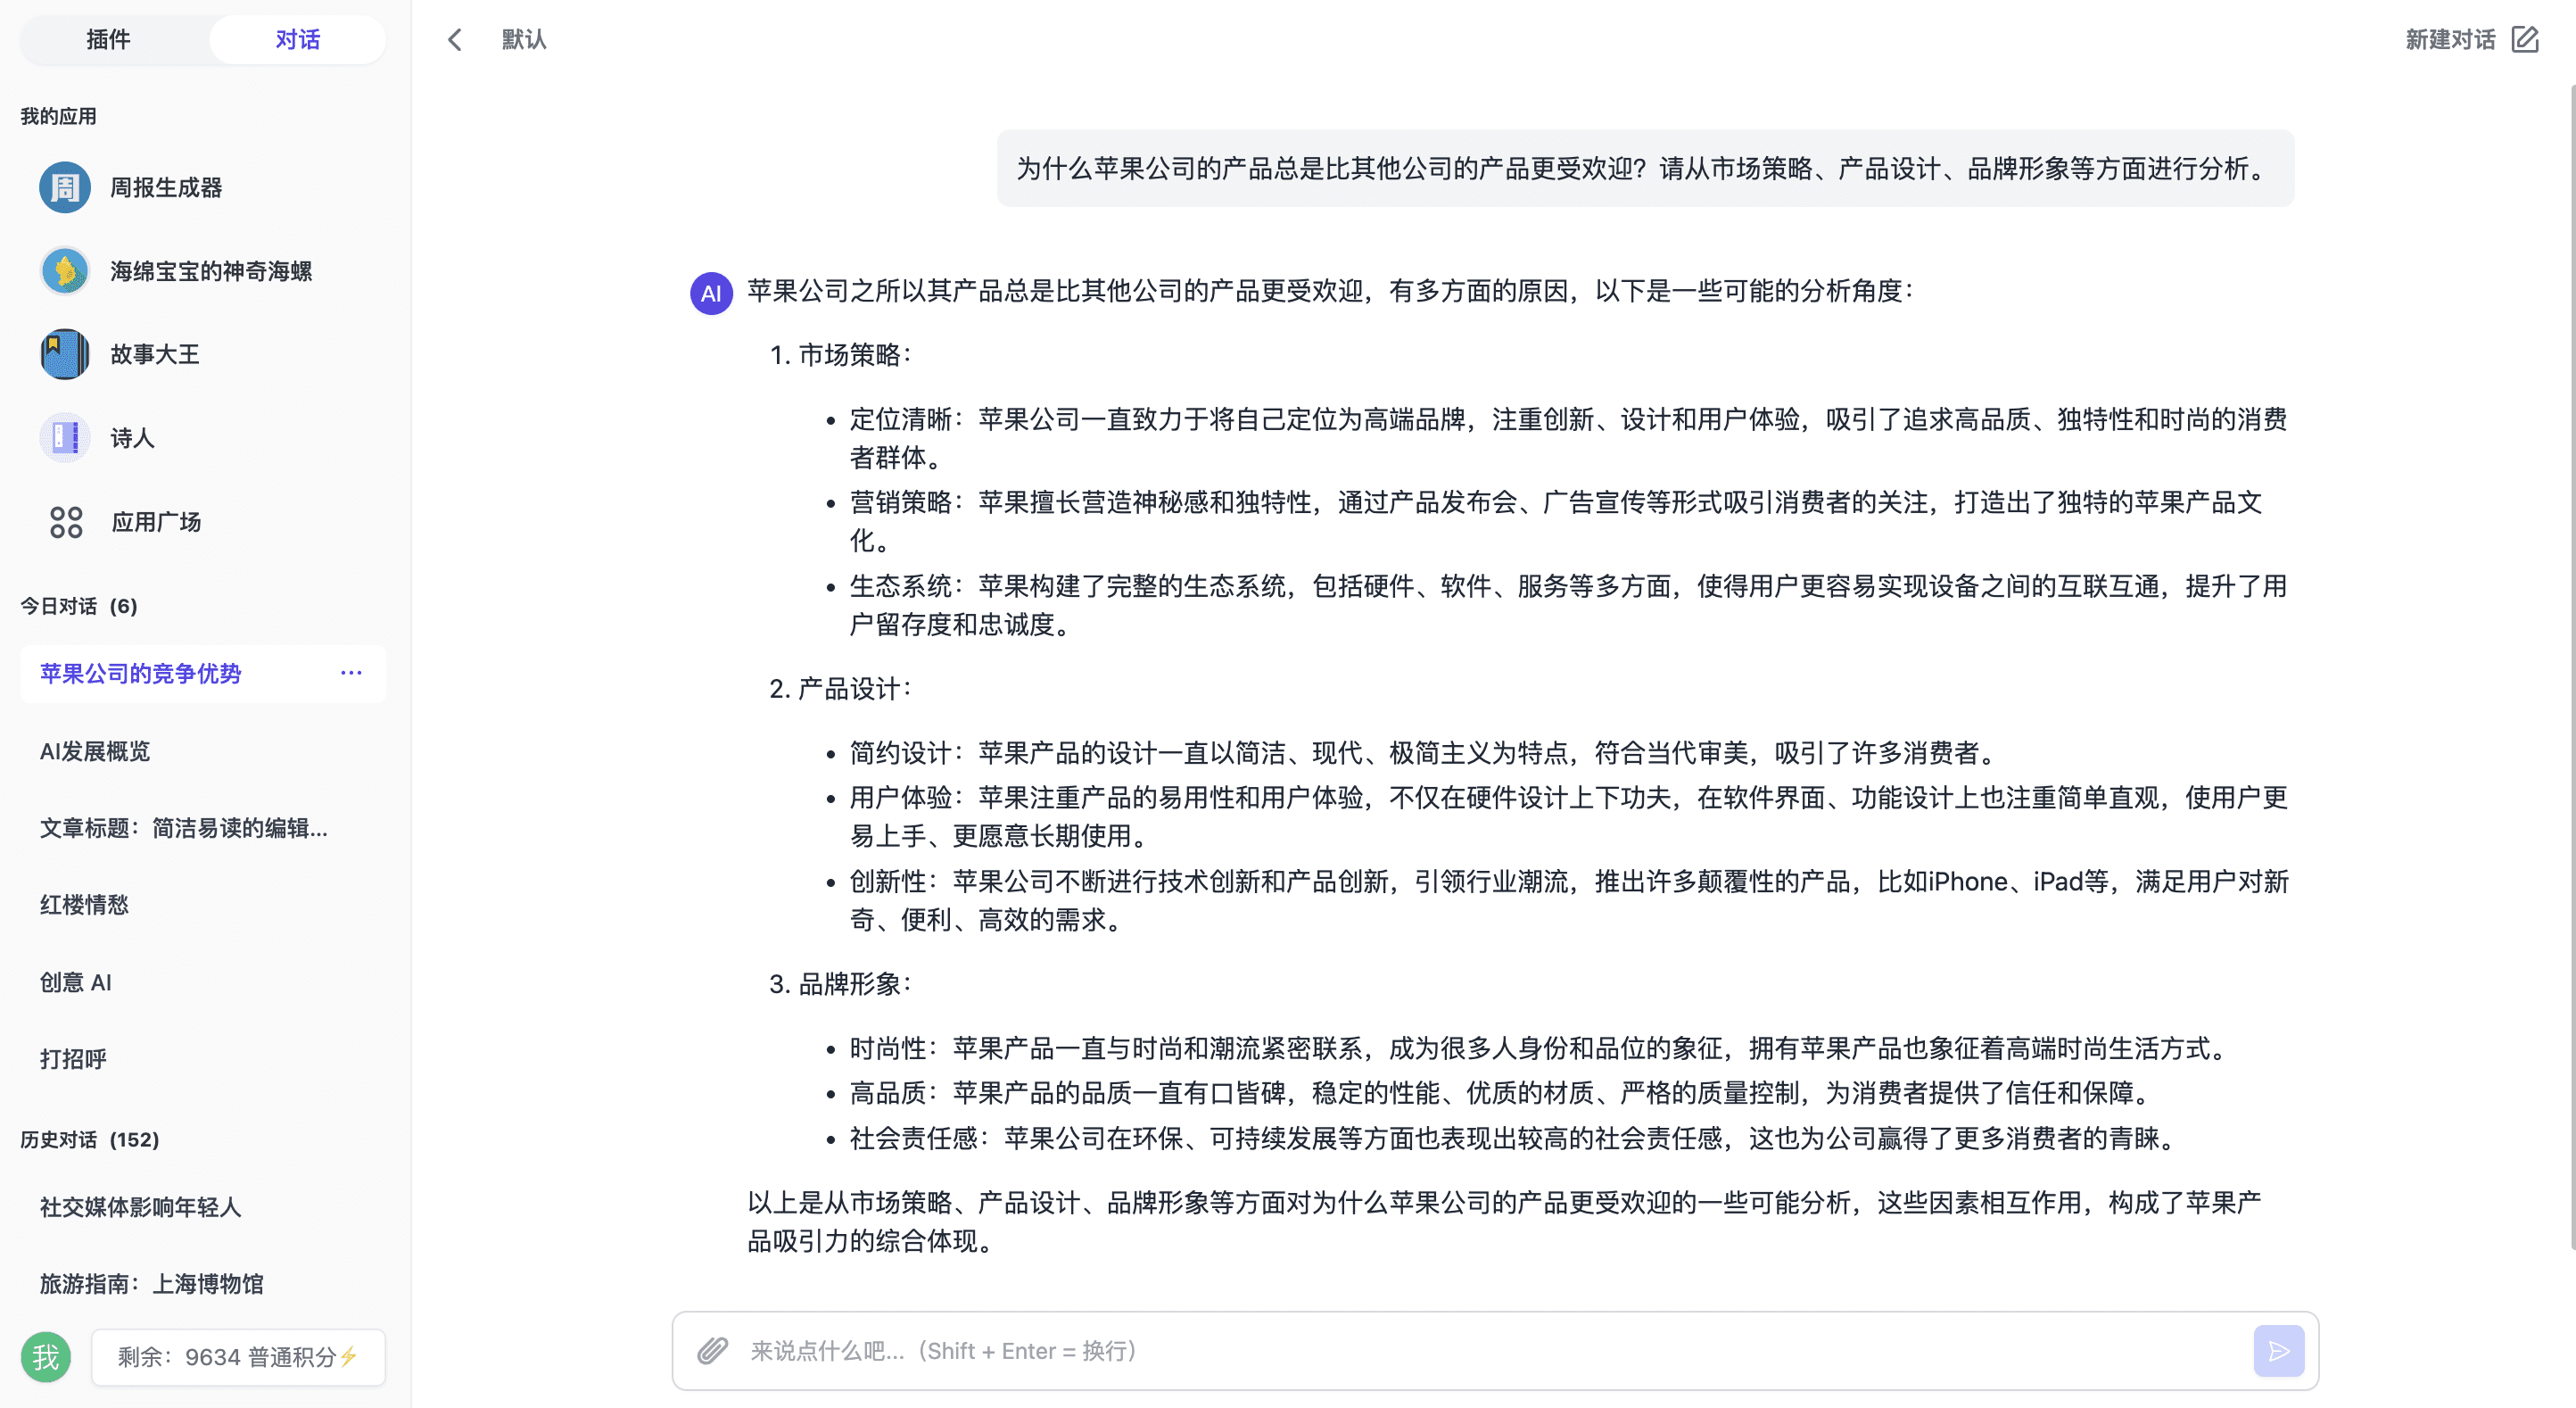
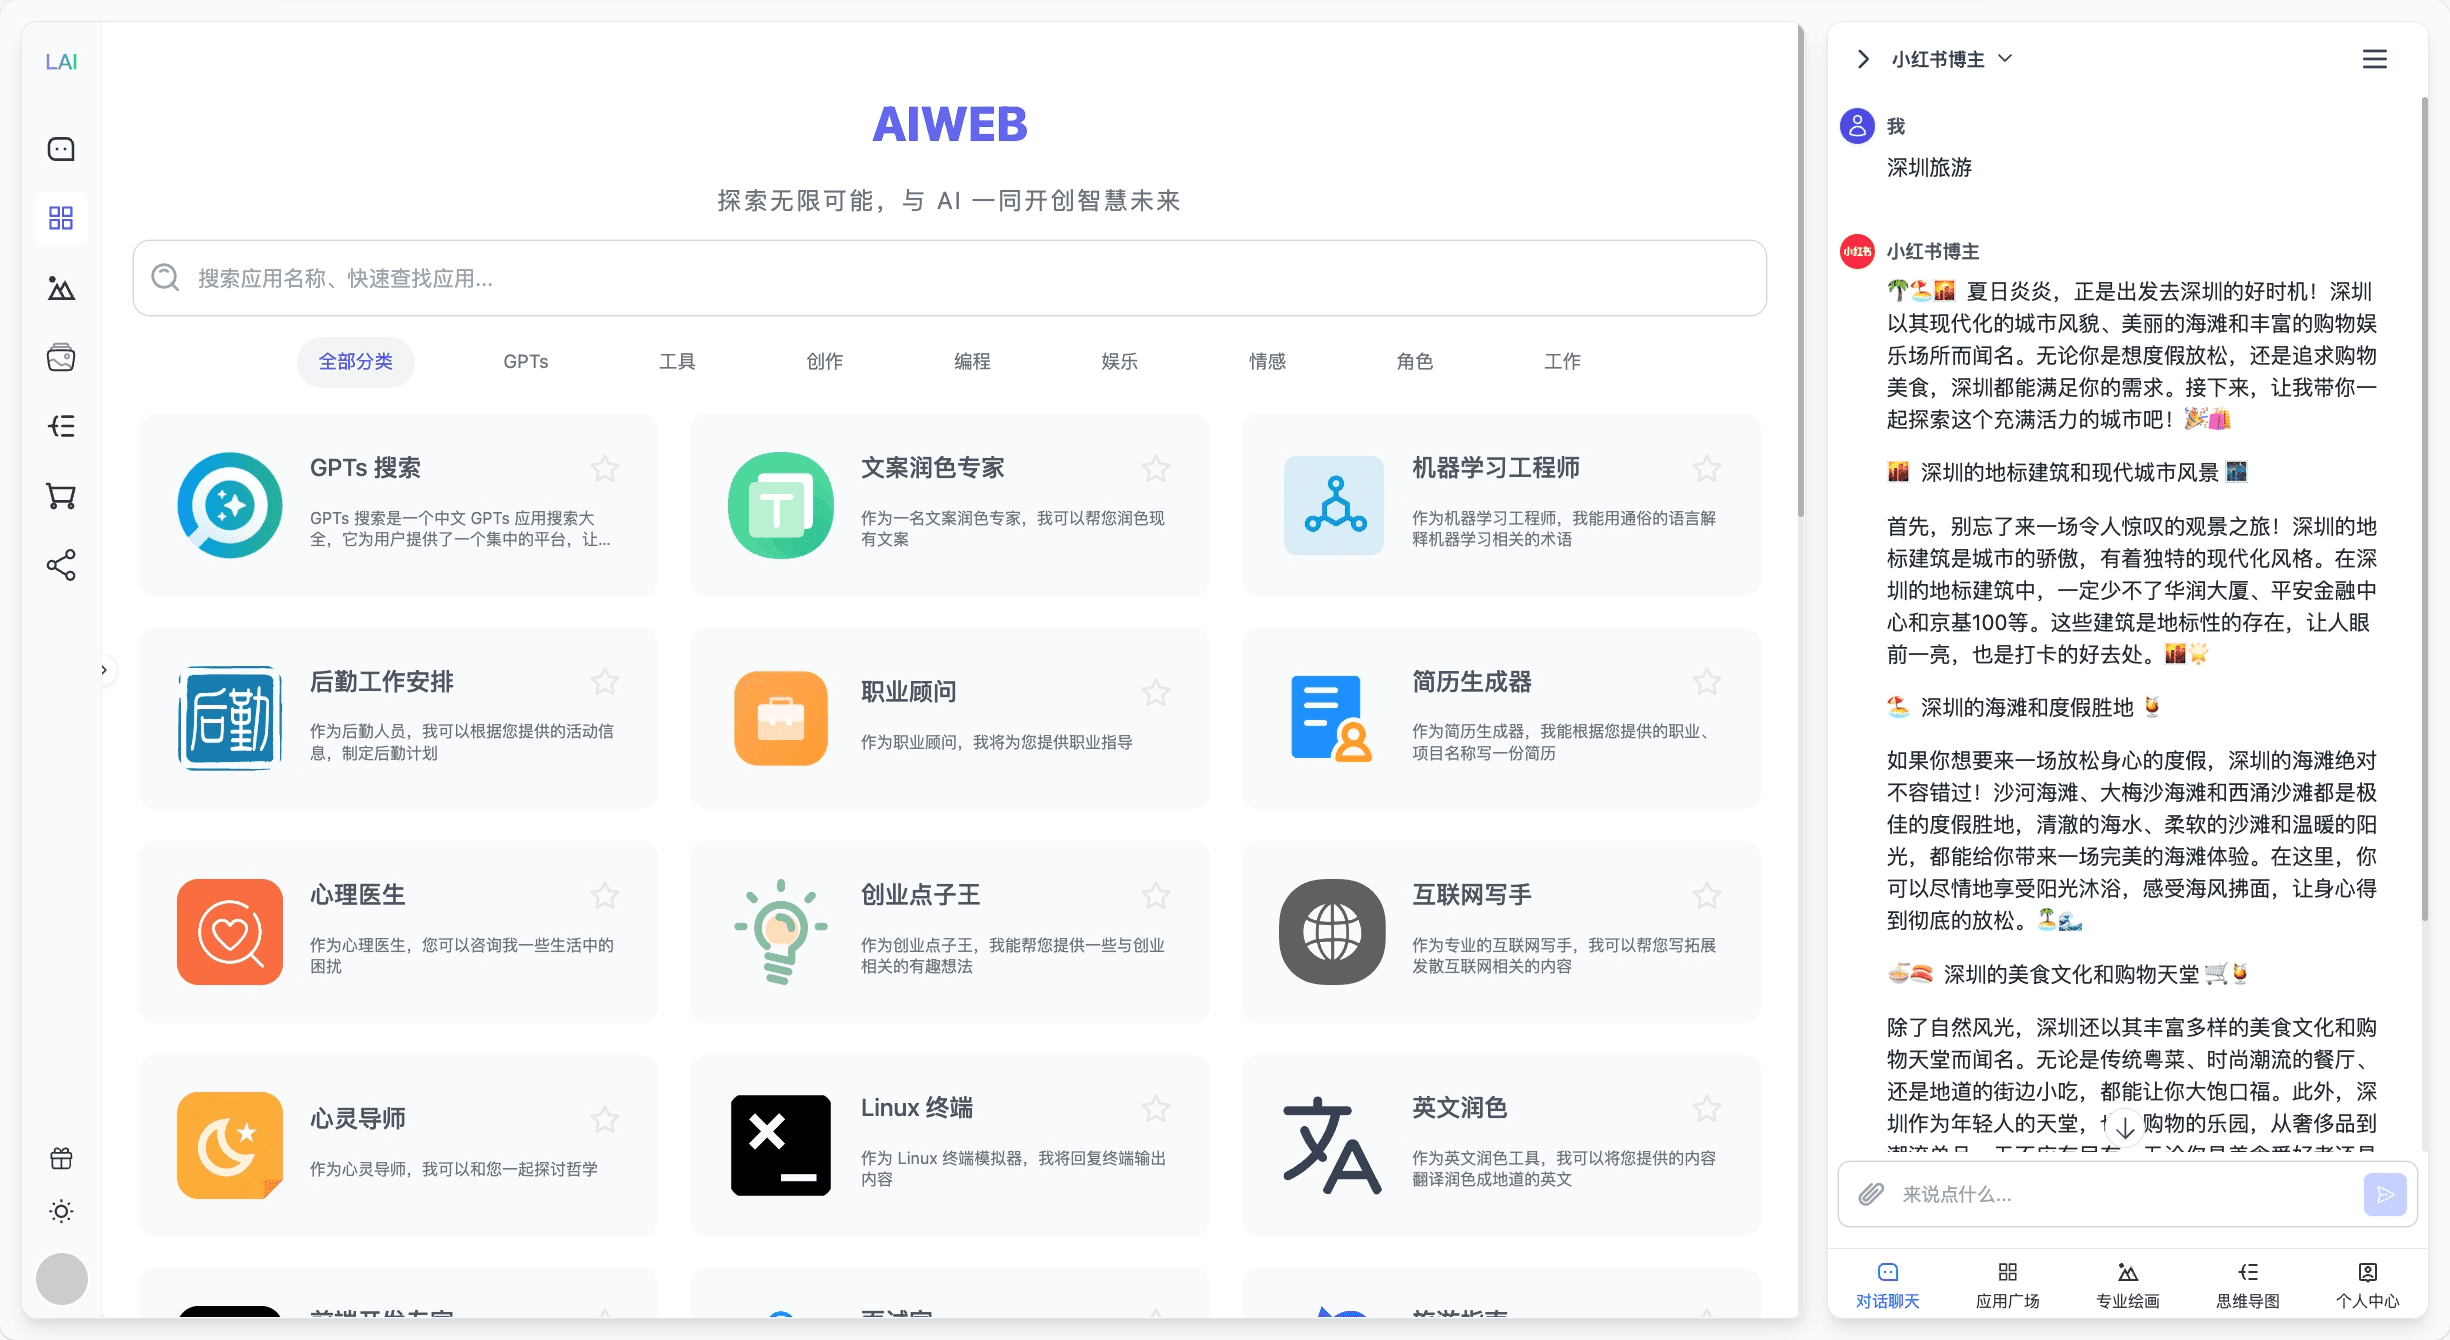
99AI is an open source AI web application project that aims to provide an easy-to-deploy, low-barrier integrated AI service platform. 99AI supports intelligent dialog, multimodal modeling, connected search, and integrated AI painting and music and video creation. The project supports intelligent dialog, multimodal modeling, application plaza, networked search, etc., and integrates AI painting, music and video creation capabilities. 99AI has been compiled into an integration package that supports a variety of rapid deployment methods, which makes it easy for individual and enterprise users to build AI service platforms.
Experience the site:PlasmaAI
Function List
- AI Dialogue: Supports OpenAI Chat format, with backend customizable parameters such as model name, avatar, introduction, agent, key, point deduction method, file upload mode, and more.
- multimodal model: Use visual models such as gpt-4o, claude-3, or inverse models such as gpt-4-all to complete the recognition analysis of images and documents.
- Application Plaza: Expand the boundaries of AI functionality by interfacing with plug-in systems.
- Internet search: Docking plug-in system that provides networked search capabilities.
- mind map: Generate MarkDown format outlines and user-generated mind maps.
- AI Painting: Docking midjourney, dall-e, stable-diffusion, and other painting models.
- AI Music: Docking with suno-music for music creation.
- AI Video: Docking luma-video Vincennes video.
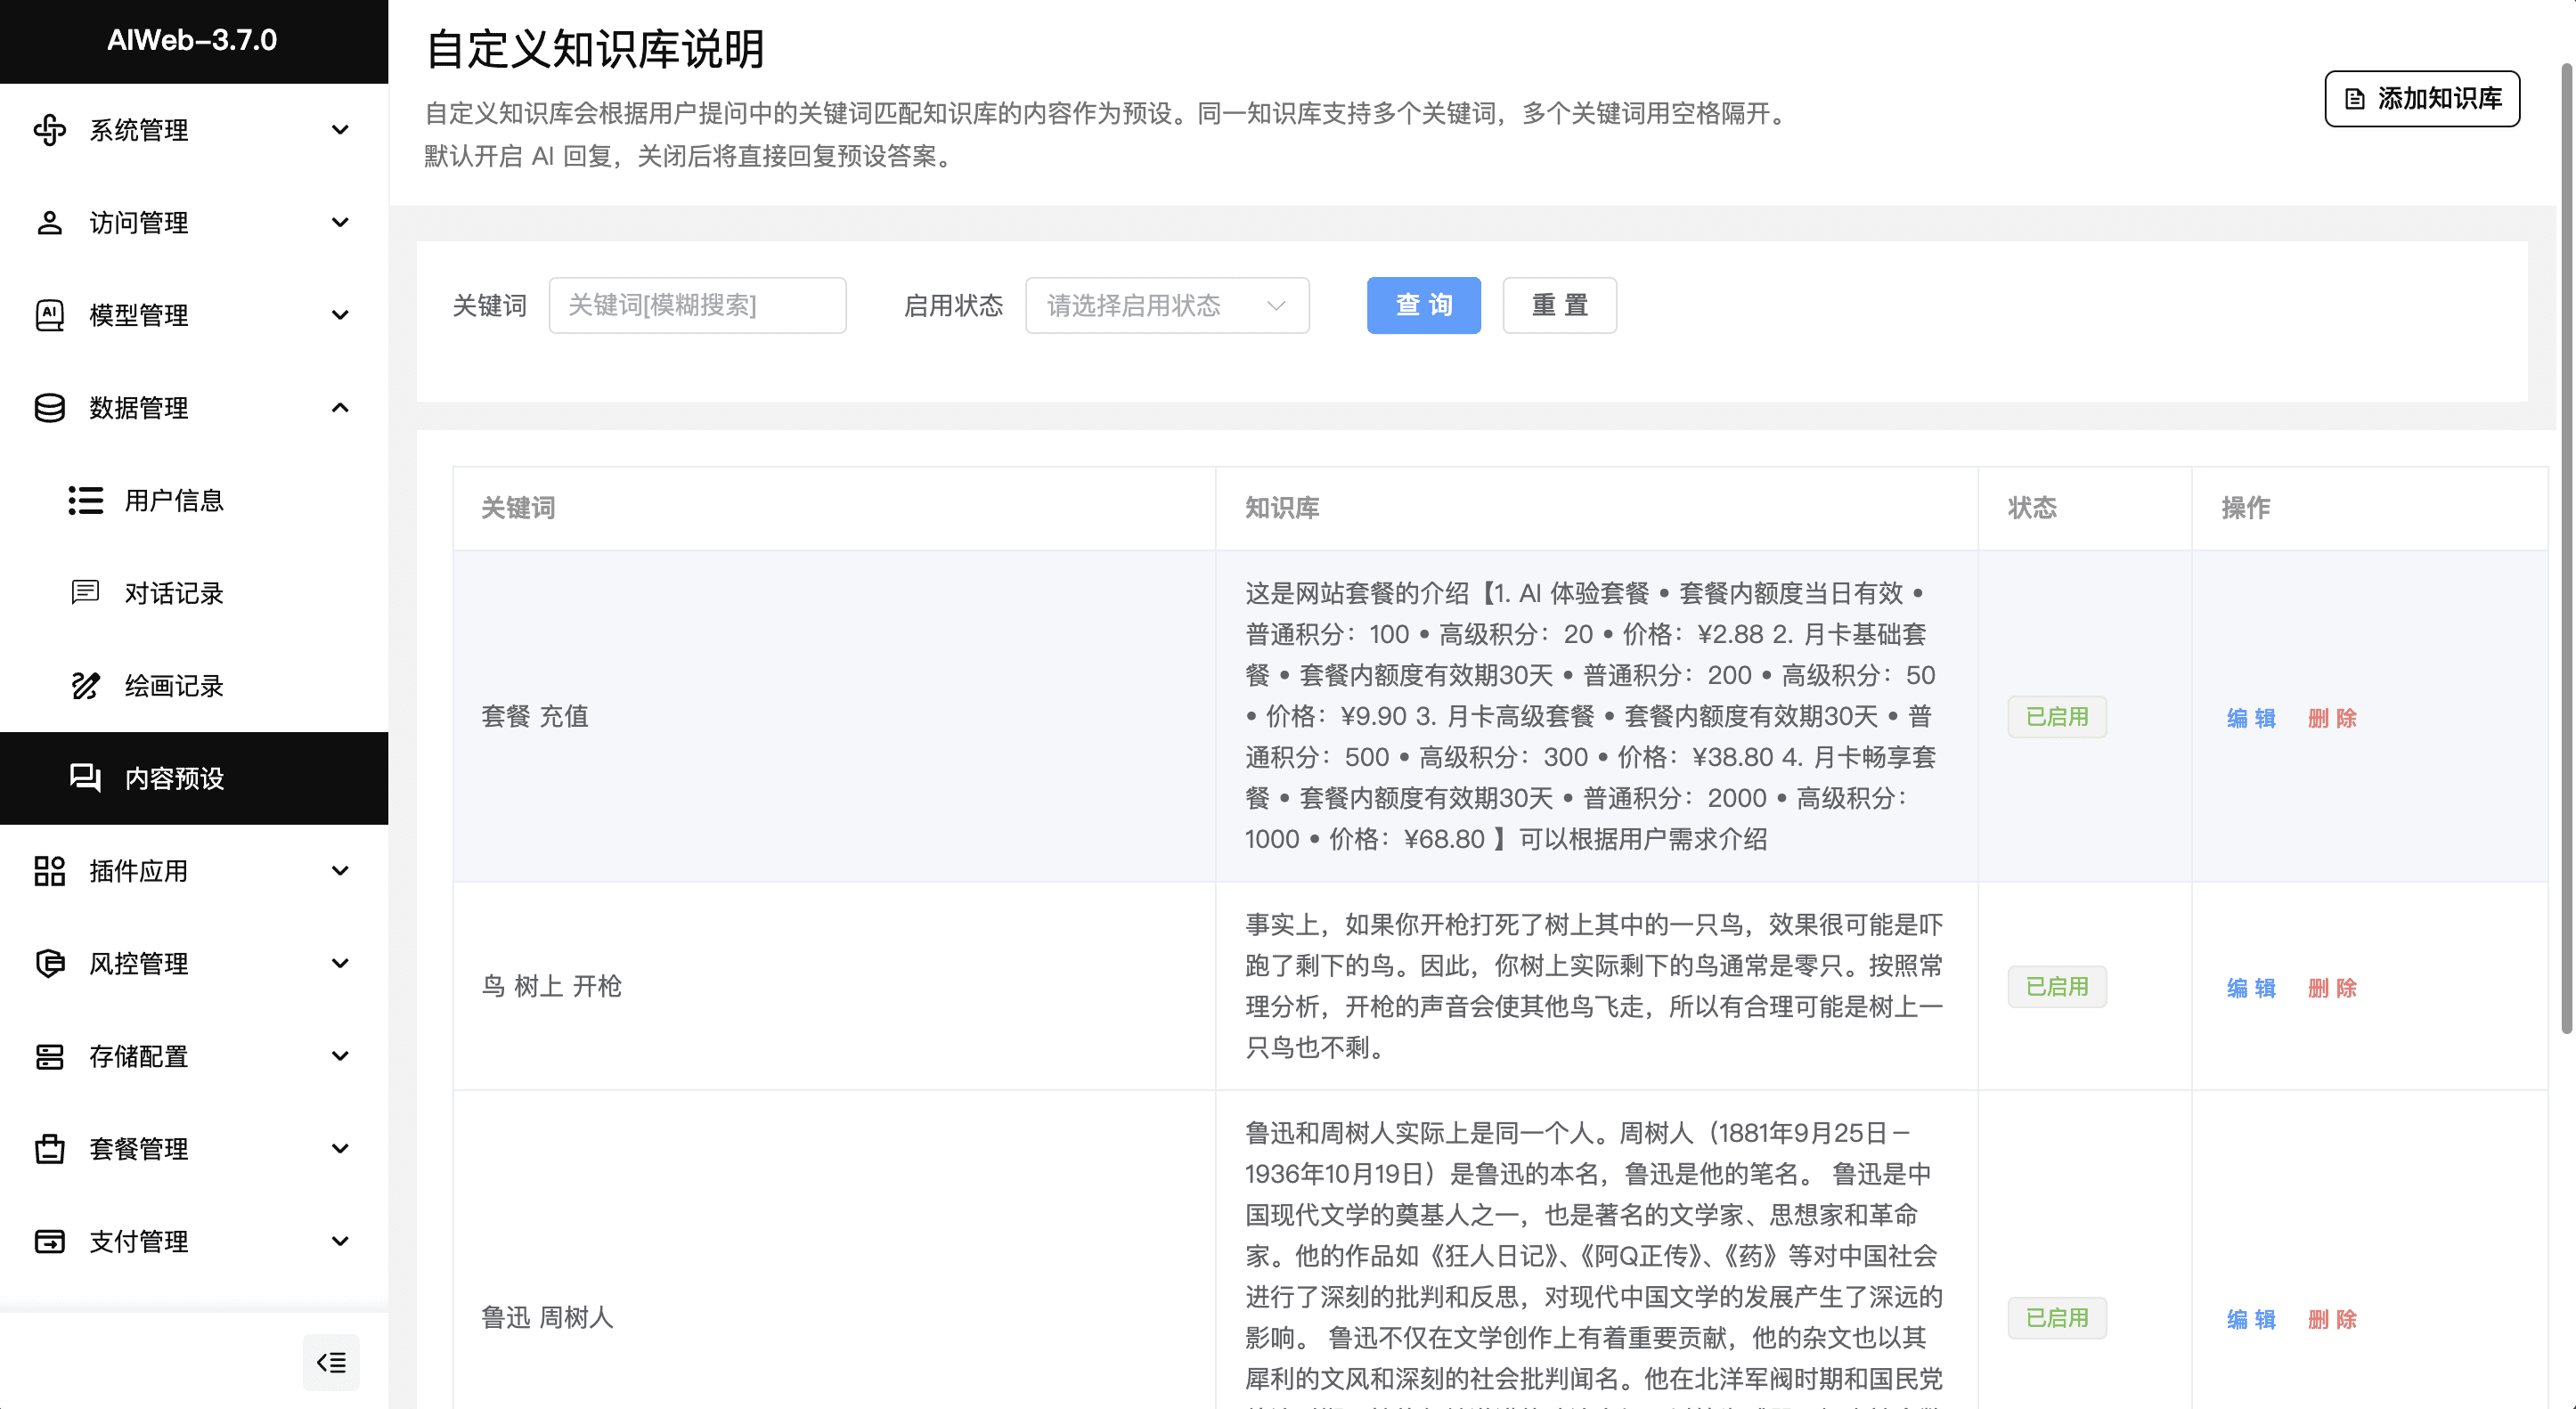
- Knowledge base presets: Support for adjusting lyrics, selecting music genres and styles.
- Code Preview: Preview and edit HTML code.
- Localized Storage: Supports local storage for saving data.
Using Help
Installation process
Node.js Deployment
First we install the basic environment, Nginx, MySql, Redis, Node.js, pnpm, pm2
For convenience we can install Pagoda Panel International Edition, also known as aapanel, through the Pagoda Panel can quickly install Nginx, MySql, Redis with one click.
wget -O install.sh http://www.aapanel.com/script/install-ubuntu_6.0_en.sh && bash install.sh aapanel
We then proceeded to install Node.js, pnpm, and PM2, depending on the system installed.
Node.js v21.x.
Using Ubuntu:
curl -fsSL https://deb.nodesource.com/setup_21.x | sudo -E bash - &&\
sudo apt-get install -y nodejs
Using Debian, as root.
curl -fsSL https://deb.nodesource.com/setup_21.x | bash - &&\
apt-get install -y nodejs

Install PM2 using npm:
npm install pm2 -g

Install pnpm using npm:
npm install -g pnpm
```[](https://pic.sky350.cn/images/2024/08/30/114x4u2.jpg)
确认 PM2 和 pnpm 都已正确安装并且可以运行:
pm2 -v
pnpm -v

After installing the basic environment, we create a new website, by the way, a new database, bind the domain name, do the resolution. Click on the site settings, one click to apply for ssl.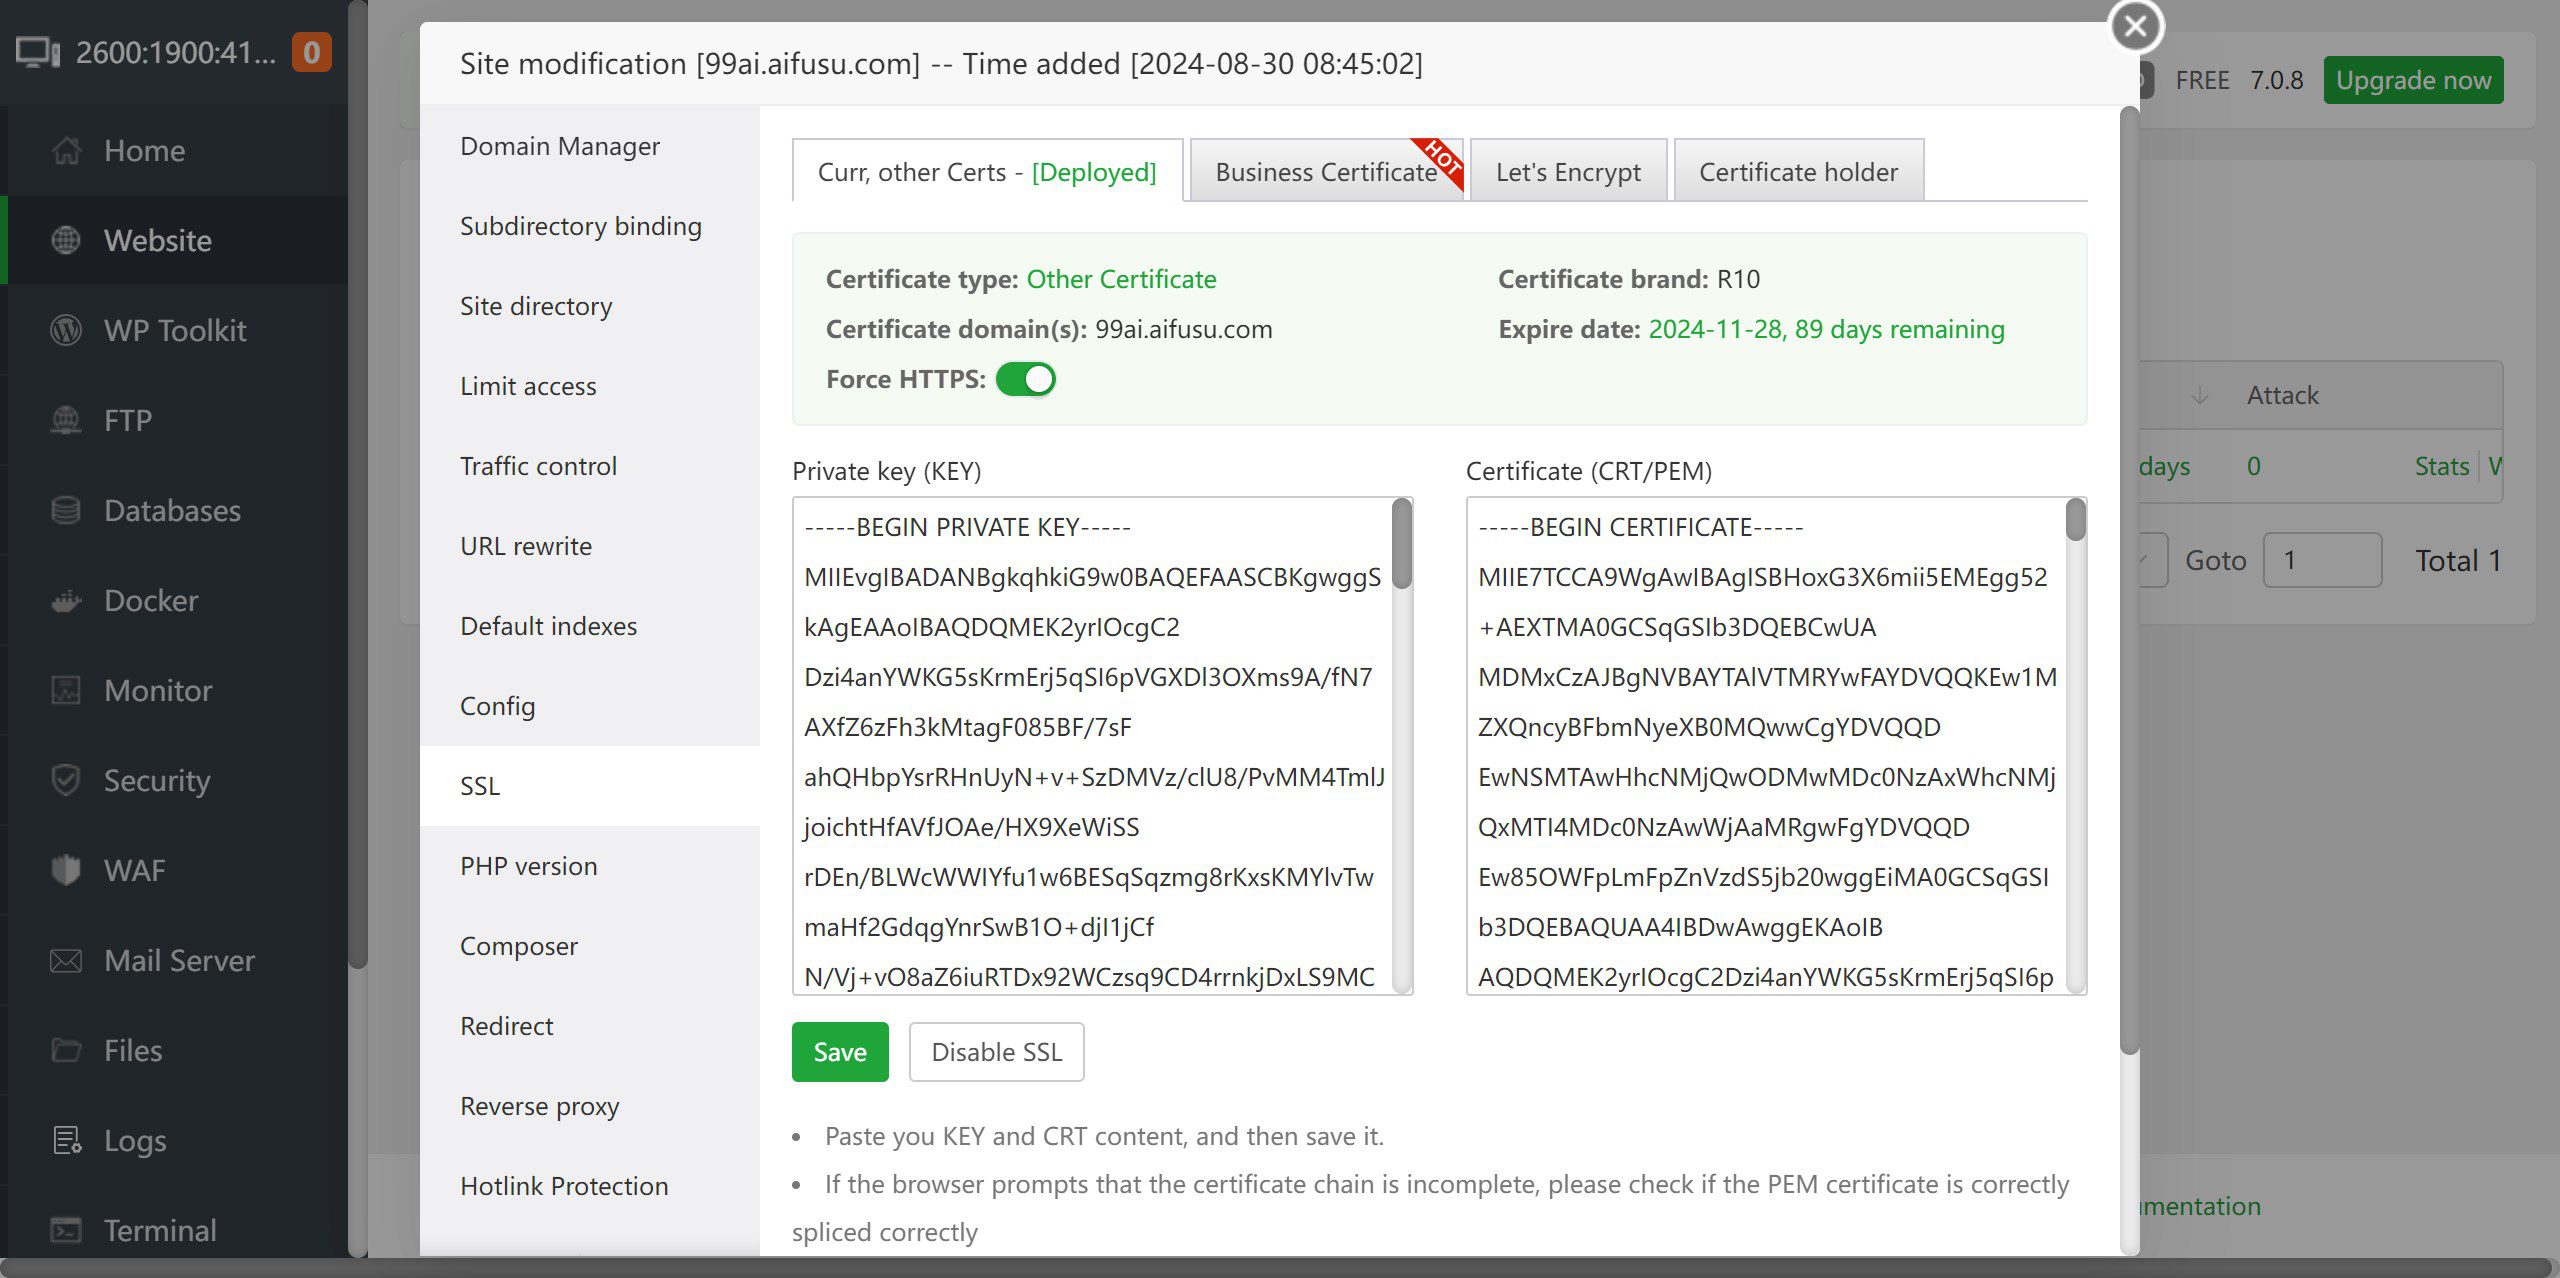
In order to facilitate the memory, 99ai we put the site directory, click into the site directory, upload 99ai source code, or copy the address of the GitHub releases file, download it remotely to the site directory, and then unzip it.
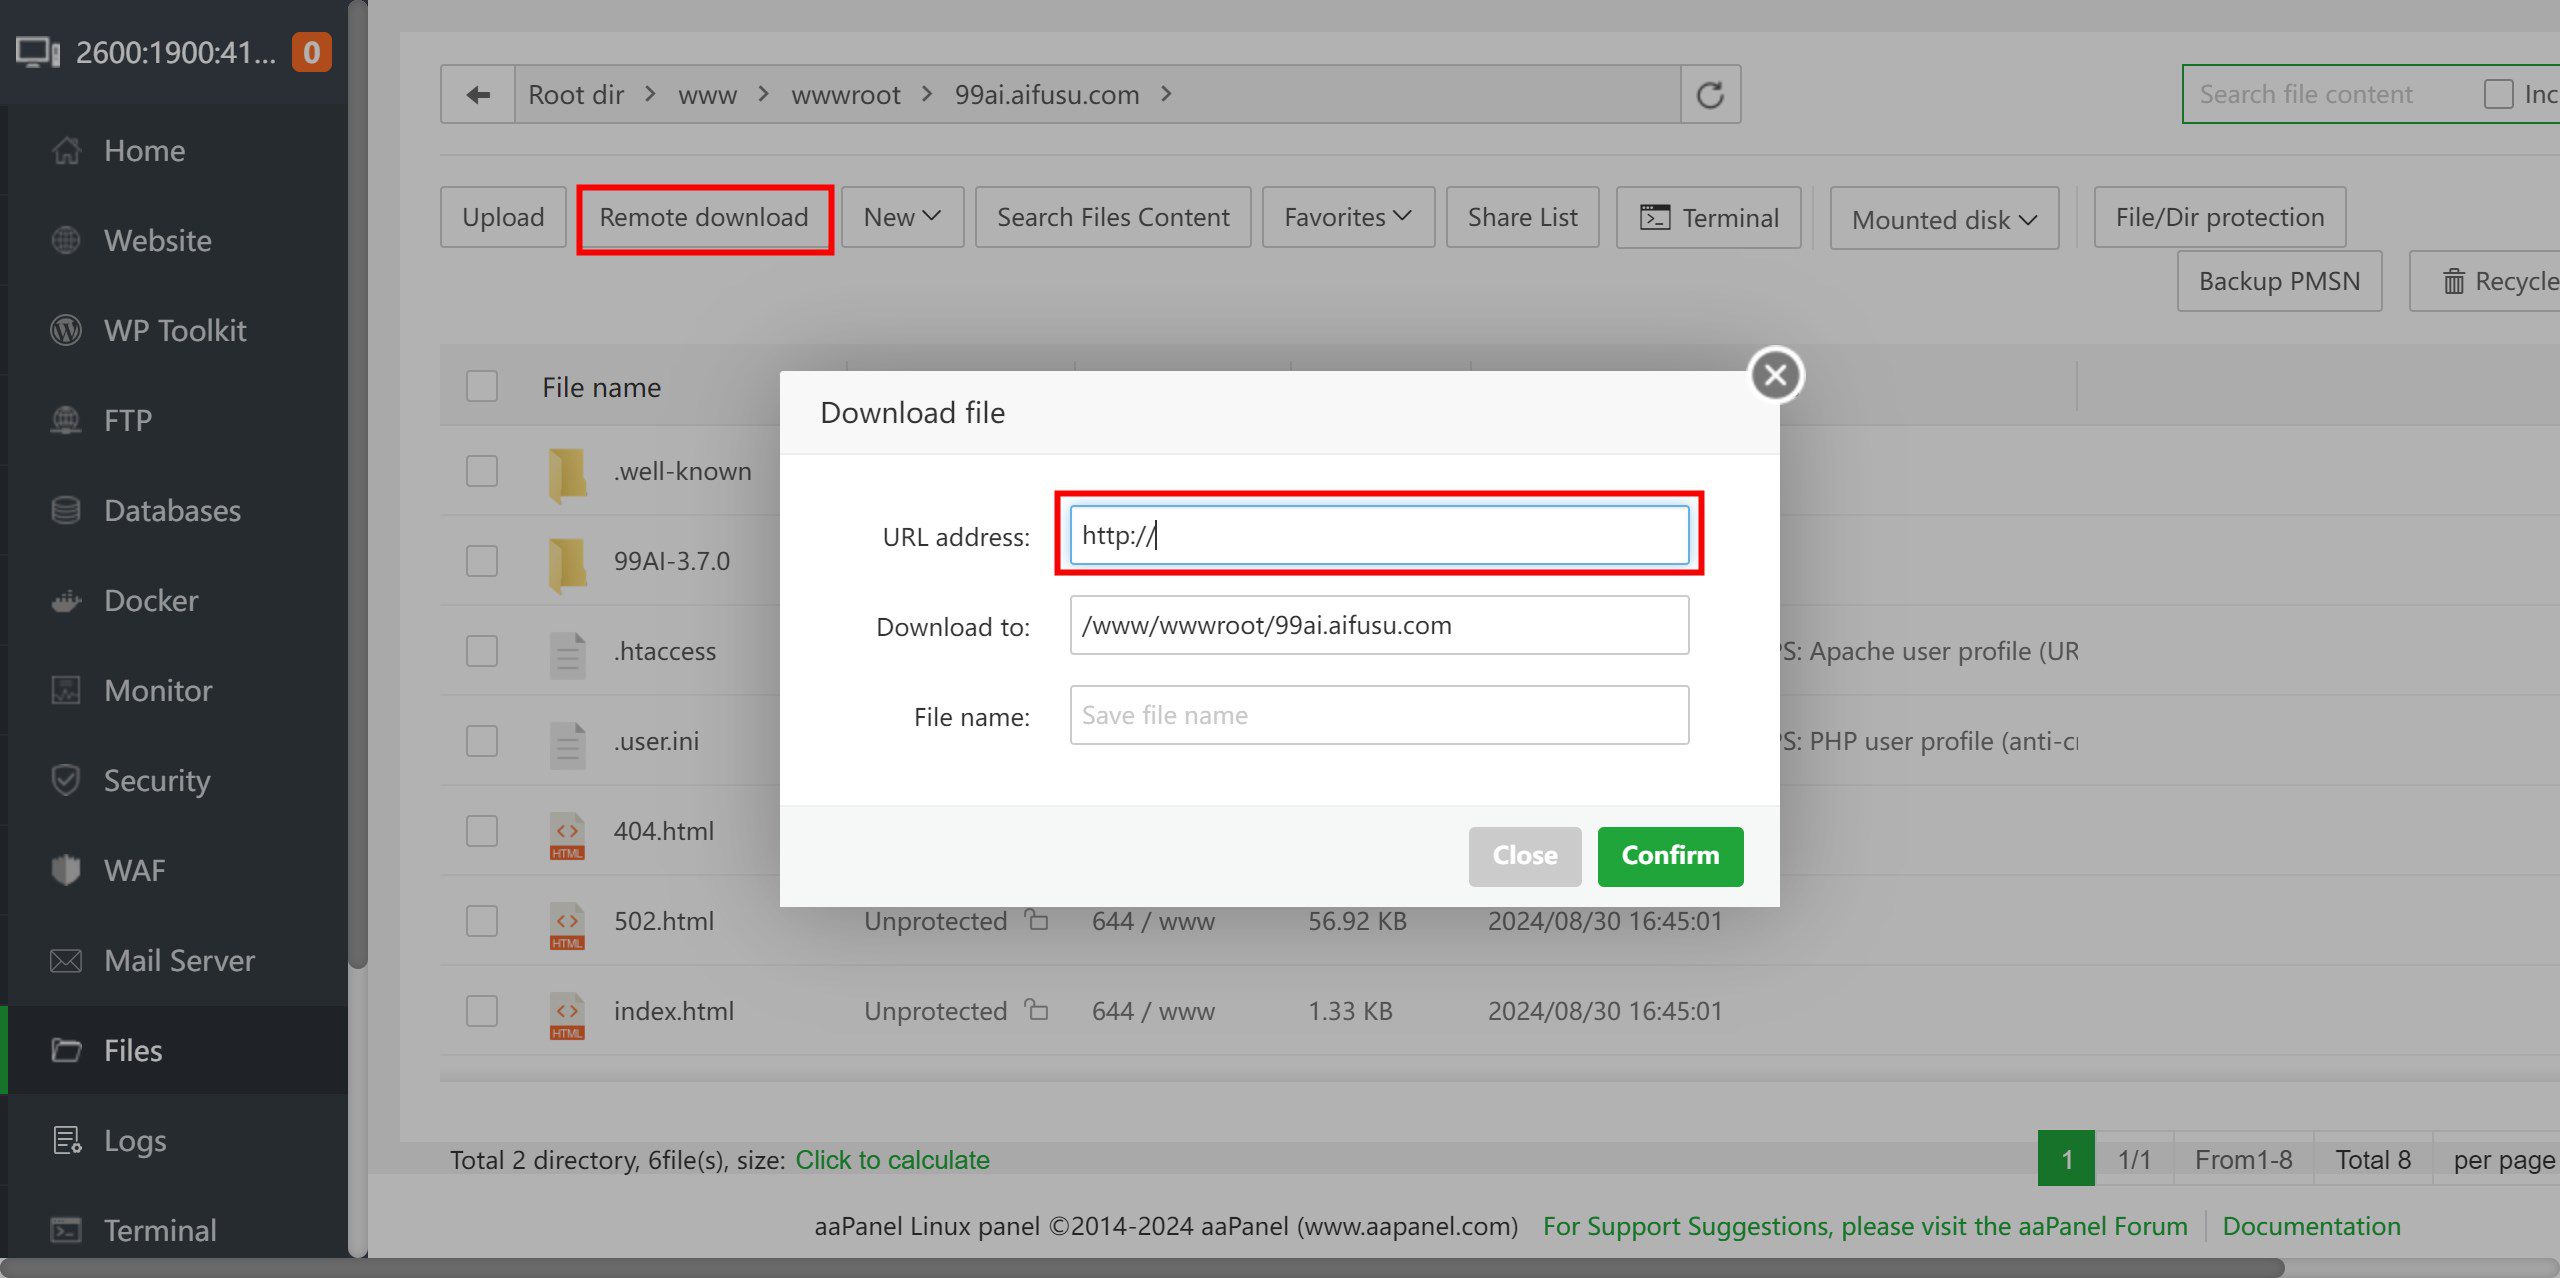
After unzipping we open the .env.example file in the directory, copy the contents, and create a new file named .env, paste the copied contents into it, and fill in the configuration according to our actual situation, and finally save.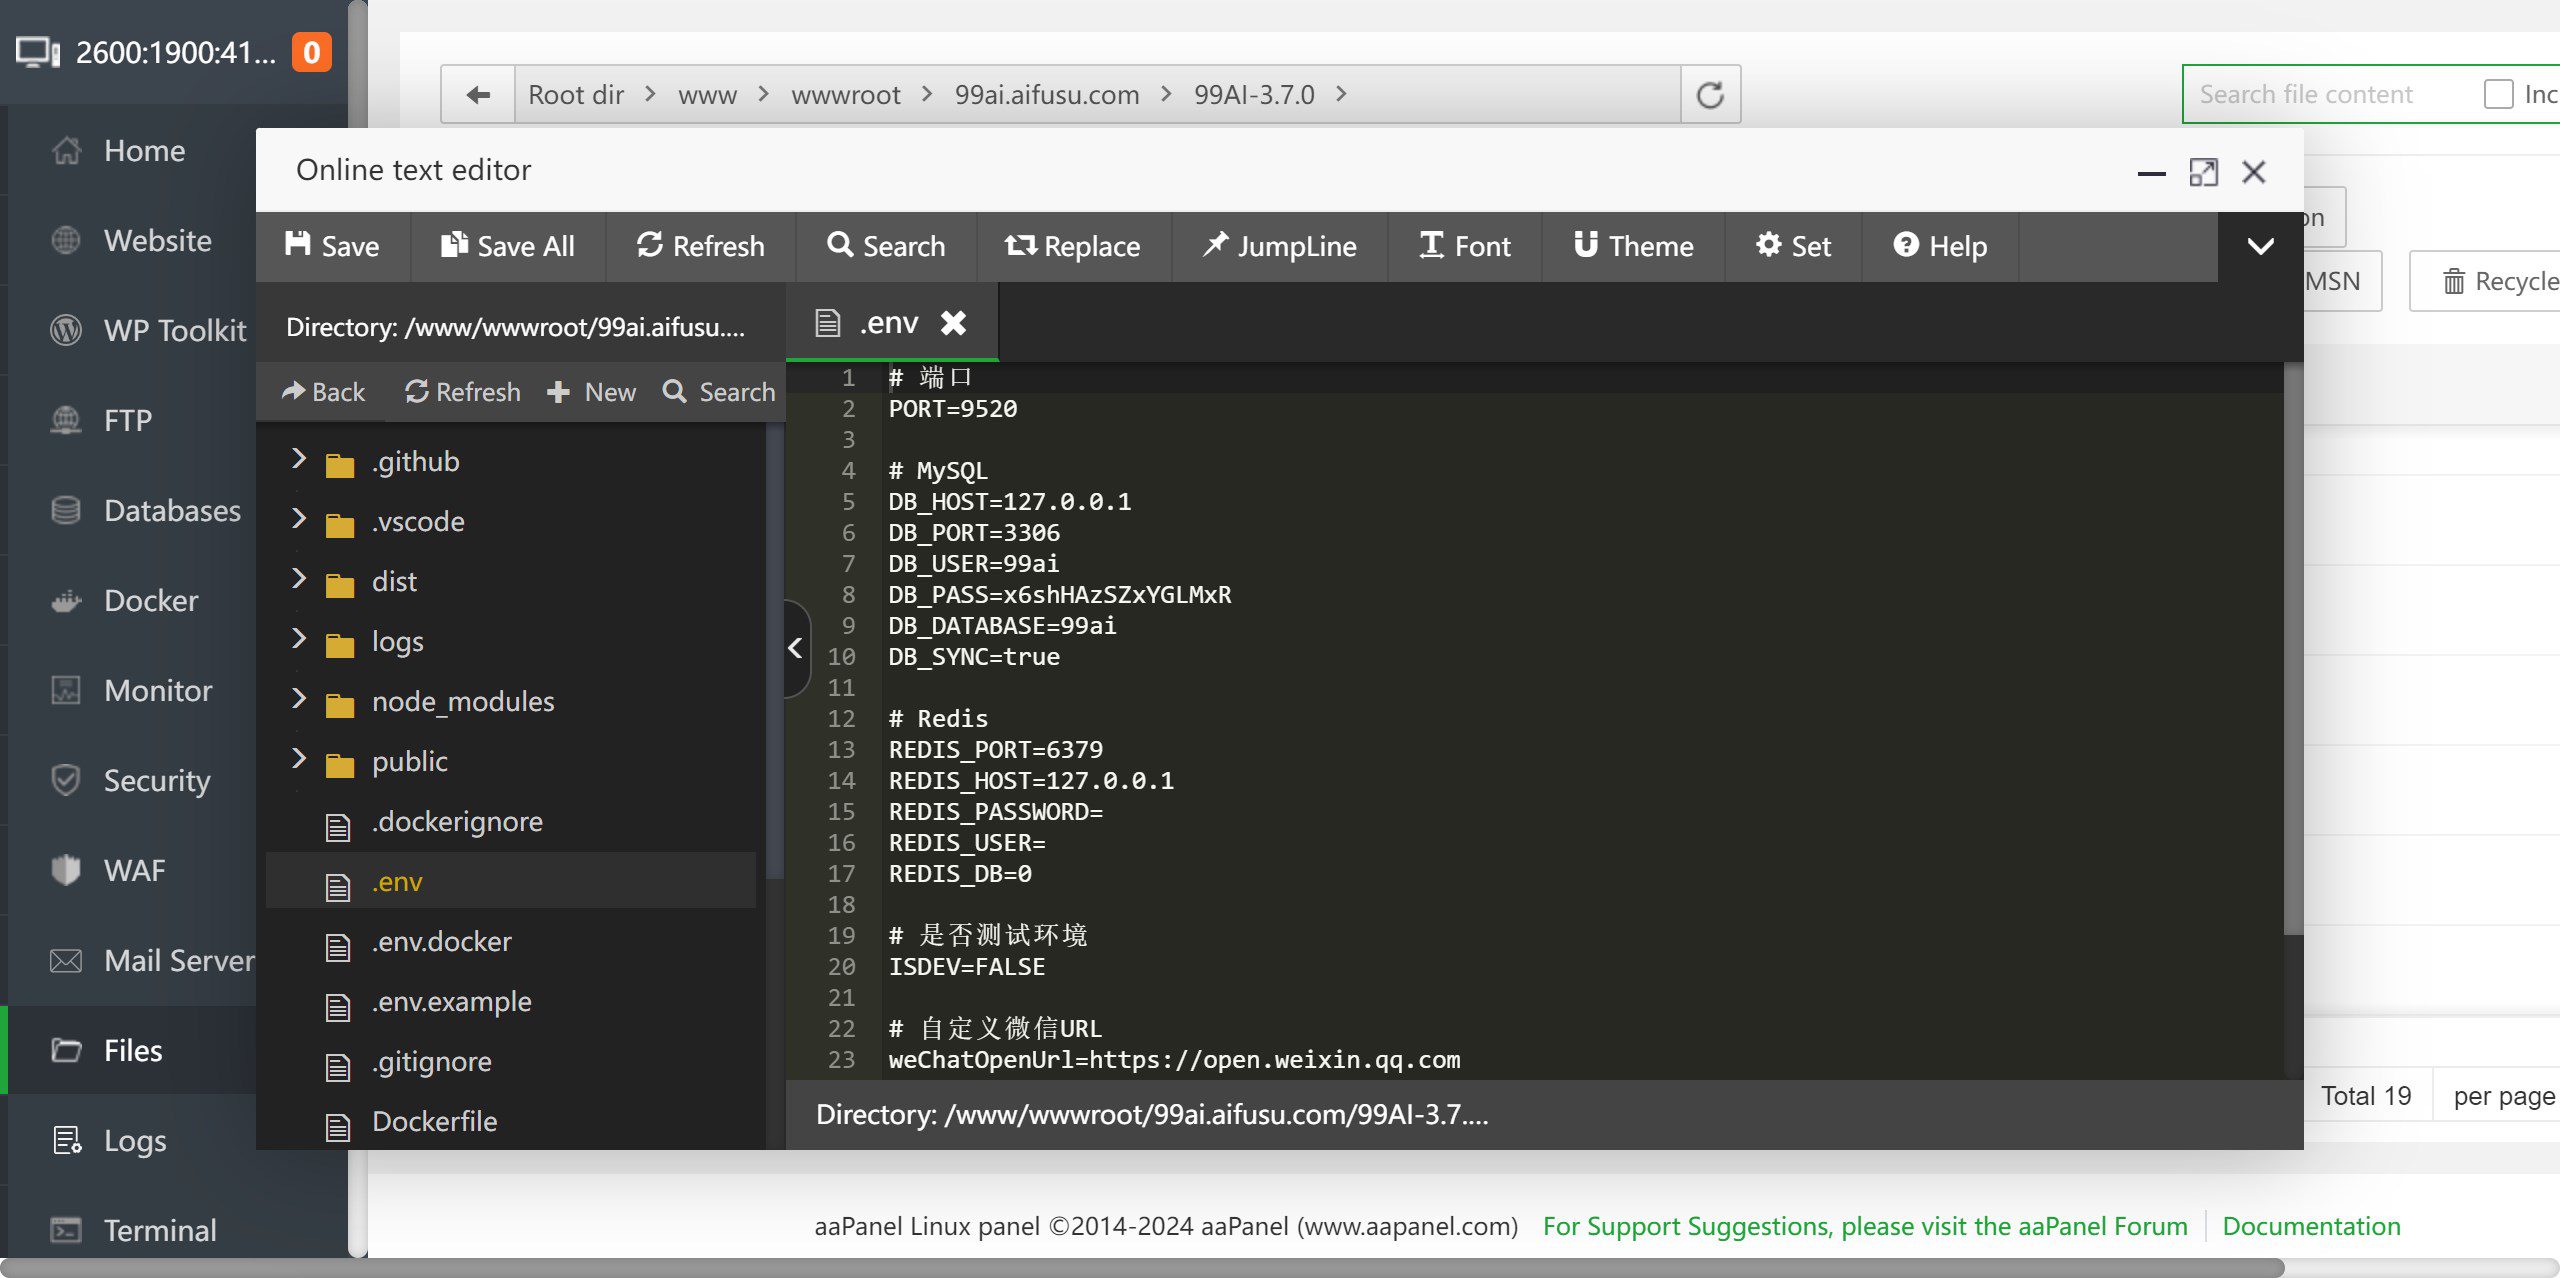
To finish, we open SSH in the directory and install the dependencies: (if the installation is slow, try using domestic sources, some dependencies may need to be forced to install)
pnpm install --force

Start the process after installing the dependencies: (by default the PM2 background is used)
pnpm start
```[](https://pic.sky350.cn/images/2024/08/30/11732xq.jpg)
之后浏览器打开IP:9520查看是否正常。
[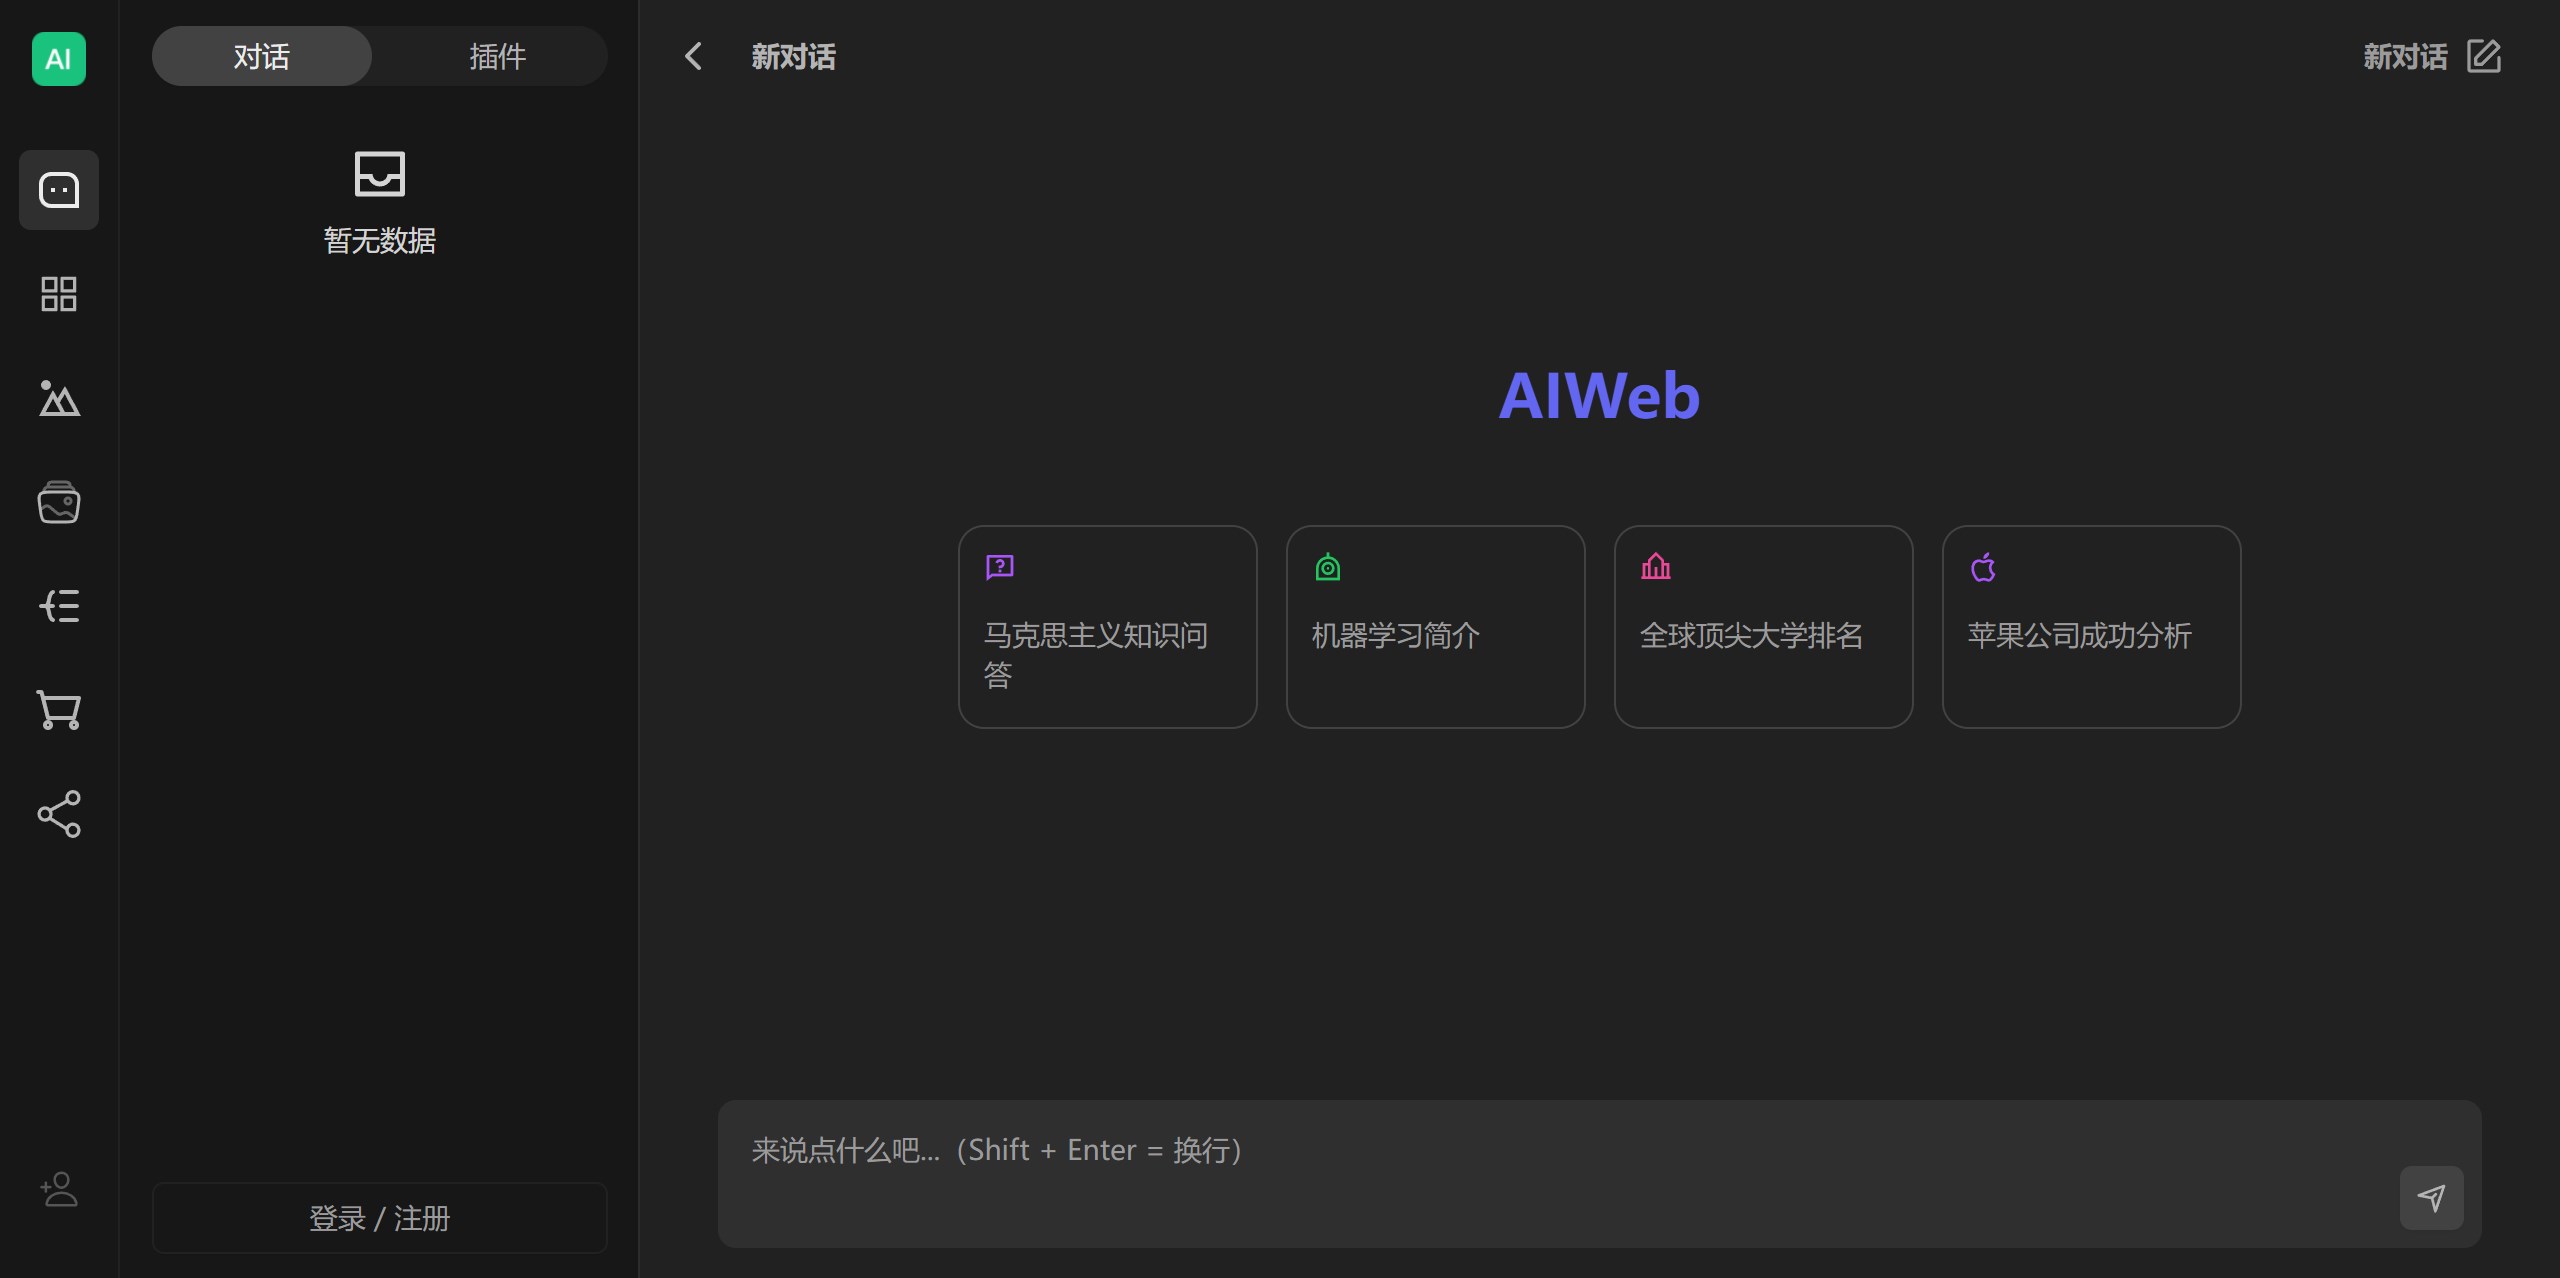](https://pic.sky350.cn/images/2024/08/30/117386k.jpg)
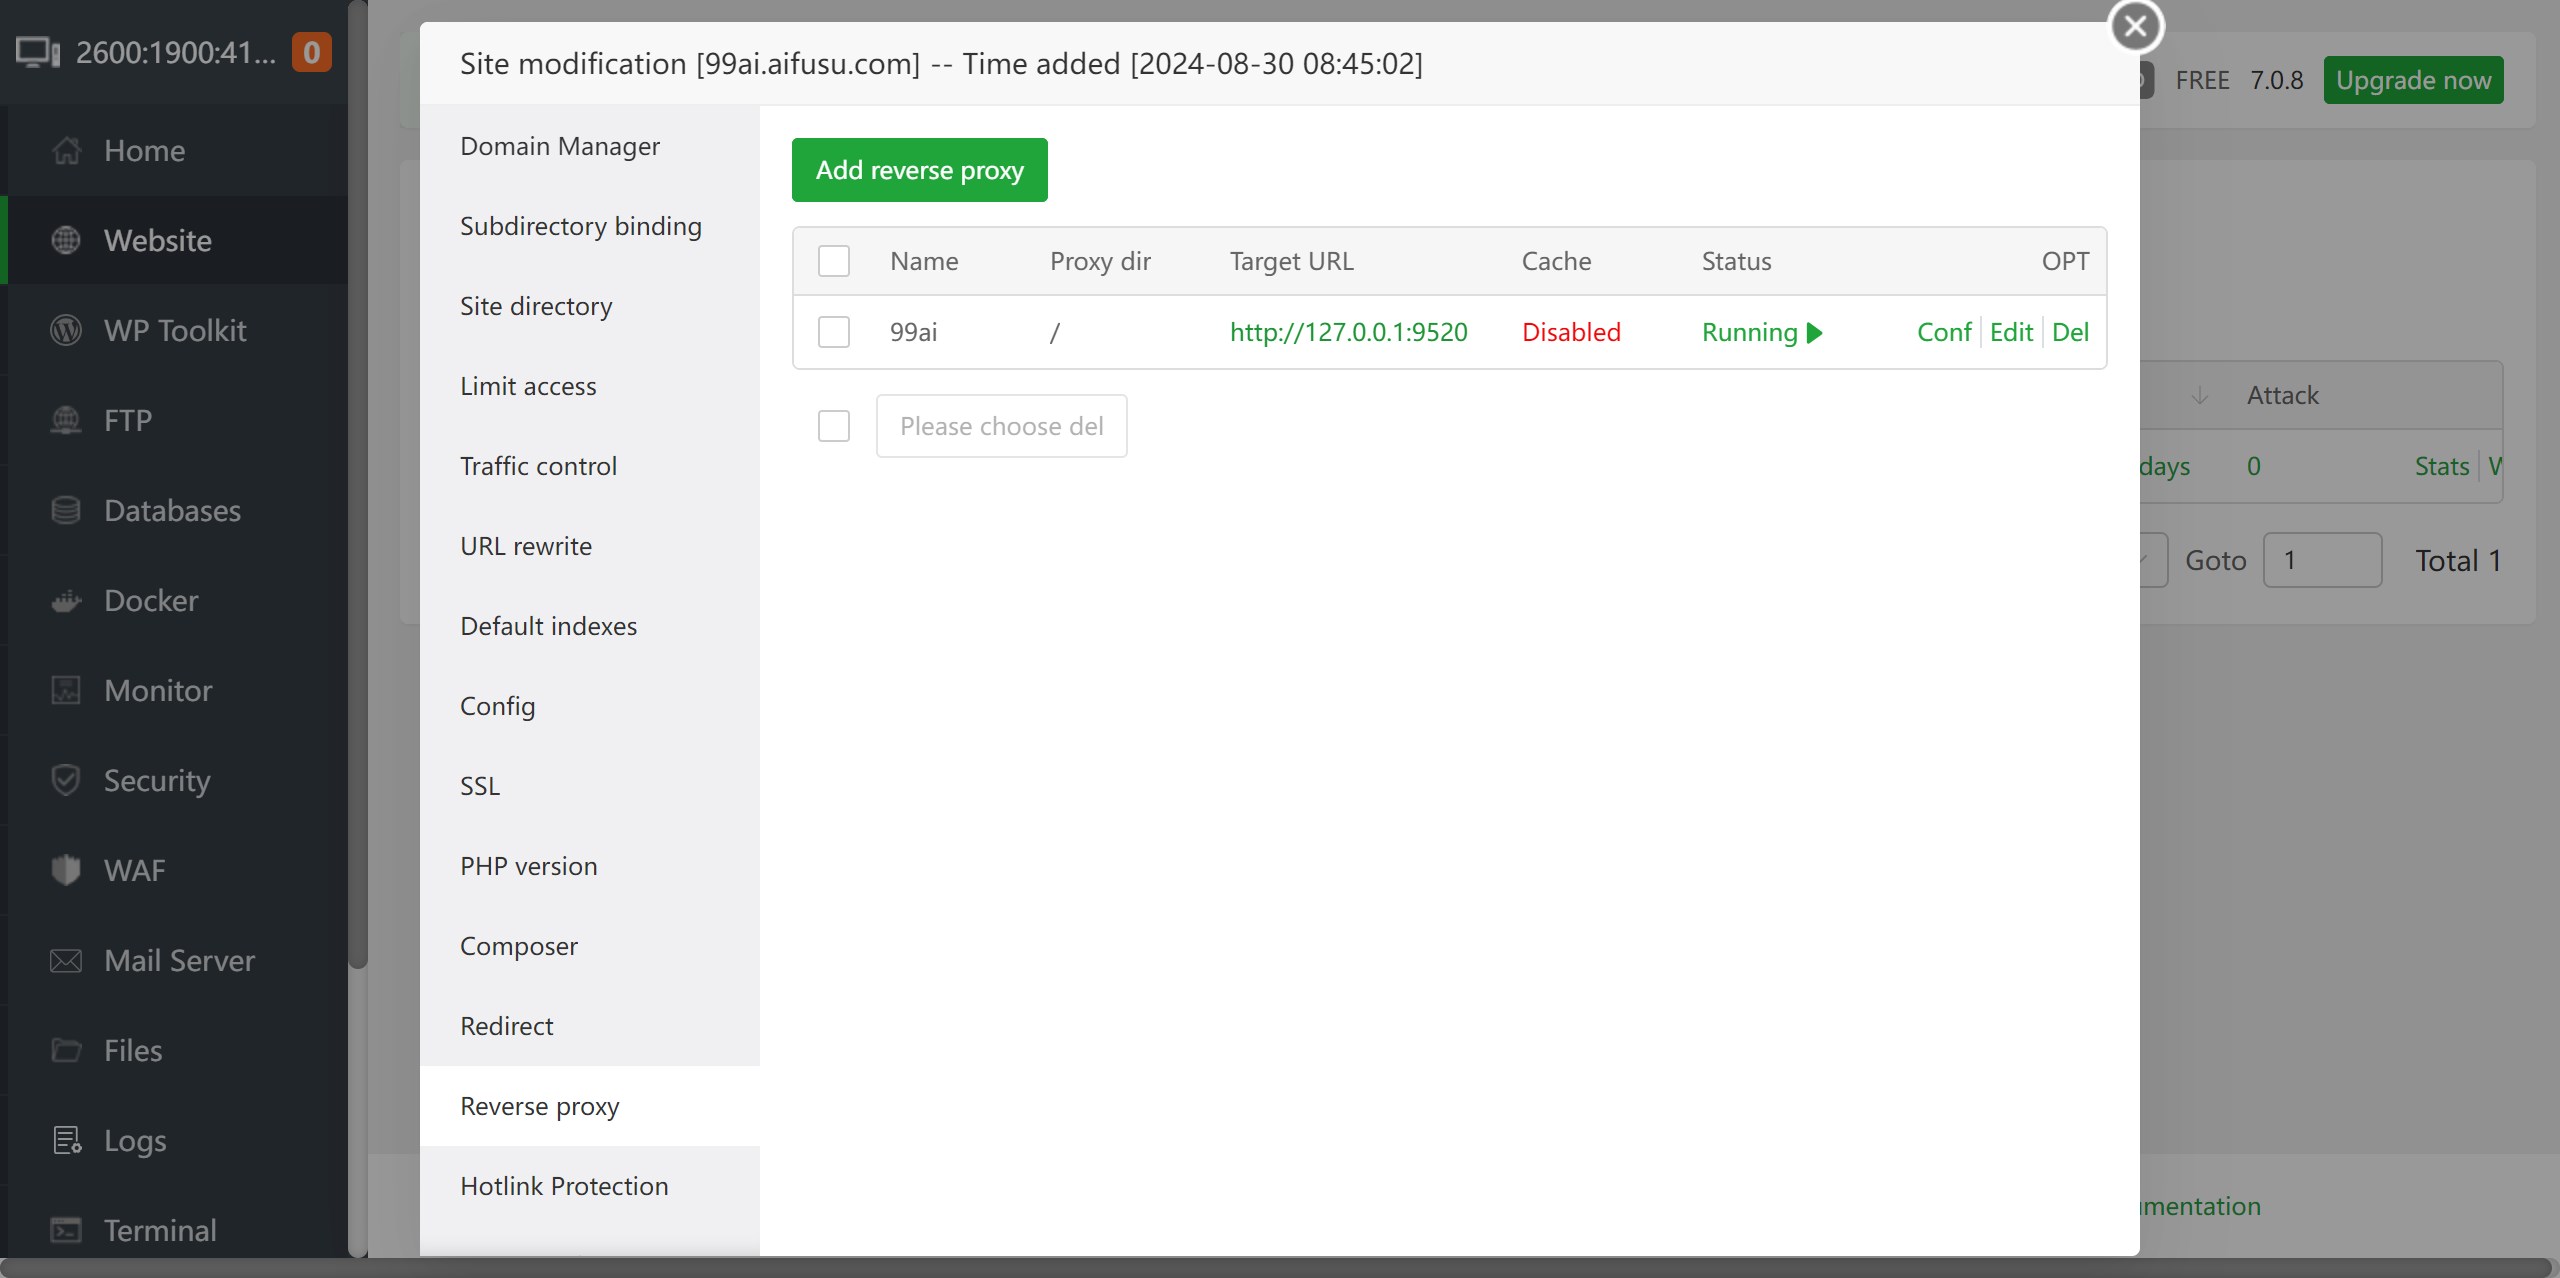
回到宝塔面板,点击网站,点击我们之前新建的网站,点击反向代理,新增反向代理,地址填[http://127.0.0.1:9520](http://127.0.0.1:9520/) ,保存即可通过域名访问。
[](https://pic.sky350.cn/images/2024/08/30/117u6vi.jpg)
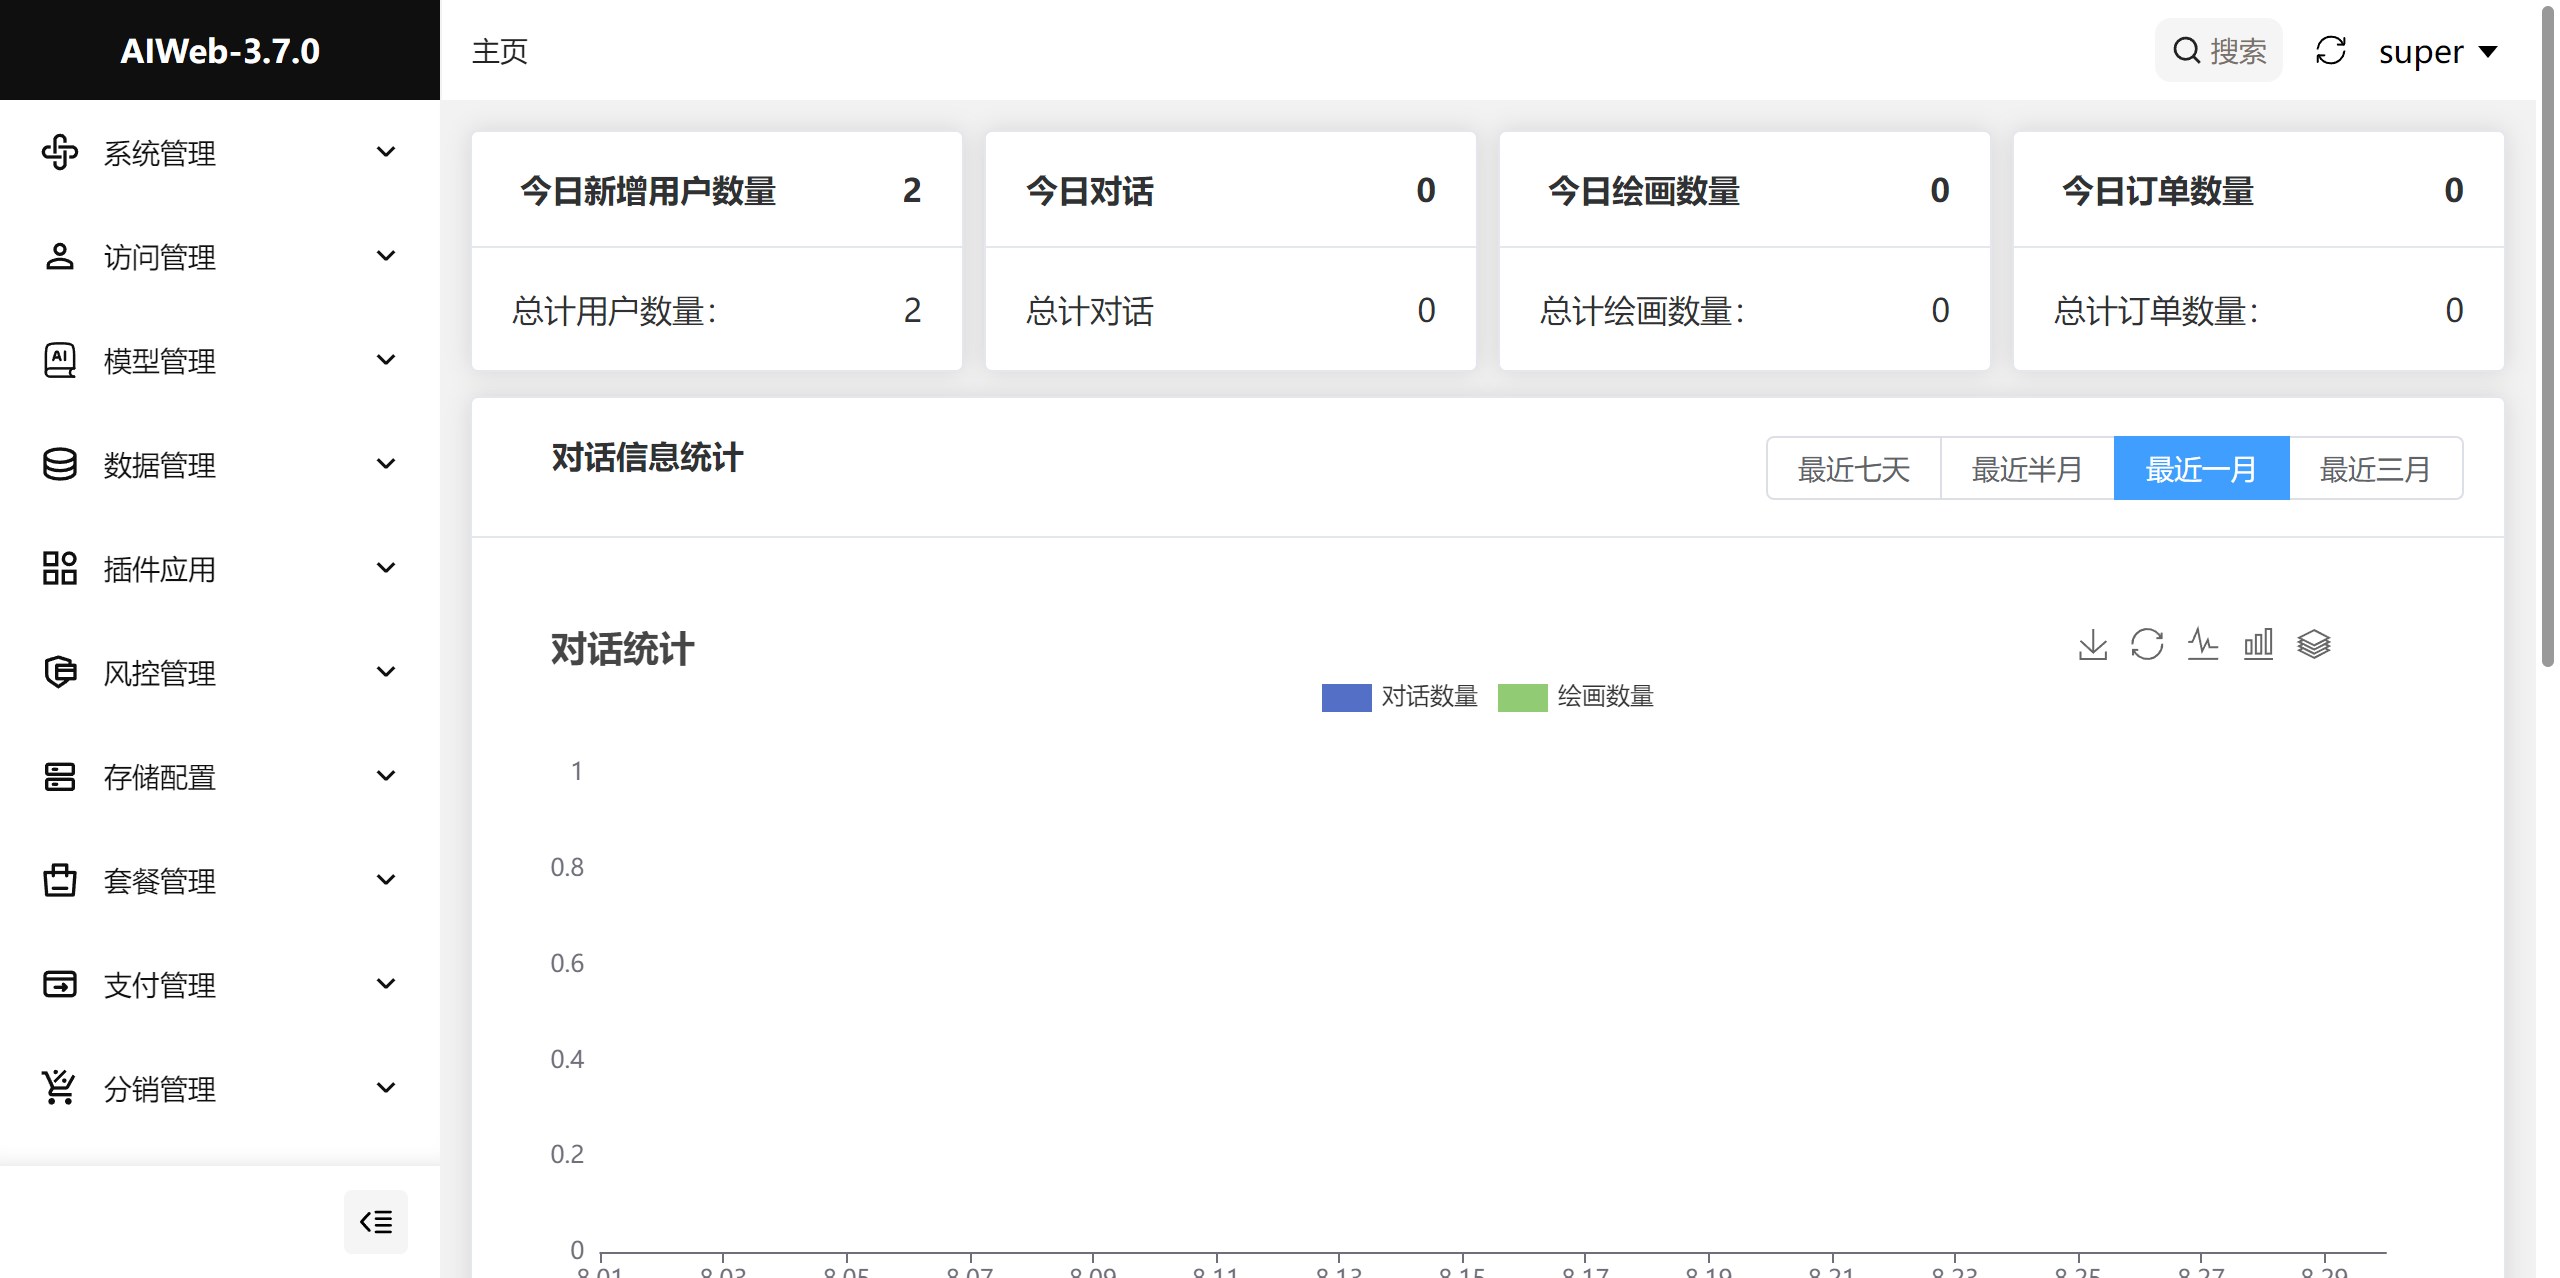
管理端地址:`项目链接/admin`
普通管理员账号:admin(默认不激活)
超级管理员账号:super
密码:123456
[](https://pic.sky350.cn/images/2024/08/30/1173i7j.jpg)
进入后台配置一下邮件和模型地址和API_KEY就可以愉快的使用了。
Docker-compose Deployment
- Installing Docker and Docker-compose: Ensure that Docker and Docker-compose are installed on your system.
- Cloning Project Warehouse::
git clone https://github.com/vastxie/99AI.gitThe - Go to the project directory::
cd 99AIThe - Starting services::
docker-compose up -dThe
Usage Process
- Access to the backend administration page: Accessed via browser
http://localhost:3000/admin, use the default account password to log in. - configuration model: Configure the required AI models and plug-ins in the backend administration page.
- Starting a conversation: On the front page, users can start a conversation with the AI to use features like drawing, music, video, and more.
Functional operation flow
- AI Dialogue: The user can enter a question in a dialog box and the AI will answer it based on the configured model.
- AI Painting: The user can select a drawing model, enter a description, and the AI will generate a corresponding image.
- AI MusicThe user can select the genre and style of music, enter the lyrics, and the AI will generate the corresponding musical composition.
- AI Video: The user can select the video type and size, enter a description, and the AI will generate the appropriate video content.
© Copyright notes
Article copyright AI Sharing Circle All, please do not reproduce without permission.
Related posts

No comments...

