Mochi Diffusion: Run Stable Diffusion Natively on Mac with Very Low Memory
General Introduction
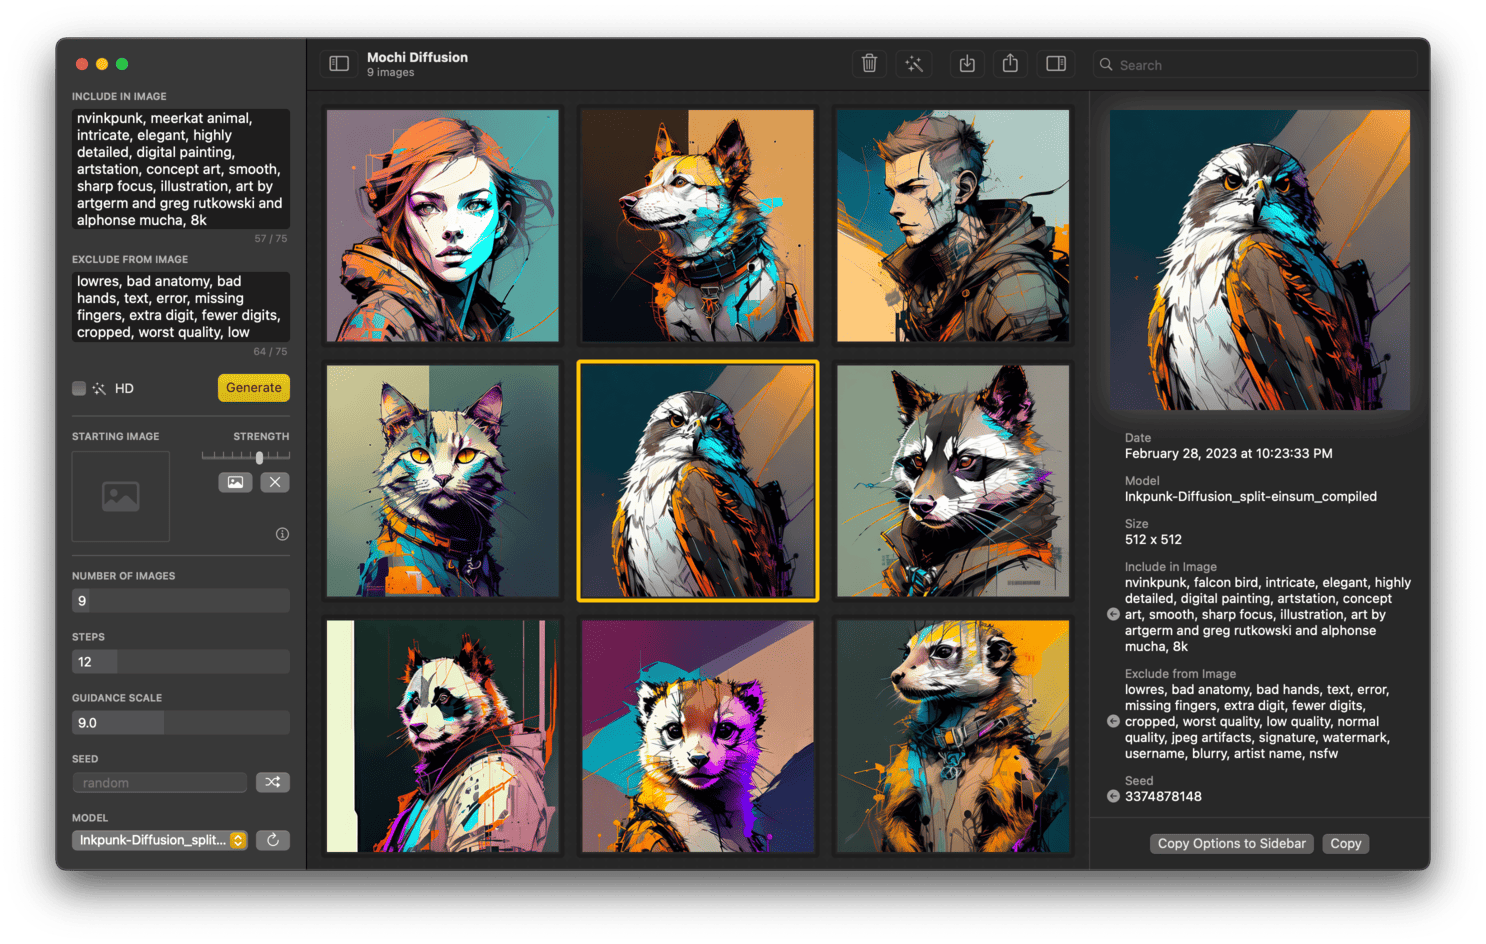
Mochi Diffusion is an application designed to run Stable Diffusion natively for Mac users. It leverages Apple's Core ML framework to maximize the performance of Mac devices with Apple chips. The application supports multiple models and all image generation is done locally without the need for an Internet connection, ensuring the privacy and security of user data.
Apple's Core ML Stable Diffusion framework is built into the app for optimal performance with a very low memory footprint on an Apple-powered Mac. The neural network engine may take about 2 minutes to compile the cache when the model is first run, but subsequent runs will be significantly faster.

Function List
- Native Image Generation: All image generation processes are done locally to ensure data privacy.
- Multi-model support: Supports a variety of Stable Diffusion models, which can be selected and switched by users according to their needs.
- High performance: Utilizes Apple Silicon's Neural Engine for extremely low memory footprint and efficient image generation.
- Image to Image: Support for converting existing images into new artwork.
- ControlNet Support: Further refinement of the image output using ControlNet technology.
- EXIF information storage: Store all keywords in the EXIF information of the image for easy viewing.
- Image Enlargement: Zoom in on the generated image using RealESRGAN technique.
- Autosave and Restore: Automatic save and restore function during image generation ensures that no progress is lost.
- Custom Models: Support for customizing Stable Diffusion Core ML models.
Using Help
Installation process
- Download the application: AccessMochi Diffusion GitHub page, download the latest version of the installation package.
- Installation of the applicationUnzip the downloaded installation package and drag the application into the "Applications" folder of your Mac.
- Download model: Visit Hugging Face or other modeling libraries to download the required Stable Diffusion models.
- conversion model: Convert the downloaded model to Core ML format, see the GitHub page for detailed instructions on how to do this.
- configuration model: Place the converted model file in the model folder specified by the application.
Usage Process
- Launching the application: Double-click the application icon to launch Mochi Diffusion.
- Select Model: Select the configured model in the application program interface.
- Enter keywords: Enter a keyword or sentence describing the image in the left column.
- Setting parameters: Set parameters such as image size, number of generation, number of iteration steps and keyword weights according to requirements.
- Generating images: Click the "Generate" button and wait until the image is generated.
- Viewing and saving images: The generated images are automatically saved to a specified folder and the user can view and manage the generated images in the application.
Featured Function Operation
- Image to Image: Upload an existing image while entering a keyword and the application will convert the image based on the keyword.
- ControlNet Usage: Select ControlNet model, enter keywords and set relevant parameters to generate more detailed images.
- Image Enlargement: After generating the image, select the "Zoom" function to zoom in using RealESRGAN technology.
© Copyright notes
Article copyright AI Sharing Circle All, please do not reproduce without permission.
Related posts

No comments...


