Leonardo AI: Generating Consistent Character Images Tutorial
It's useful to keep AI-generated character designs consistent across multiple scenarios, whether you're designing a cover for a book series or producing concept art. However, this is not an easy task - especially when using an illustrative style.
To simplify the process, we've crafted this guide that covers everything you need to create consistent characters. The guide offers two approaches: no model training and model training required.
Method 1. No model training required
Step 1: Start with a clear initial prompt:
First, you need to conceptualize a detailed initial prompt. This prompt should detail the core characteristics of the character and set a basic background.
For example, you might describe, "Jason Segen, an illustration of a male teenage character with short dark hair, expressive eyes and large glasses, wearing a baseball cap and standing in the middle of a city street." This initial prompt sets the standard for your character's appearance and initial environment.
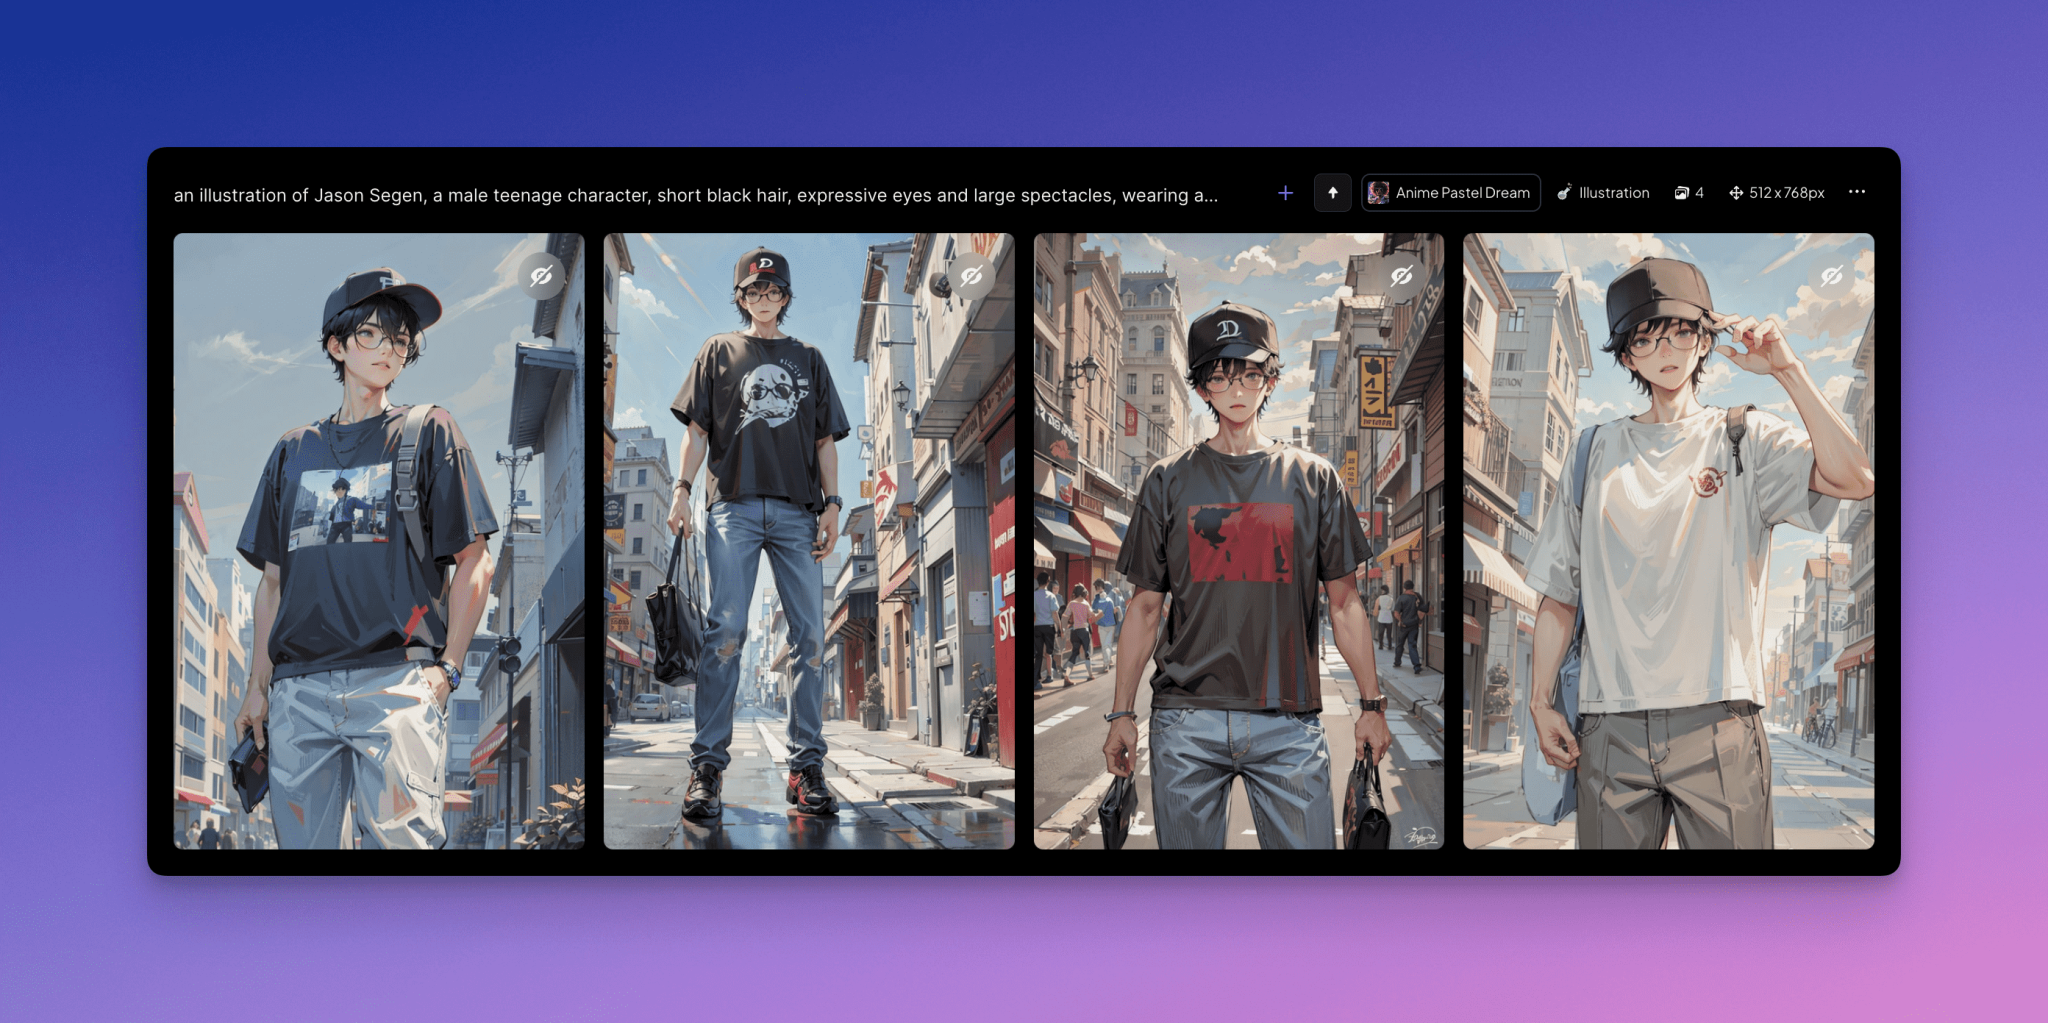
Step 2: Cue diversity:
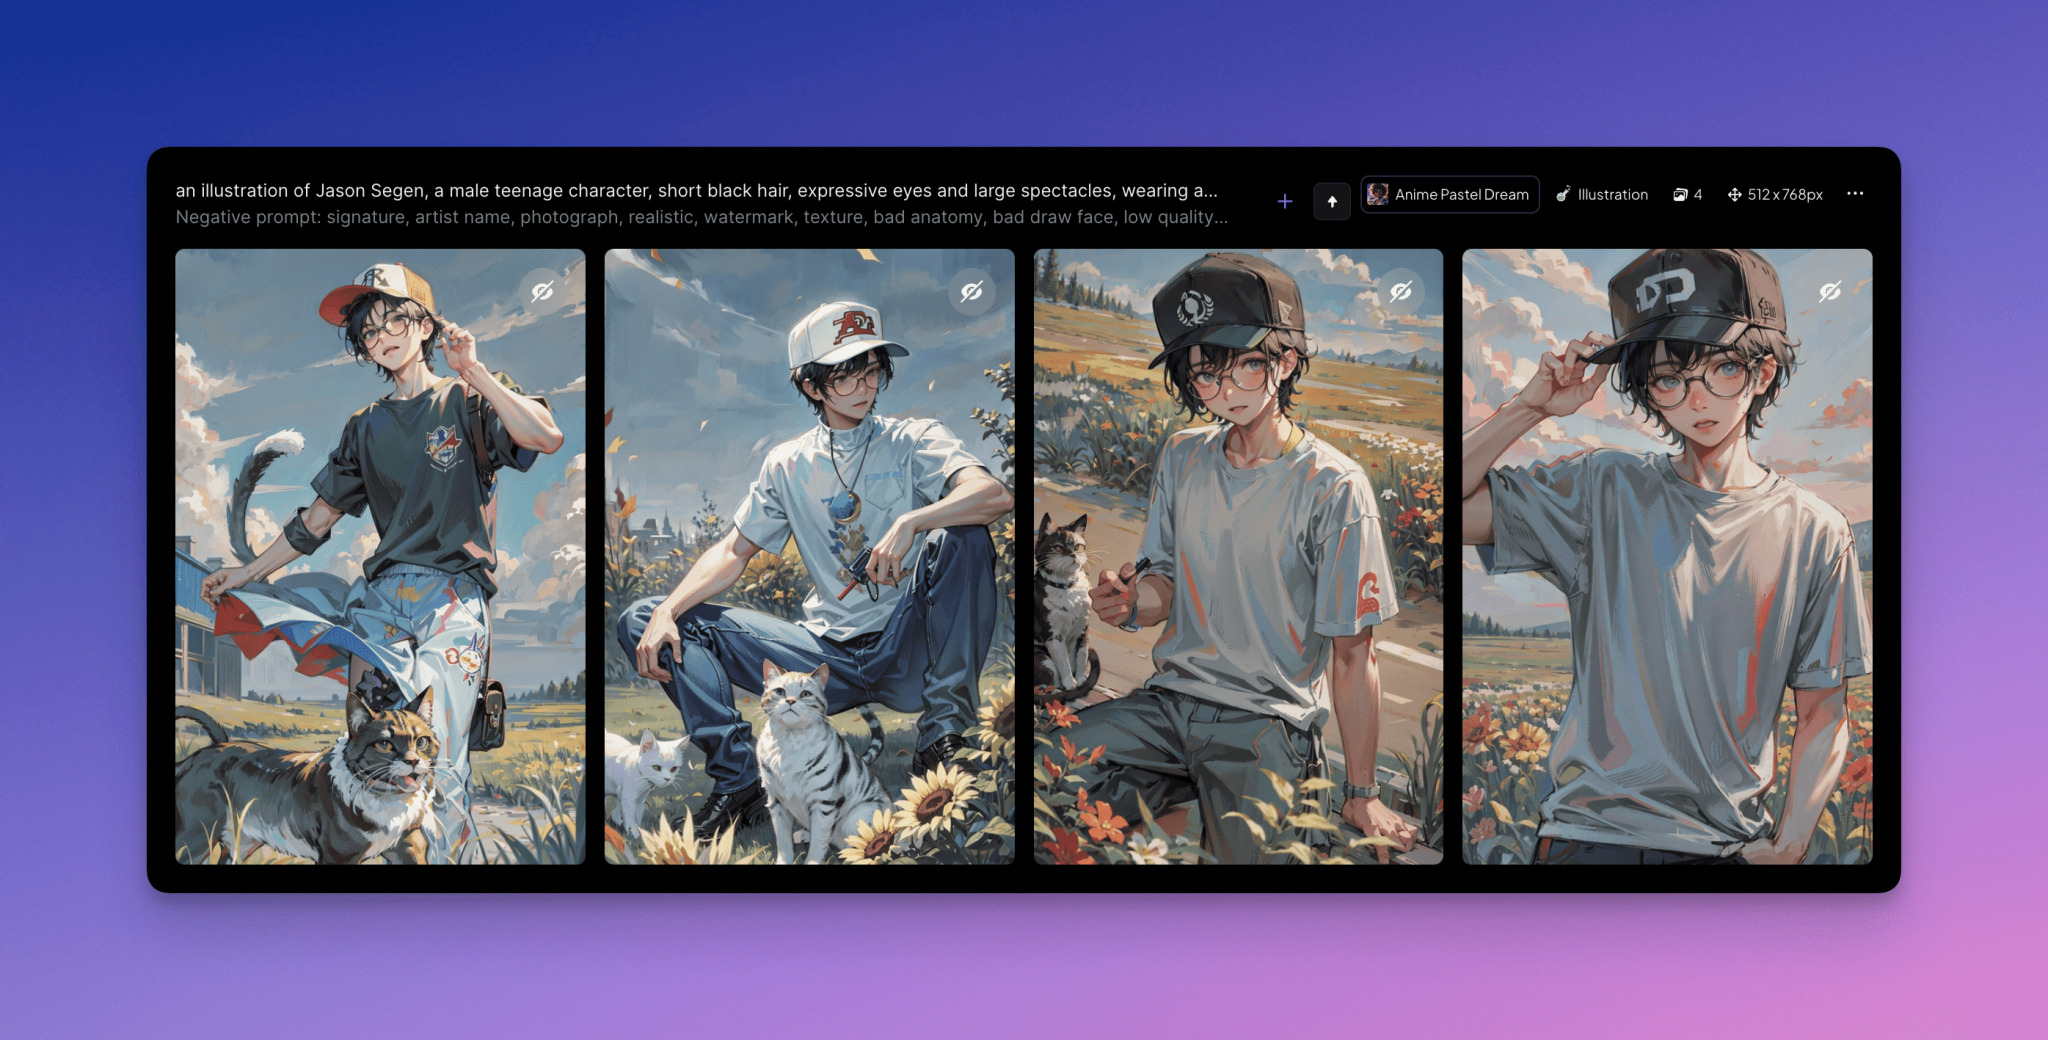
Next, you need to have the character appear in different scenes and poses. It's vital to keep the character consistent during this process. For example, you need to continue to use the fictional name 'Jason Segen' that you originally set out to use. This consistency ensures that the character's preset appearance and characteristics are maintained even when the activity or scene changes, while ideally, the character's visual description should also be consistent across prompts.
For example, "Jason Segen, a male teenage character with short dark hair, expressive eyes and large glasses, wears a baseball cap and plays with a friendly cat in a field."
Keep in mind that if using fixed seeds, be sure to vary the wording of your prompts or you'll get the same picture over and over again. However, make sure that these changes do not alter the framework of the characterization.
If you are still not satisfied with the results and need a higher level of consistency for your project, we recommend approach 2, which achieves role consistency by training a custom model.
Method 2. Training of customized models
This method requires more time and effort, as well as a set of source images, but if done correctly can lead to extremely effective and consistent results. It involves training your own fine-tuned model and then taking additional steps to ensure character consistency.
Since training a custom model can be a complex process, this guide will focus on the key elements of model training needed to achieve consistent roles. Click here for a more detailed guide [How to train a model].
Step 1: Start Training
After logging into the Leonardo.Ai app, go to the "Training and Datasets" section. (Please note that you can only train one model at a time in the free plan).
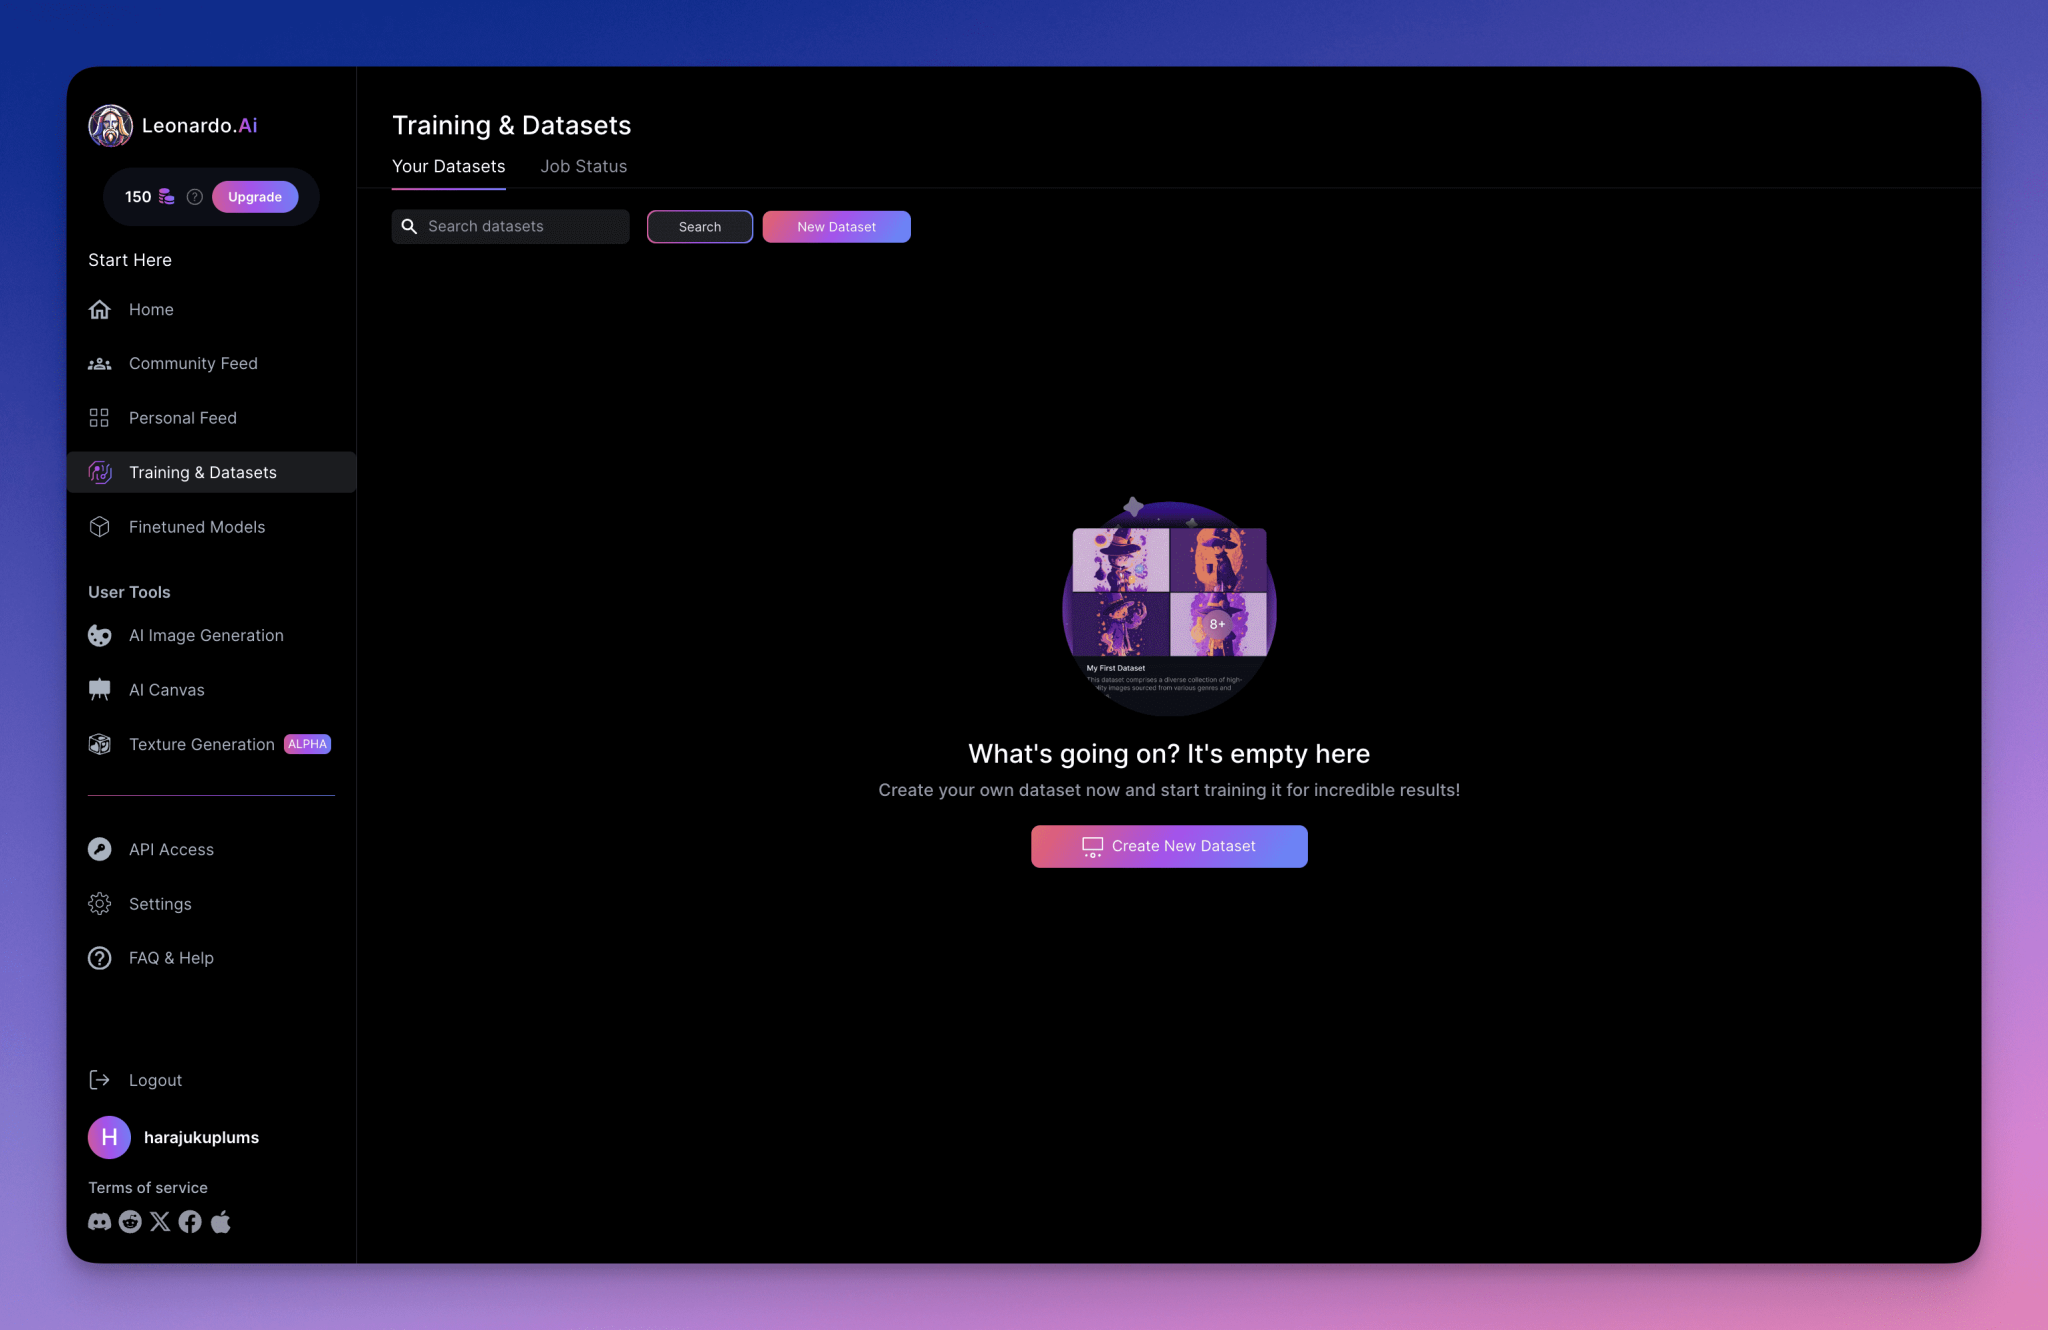
Select New Dataset and name it after the character you want to generate consistently (e.g., "Anna" or "John"). This helps the AI associate the name with the need for repeated generation.
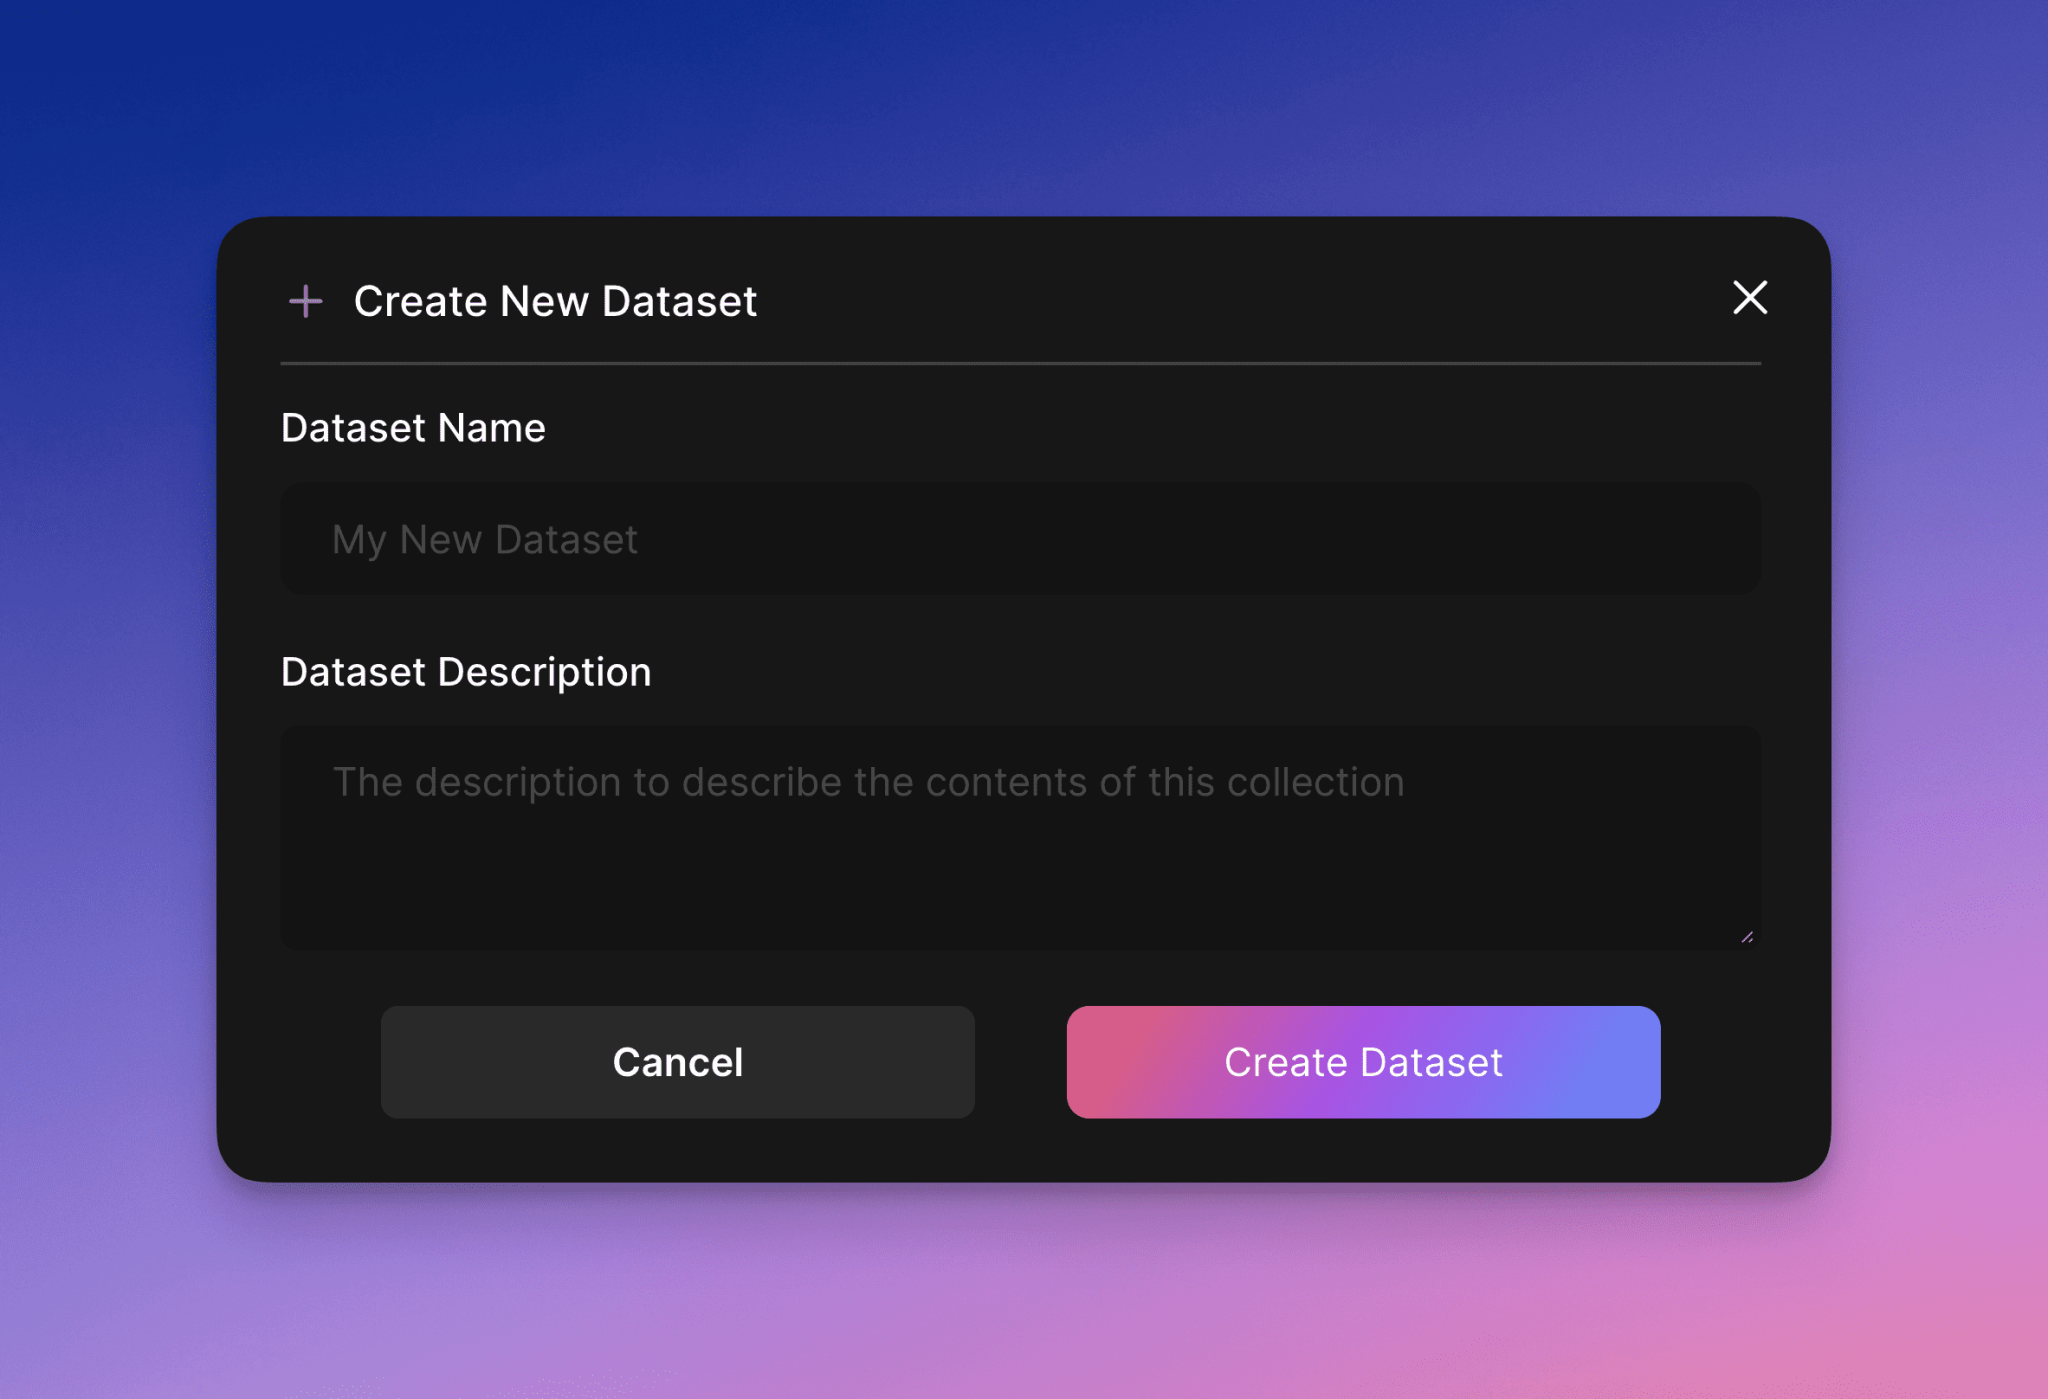
Provide a succinct description of the dataset to summarize its use case, e.g. "for a character design portfolio" or "for a series of book covers".
Step 2: Upload a reference image
Upload at least 10 reference images to help you generate a base image of your character. For better results, it is recommended to upload 15 or more images. These images should be representative of the character traits you wish to create.
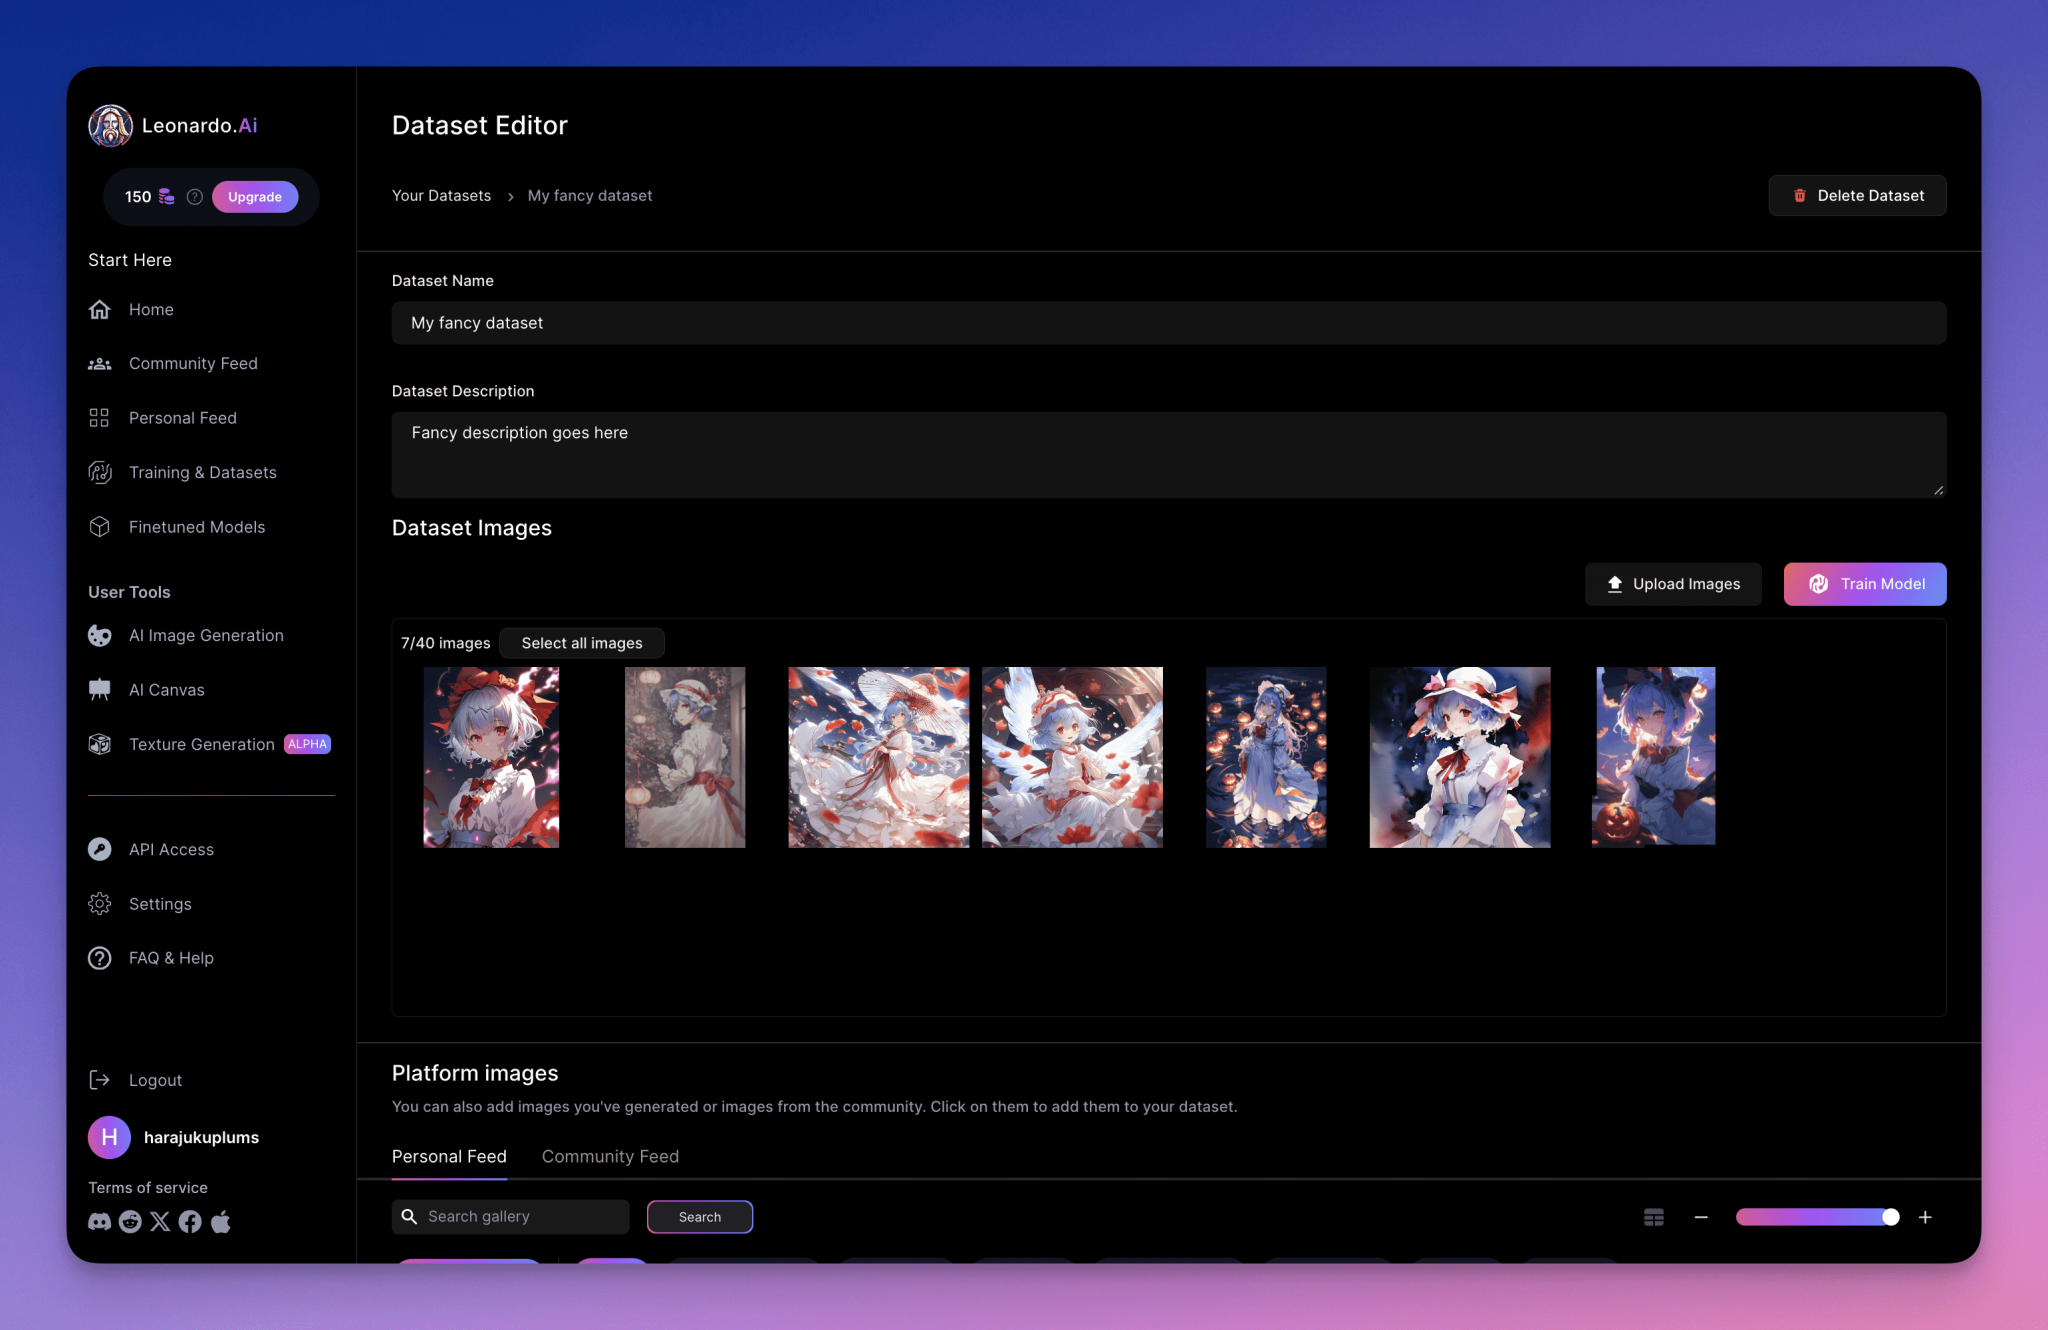
You can use stock photos, drawings or real photos, but always make sure you have a legal license to use them. (Either a copyright license for certain images or a license to use portraits of real people).
Step 3: Train your model
After uploading the selected image, click "Train Model" to start the training process.
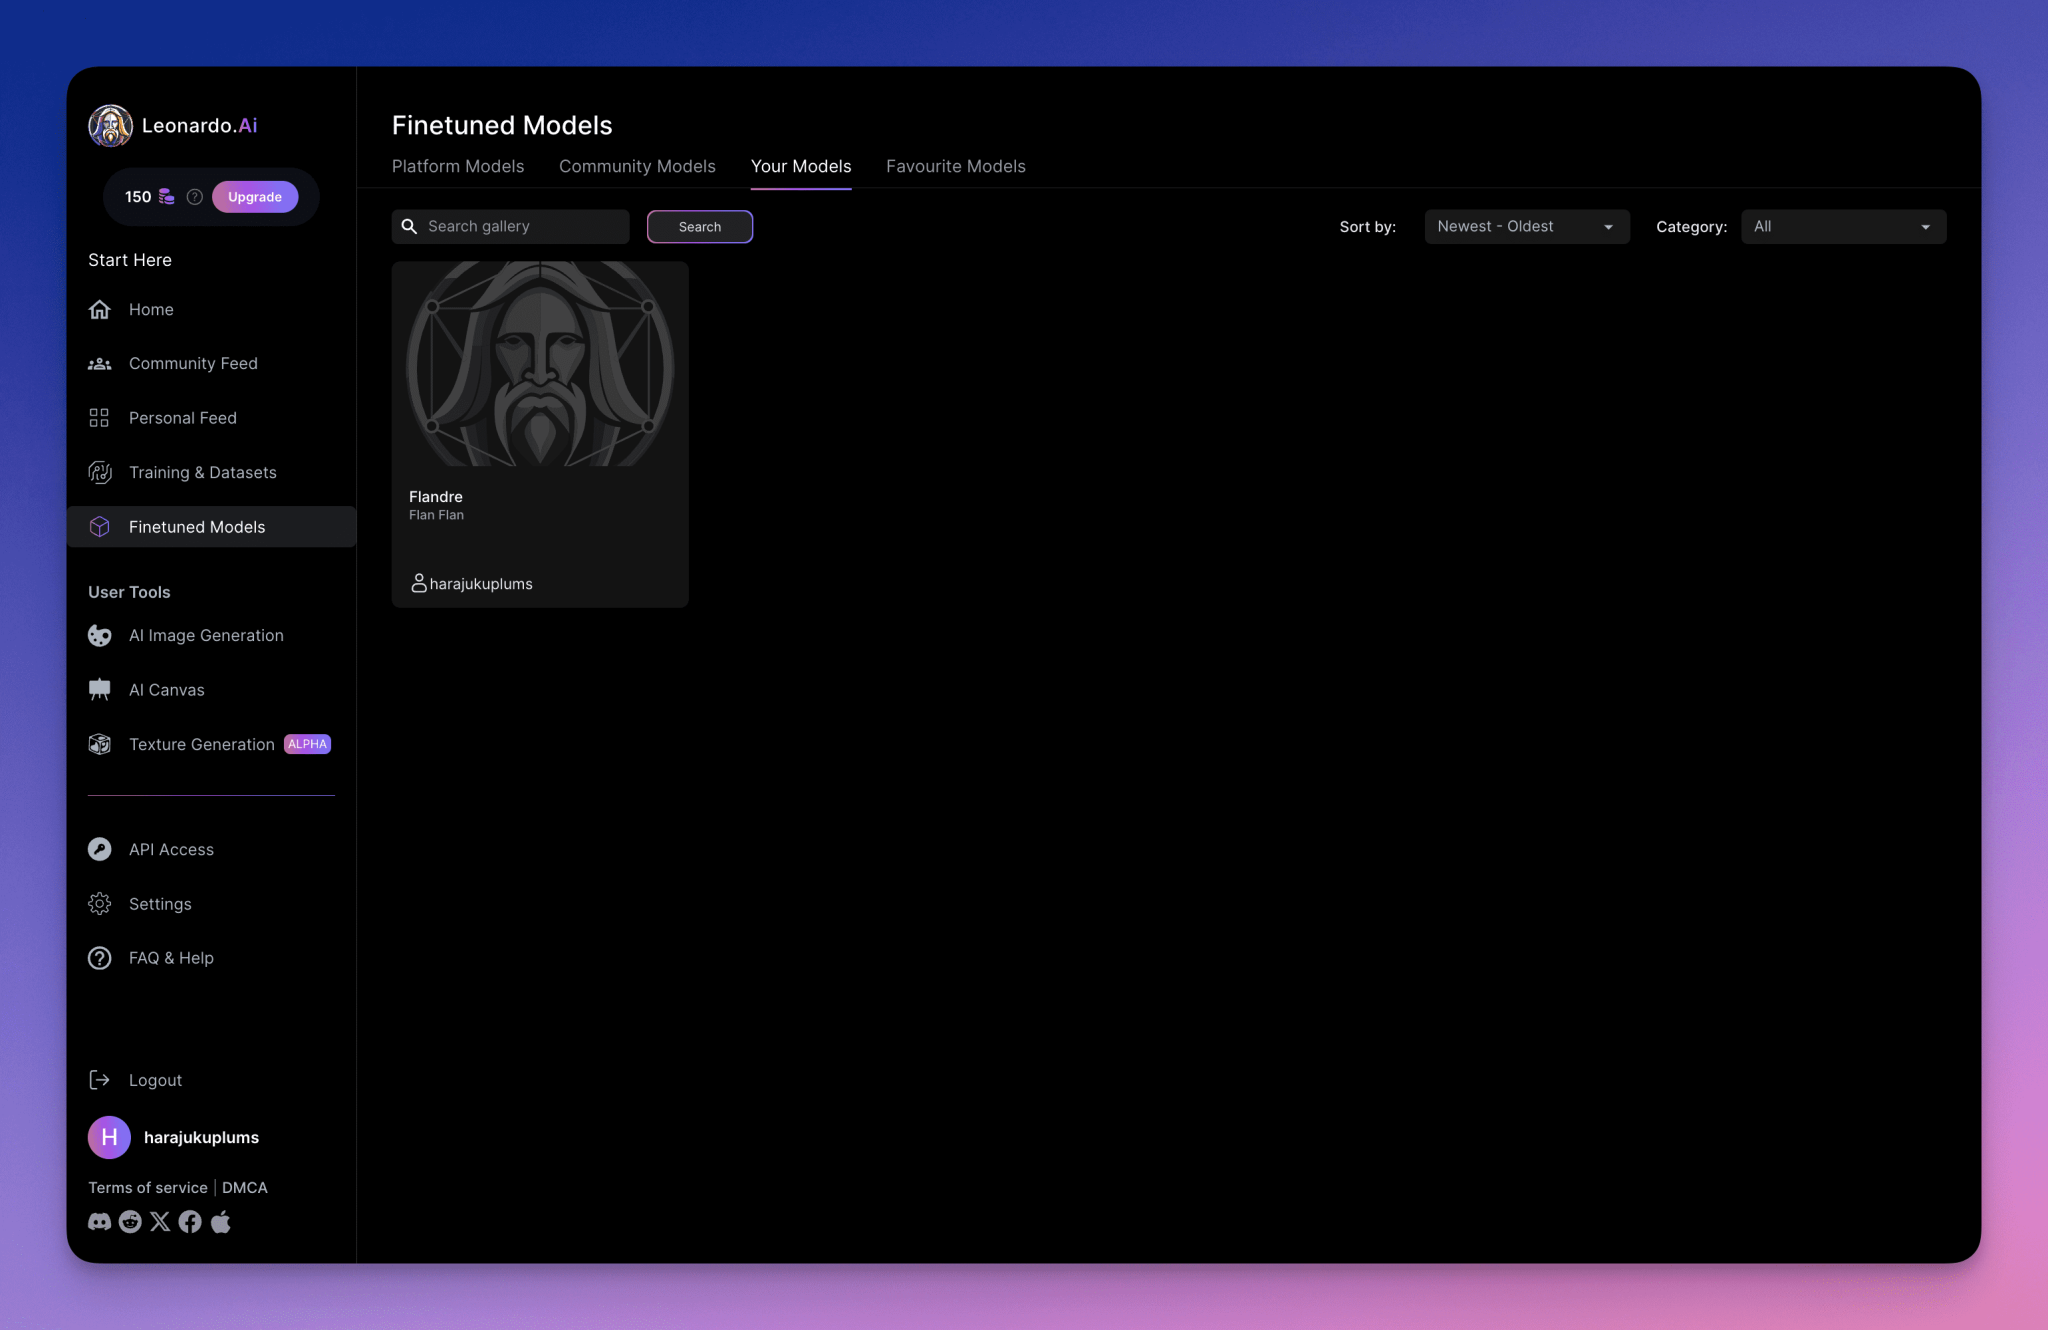
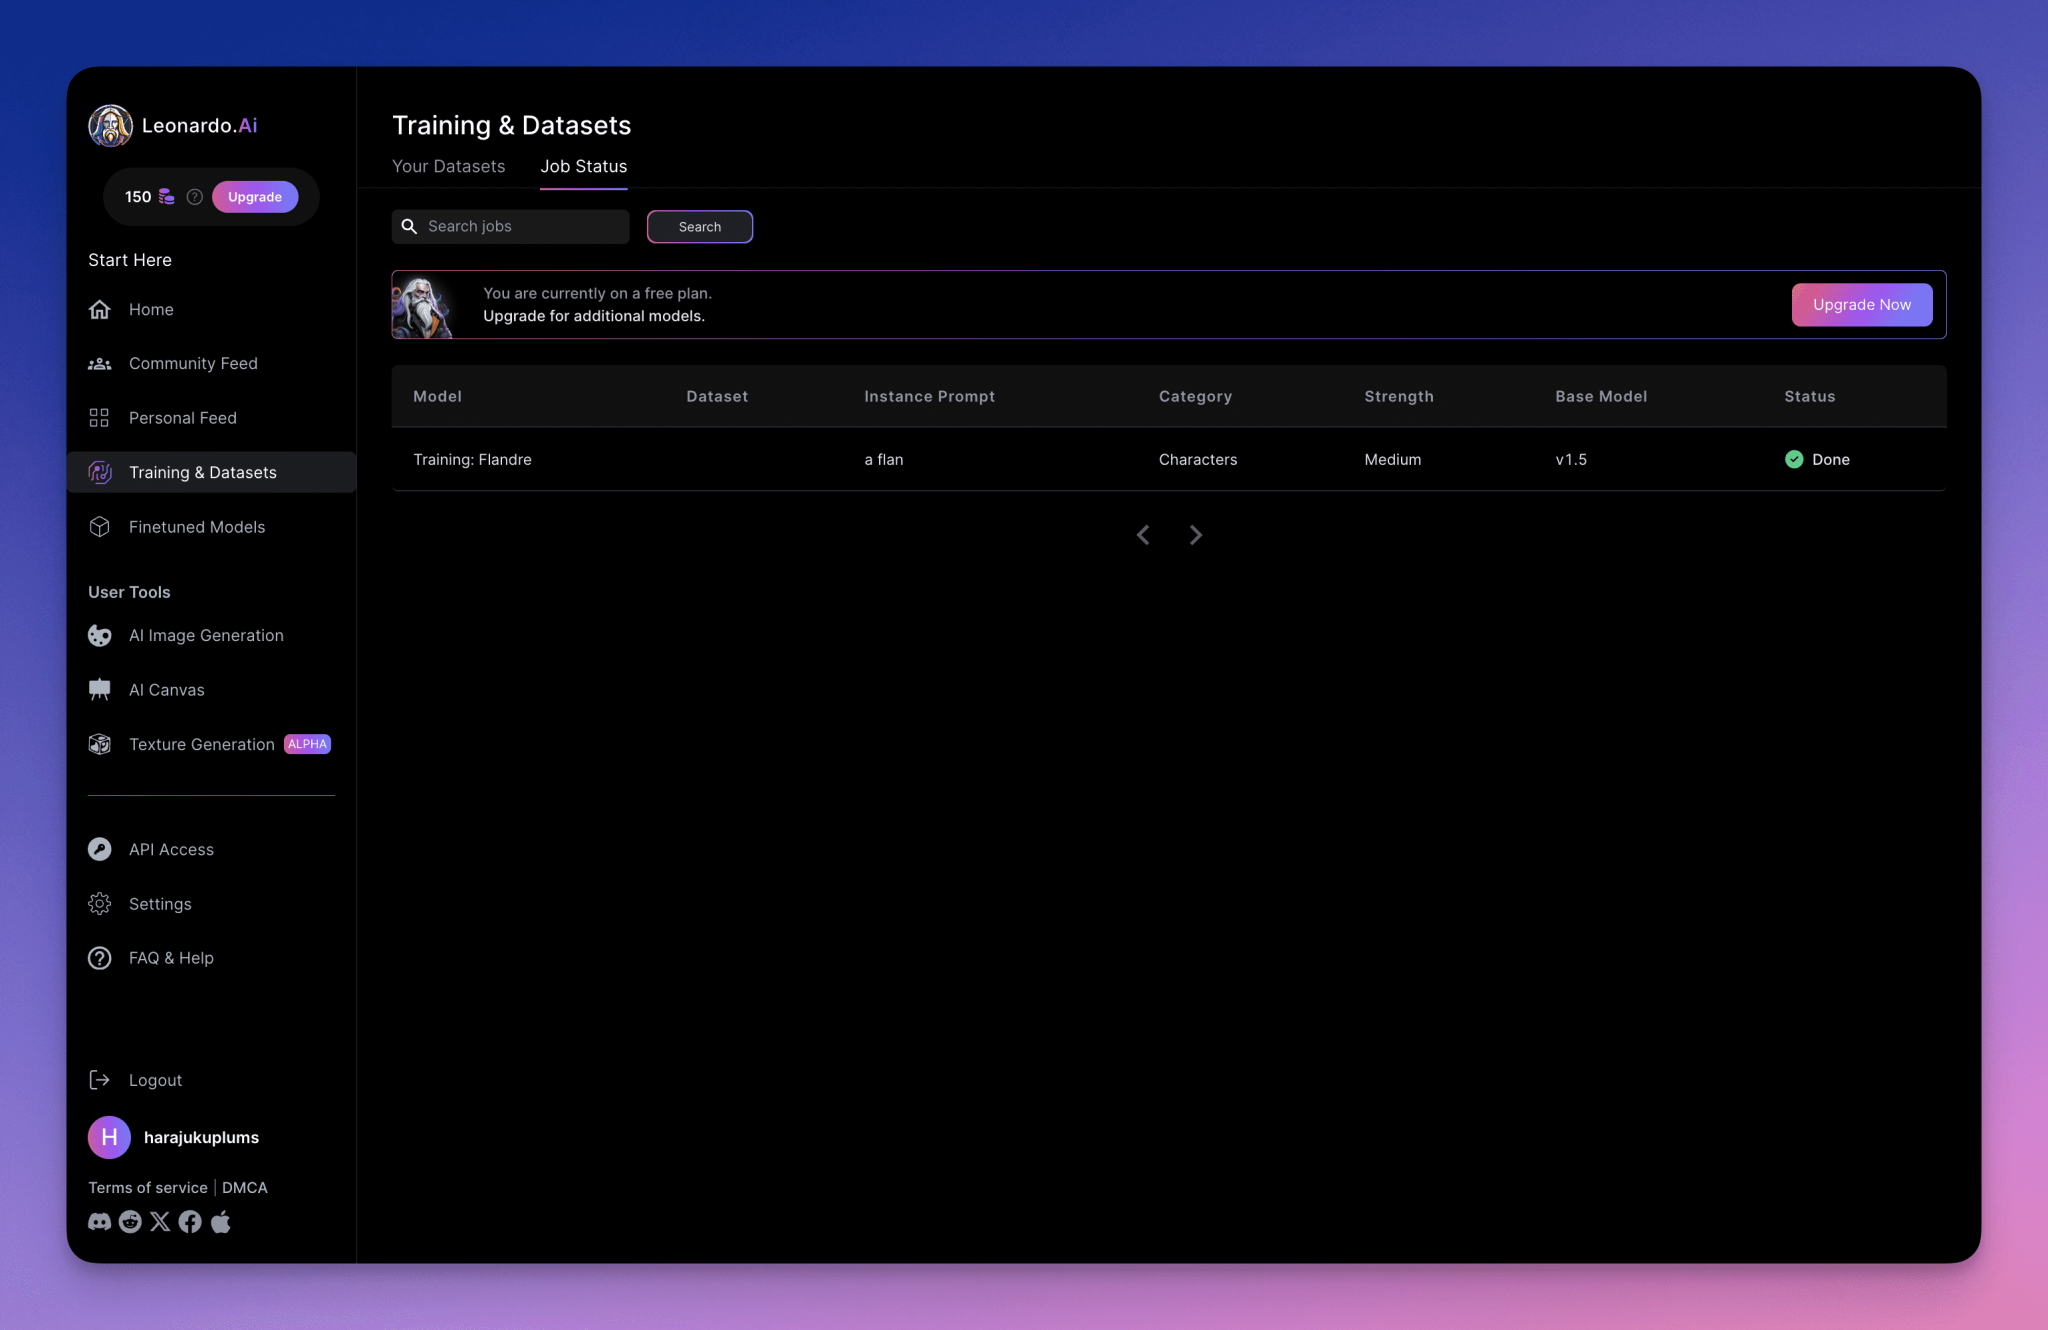
You can check the completion status of your dataset in the "Fine-tuning Models" > "Your Models" or "Training and Datasets" section of "Training and Datasets" to see the completion of your dataset. Once the training is complete, it will be listed under the name you named it before (e.g., "Anna" or "John"). Note that your fine-tuned model will not have an image preview until you start using the model to generate images.
Step 4: Generate an image
Go to the "Image AI Generation" section and select your newly created fine-tuned model from the available options.

To get started with image generation, use creative prompts that include the name of your dataset to guide the AI to use the trained model. For example, "John Smith is wearing a suit, holding an umbrella, and standing at the entrance to a tall building."
It's possible that some of the images generated aren't exactly what you expected. Try adjusting the structure of the prompts, using negative prompts if necessary to refine and vary the results, while keeping the characters consistent.
Step 5: Optimization and evaluation
Review your generated images to ensure they are accurate and consistent. Often, out of the 4 images generated, 1-2 may be very close to the effect you want and the rest may not be as good. This is part of the creative process!
Adjust settings to balance creativity with consistency, and if you have access to advanced services such as Alchemy, consider enabling them to boost the resolution and quality of your images.
Download successful creations and add them to your dataset to continually improve role consistency.
Final Tip:
Keep in mind that when training a model for character consistency, the number and quality of reference images you provide directly affects the model's performance.
Experimenting and tweaking your cues and settings is crucial to getting the best results. You'll find that once the model is fully trained, generating stylistically consistent characters will become increasingly rapid!
That's our guide to creating a Consistency Role - we hope it's been helpful! Remember, we're always adding new features and updating old ones, so be sure to check back regularly for new information and tutorials.
© Copyright notes
Article copyright AI Sharing Circle All, please do not reproduce without permission.
Related posts

No comments...

