GLIGEN GUI: Precise control of the position of image elements, intuitive graphical interface based on ComfyUI
General Introduction
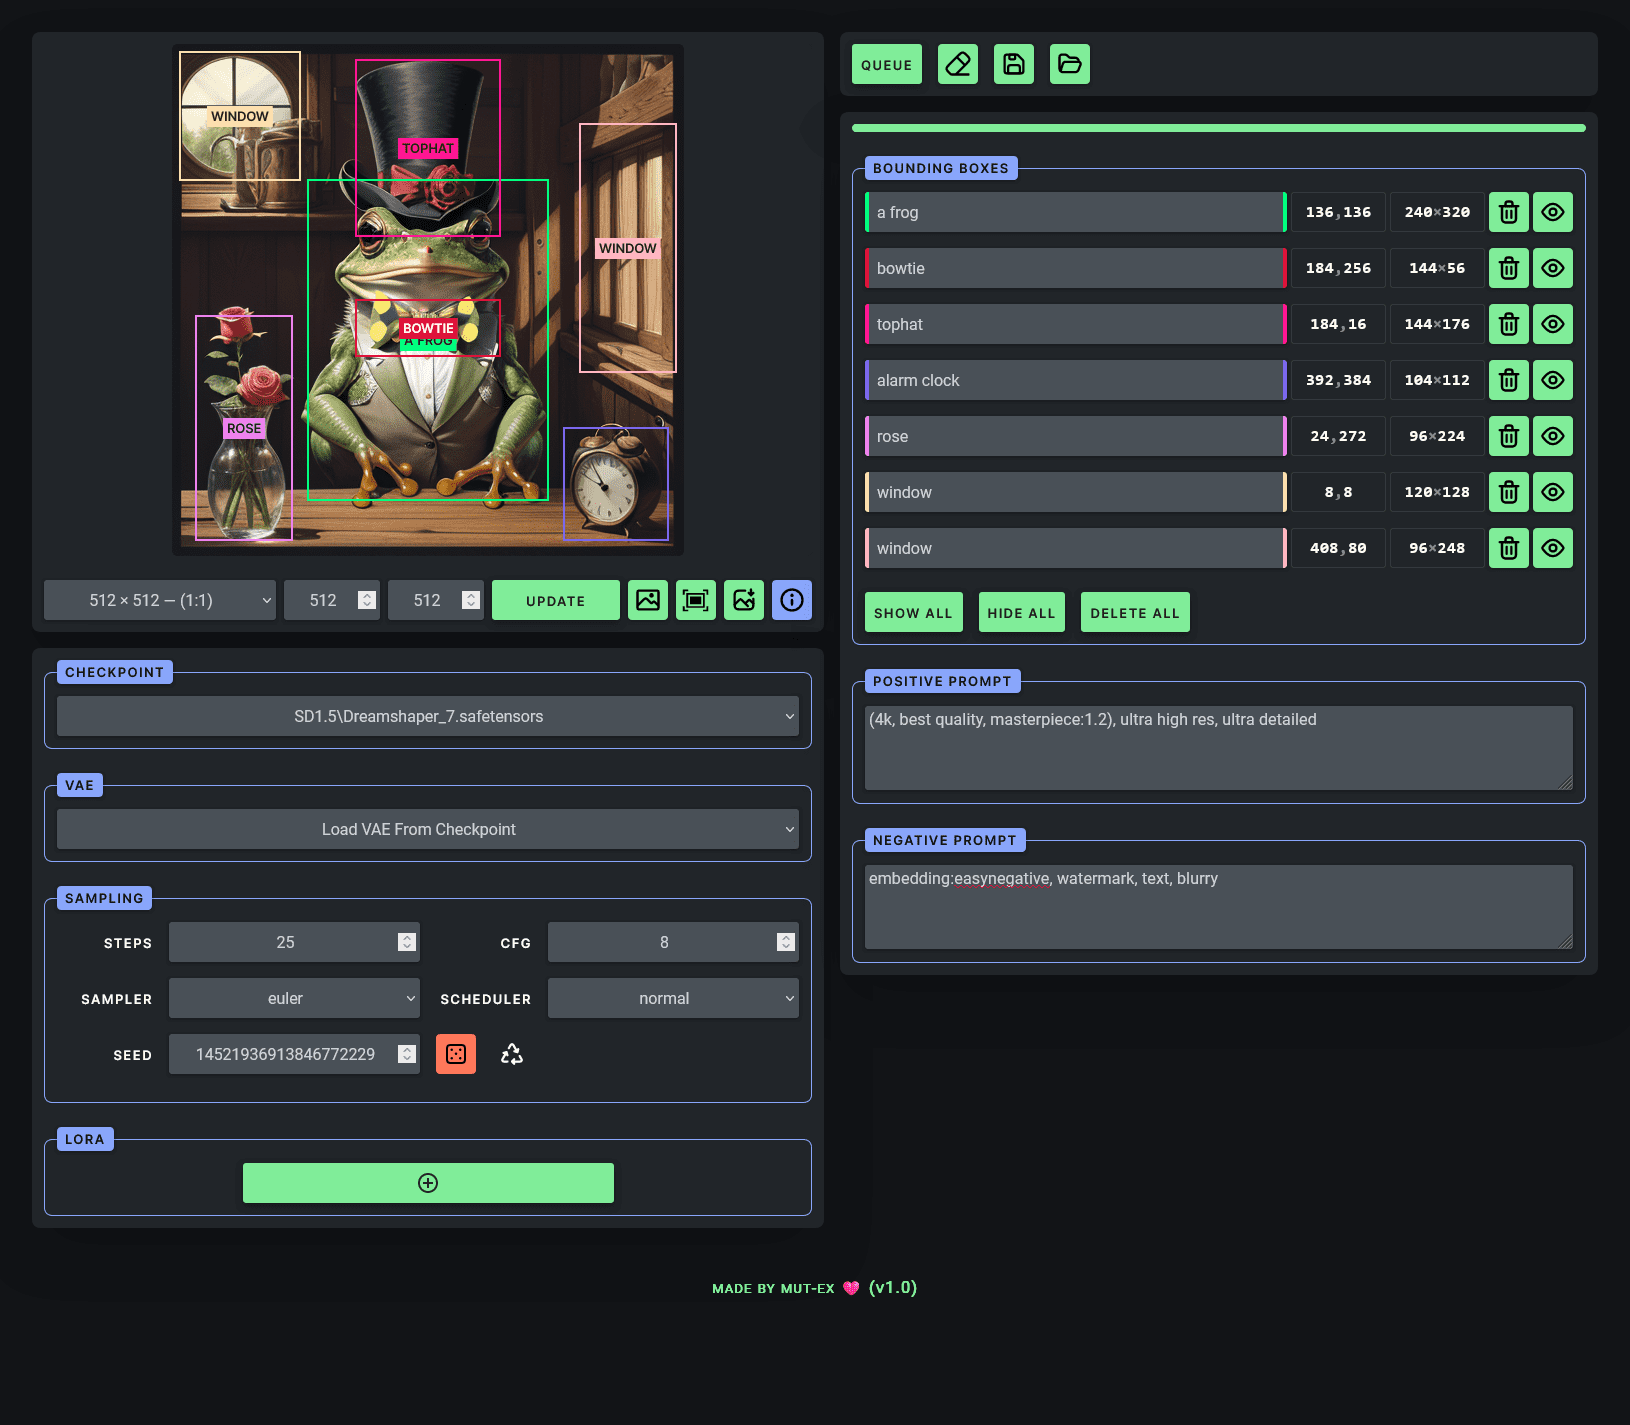
The GLIGEN GUI is a program based on the ComfyUI The GLIGEN GUI is an intuitive graphical interface designed to simplify the use of the GLIGEN model, a novel text-to-image model that precisely specifies the location of objects in an image. The GLIGEN GUI allows users to generate images by drawing boxes and typing text prompts, which greatly improves the ease and efficiency of operation.
Function List
- Draw Boxed Areas: Users can draw boxed areas on the canvas to specify the location of objects in the image.
- Text Input: Enter a corresponding text prompt for each boxed area.
- Multiple Model Support: Supports a wide selection of models and samplers.
- Save and Load Sessions: You can save the current session and load it later.
- Resize Boxed Area: Support for moving and resizing boxed areas.
- LORA Support: You can add and adjust the strength of multiple LORA models.
Using Help
Installation process
- Install ComfyUI: First make sure that ComfyUI is successfully installed and running.
- Download GLIGEN model files: Download
gligen_sd14_textbox_pruned.safetensorsfile and place it in theComfyUI/models/gligenCatalog. - Installing Flask: Run on the command line
pip install flaskto install Flask. - Clone GLIGEN GUI Warehouse: Run the following command to clone the repository and enter the catalog:
git clone https://github.com/mut-ex/gligen-gui.git cd gligen-gui - Starting the GUI: Run the following command to start the GUI:
flask --app 'gligen_gui:create_app(8188)' run --port 5000Note: It is assumed that ComfyUI uses port 8188, if different, replace it with the correct port number.
Usage Process
- Open your browser.: Open in browser
http://127.0.0.1:5000/port/8188If ComfyUI uses a different port, please change the port number in the URL accordingly. - Select Model: Ensure that the Stable Diffusion 1.5 checkpoint is selected.
- Drawing a boxed area: Draws a boxed area on the canvas using the mouse.
- Enter text prompts: Enter the corresponding text prompts for each boxed area in the table on the right.
- Describe the image: in
POSITIVEThe text box further describes the style and quality of the image. - Add LORA: If you need to use LORA, click on the LORA section of the
+button to select the LORA name and adjust the intensity. - Generating images: Click
Queue PromptSubmit the prompt and the resulting image will be displayed on the canvas.
One sentence description (brief)
© Copyright notes
Article copyright AI Sharing Circle All, please do not reproduce without permission.
Related articles

No comments...

