CSM (Cube): Provide 3D generation AI tools, support 3D model generation from images, text
General Introduction
Common Sense Machines (CSM) is a company specializing in 3D generative AI technology, providing tools to generate 3D models from images and text. Users can upload 2D images or input text to quickly generate high-quality 3D models for game development, industrial design, e-commerce, and many other fields.CSM's goal is to simplify the 3D modeling process and make it easy for professional artists and beginners alike to create 3D assets.
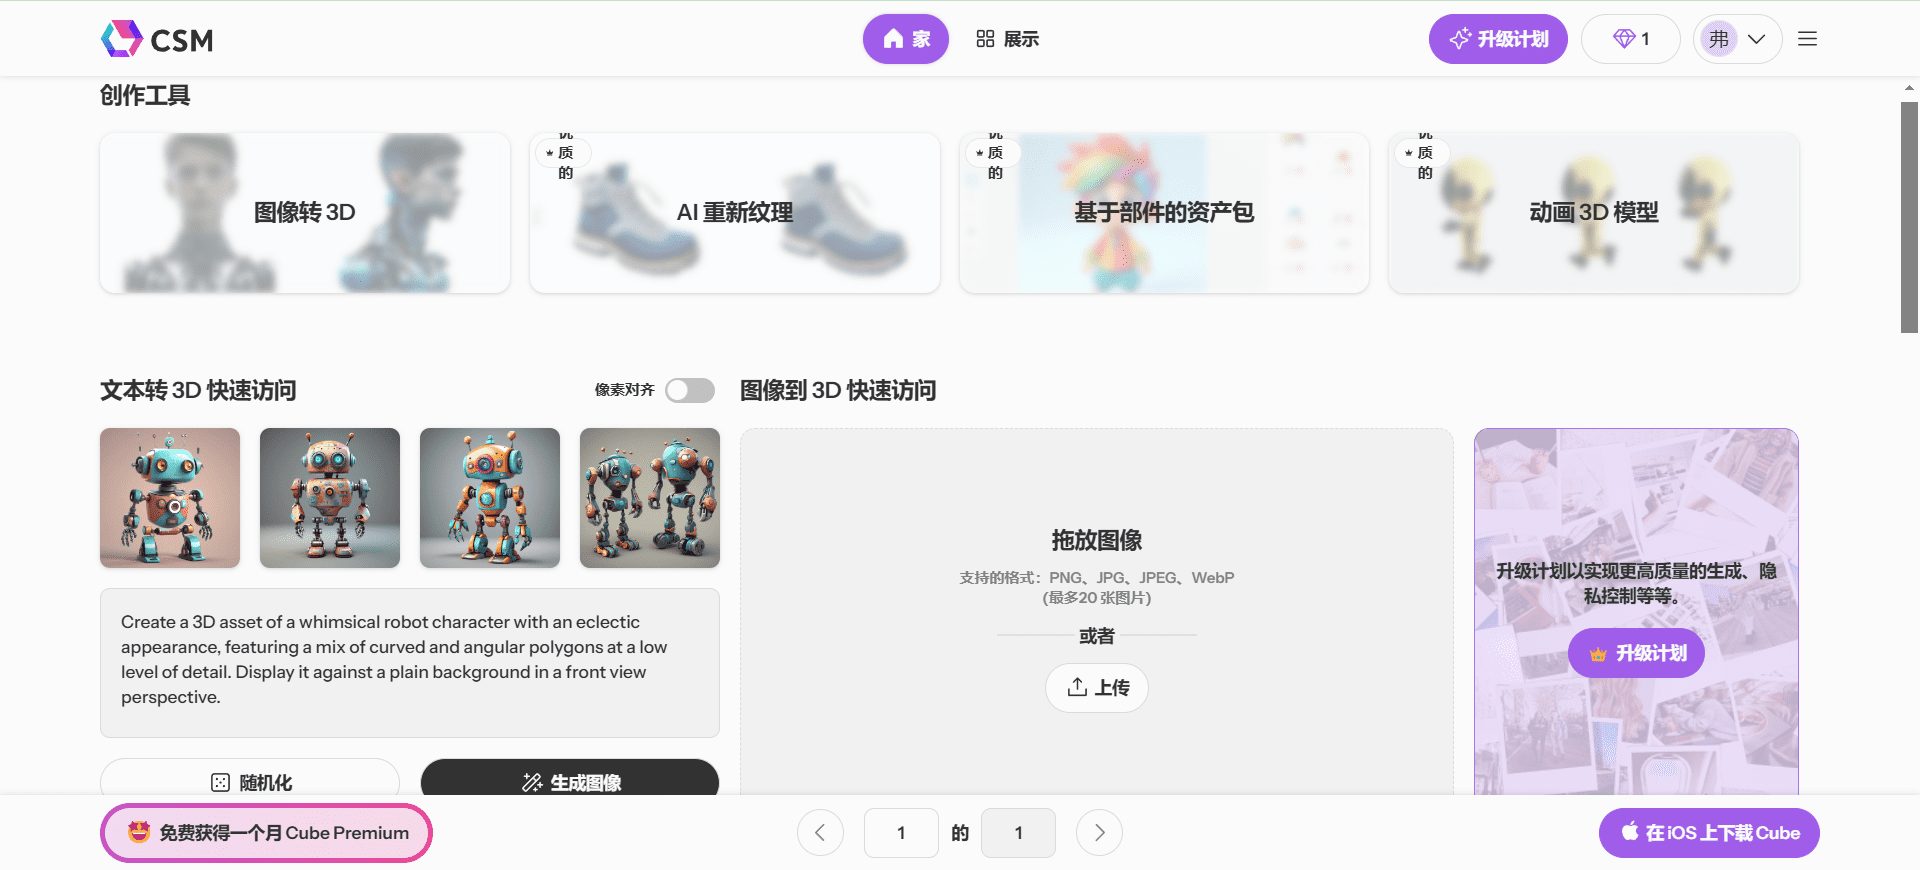
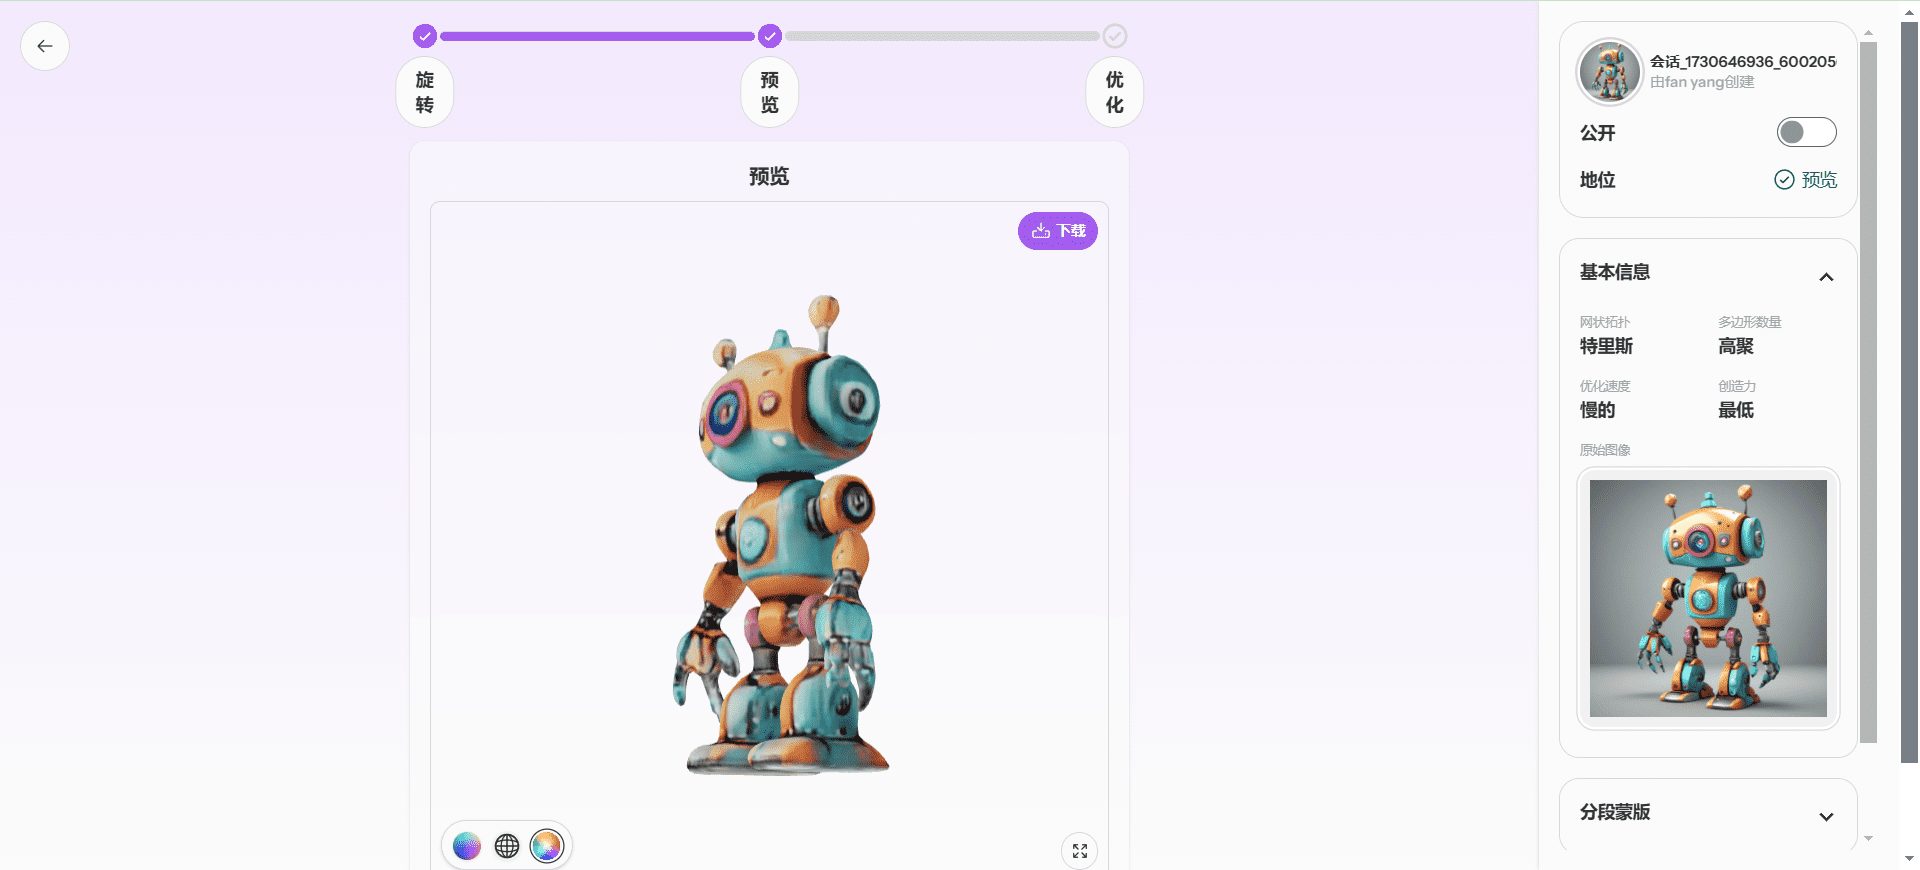
Function List
- Image to 3D: Upload any 2D image to generate a corresponding 3D model.
- Text to 3D: Enter descriptive text to generate a 3D model that matches the description.
- 3D animation generation: Create controlled 3D animations for game and movie production.
- High Resolution 3D Mesh: Generate high-quality 3D meshes for industrial design and 3D printing.
- AI-assisted UV mapping: Automatically generate UV maps to simplify texturing process.
- Multi-platform support: Support for exporting generated 3D models to third-party 3D editors such as Blender, ZBrush, and others.
Using Help
Installation and Registration
- Visit the official website: Open your browser and visit the official CSM website.
- Register for an account: Click the "Register" button in the upper right corner and fill in the necessary information to complete the registration.
- Download Client: Follow the system prompts to download the client software for Windows or Mac.
- Installing the software: Run the downloaded installation package and follow the prompts to complete the installation.
Function Operation Guide
Image to 3D
- Upload imagesSelect the "Image to 3D" function in the main interface, click the "Upload Image" button and select a local file to upload.
- Generate 3D models: After the upload is completed, the system will automatically generate the corresponding 3D model, and the user can view the effect in the preview window.
- Editing and savingUse the editing tools to make adjustments to the 3D model, and click the "Save" button to save the model locally or to the cloud when you are satisfied with it.
Text to 3D
- input text: Select the "Text to 3D" function and enter descriptive text in the input box.
- Generating Models: Click on the "Generate" button and the system will generate a 3D model based on the text description.
- Preview and adjustment: View the generated model in the preview window and use the tools to make the necessary adjustments and optimizations.
Sketch to 3D
- Upload SketchSelect the "Sketch to 3D" function, click the "Upload Sketch" button, and select a local sketch file to upload.
- Generate 3D models: The system automatically converts the sketch into a 3D model, which can be viewed and edited by the user in the preview window.
- Save and Share: When you're done editing, click the "Save" button to save the model or share it on social media platforms.
3D animation generation
- Creating a new animationSelect the "3D Animation Generation" function and click the "New Animation" button.
- Adding Models and Scenes: Select 3D models from the model library and drag and drop them into the scene for layout.
- Setting Animation Parameters: Use the timeline and keyframe tools to set animation parameters and adjust the trajectory and movement of the model.
- Preview and ExportClick the "Preview" button to view the animation effect, and click the "Export" button to save the animation as a video file when you are satisfied with it.
Advanced Features
3D model rendering
- Select ModelSelect "3D Model Rendering" function in the main interface and select the 3D model you want to render.
- Setting Rendering Parameters: Adjust rendering parameters such as lighting, materials, and camera angles.
- Start rendering: Click on the "Start Rendering" button and the system will automatically perform a high quality rendering.
- Saving Rendering Results: When the rendering is complete, click the "Save" button to save the rendering as an image or video file.
User Generated Content (UGC)
- Create Content: Select the User Generated Content function to create 3D content using the Image to 3D, Text to 3D, or Sketch to 3D tools.
- Share content: Once you've created your content, click the "Share" button to publish it to your community or social platform.
- Interaction and feedback: Browse other user-generated content, like, comment and share, and participate in community interactions.
Industrial 3D modeling
- Selection ToolsSelect the "Industrial 3D Modeling" function in the main interface to enter the professional tool interface.
- Importing Design Files: Click the "Import" button to select a local design file for import.
- Editing and optimization: Models are edited and optimized using professional tools to ensure compliance with industry standards.
- Exporting and Printing: When you are done editing, click the "Export" button to export the model to a file format suitable for 3D printing.
© Copyright notes
Article copyright AI Sharing Circle All, please do not reproduce without permission.
Related posts

No comments...

