How does Browse AI create a workflow that associates two robots?
We have prepared an interactive demo for your reference. You can click at will, use the arrow keys to toggle, or hover at the bottom of the demo to see navigation options for skipping the demo. In the top right corner of the demo, you can enable/disable audio and subtitles, and even select full-screen mode 🙂 .
You can also follow the written instructions below step-by-step:
Browse AI's workflow feature is an extremely powerful tool that enables the integration and sequential execution of two bots. By using workflows, you can set your robots to perform the tasks of both robots sequentially, run large batches, and even automatically pull data from detail pages with no human intervention at all.
The workflow is set up to extract data from the detail pages. Previously, the only way to do this was to download the results, import them to a second bot, and do a batch run to extract the data from the inner pages. But with workflows, you can easily set up two robots and link them together. Robot A can extract a series of pages and pass them to robot B. Robot B can then traverse all the pages and follow the robot's training process to extract the data.
How do I create a workflow for doing a deep crawl?
In this example, we'll create a workflow for extracting information from YCombinator.com's company profile pages, needing to get company profile links and extract data from each profile.
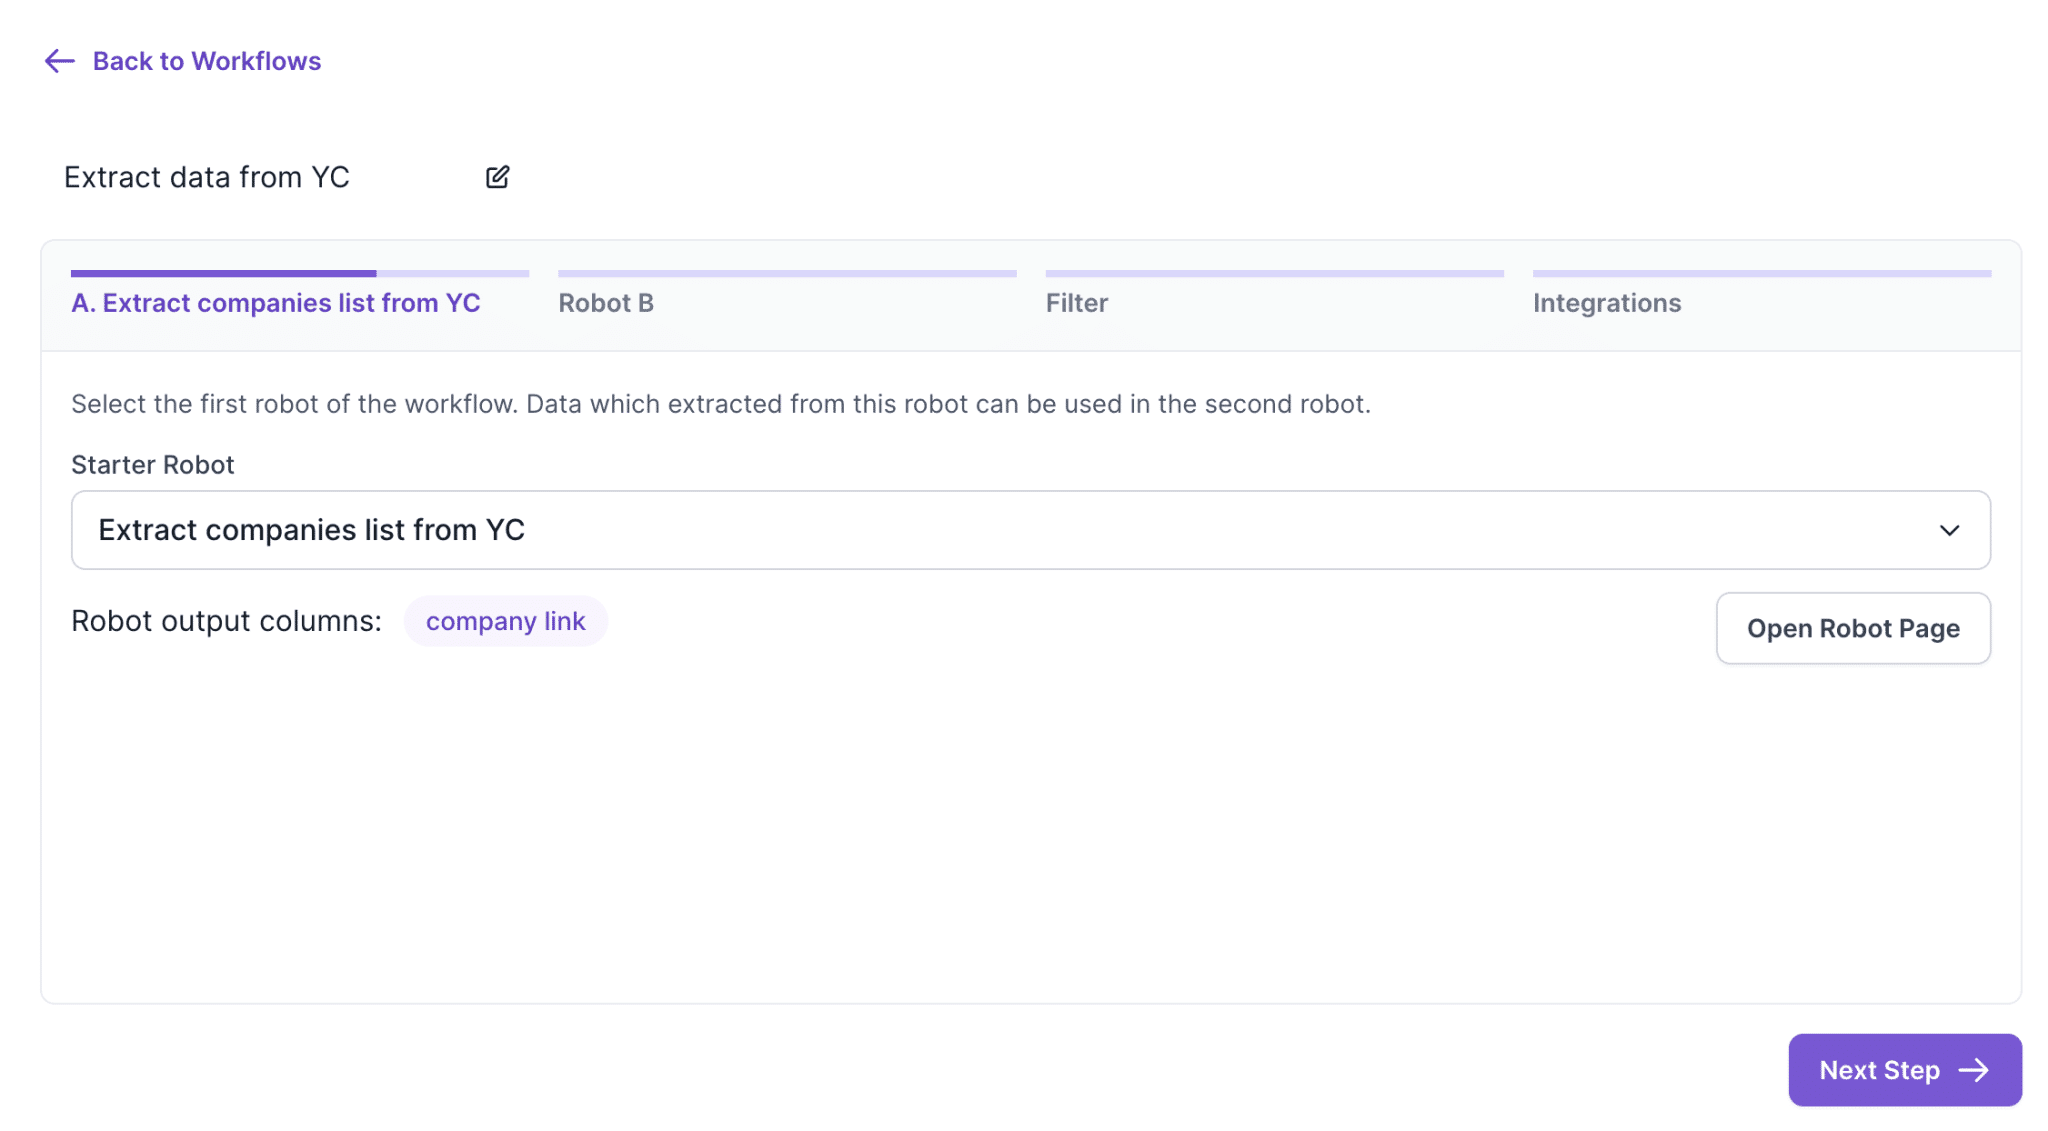
1- You need to create a bot A to extract the company profile link from the YC company list, this process is the same as you would normally create a bot. Be sure to extract the company profile link. The result should be as shown below.
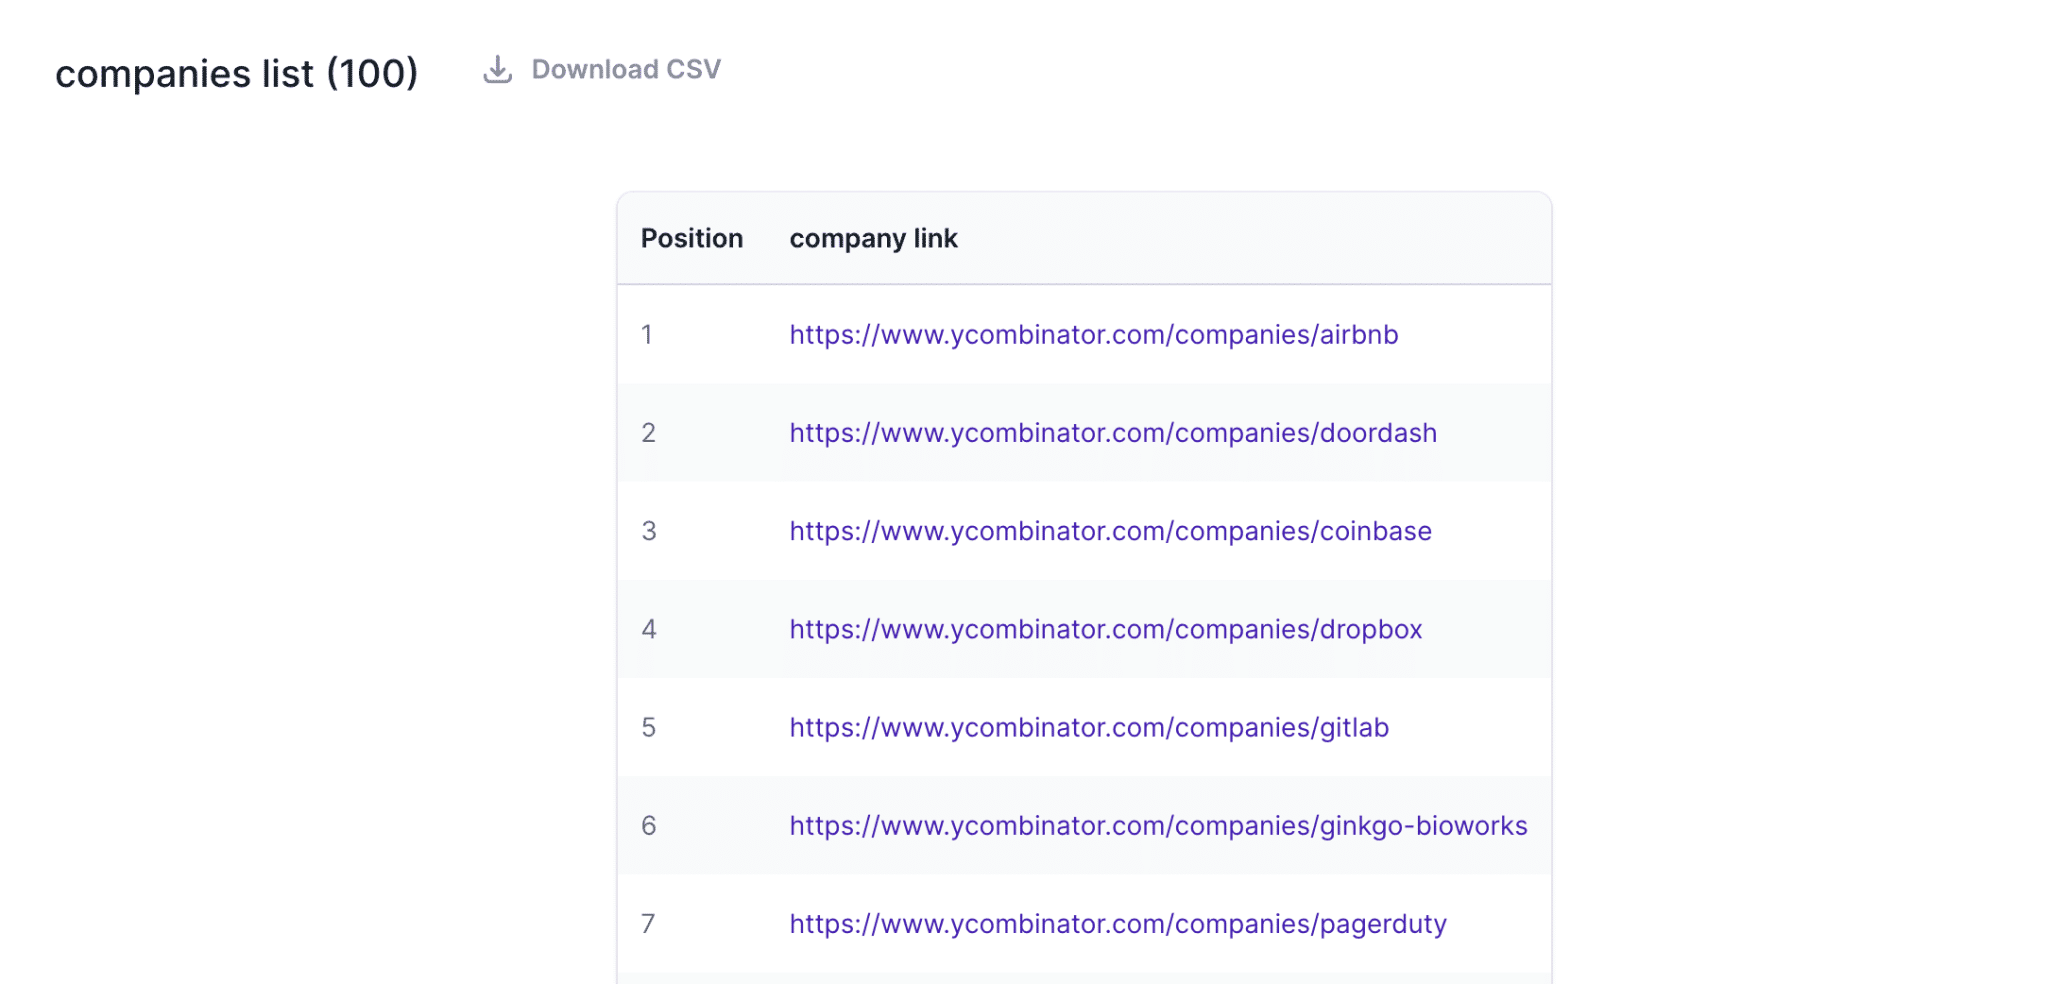
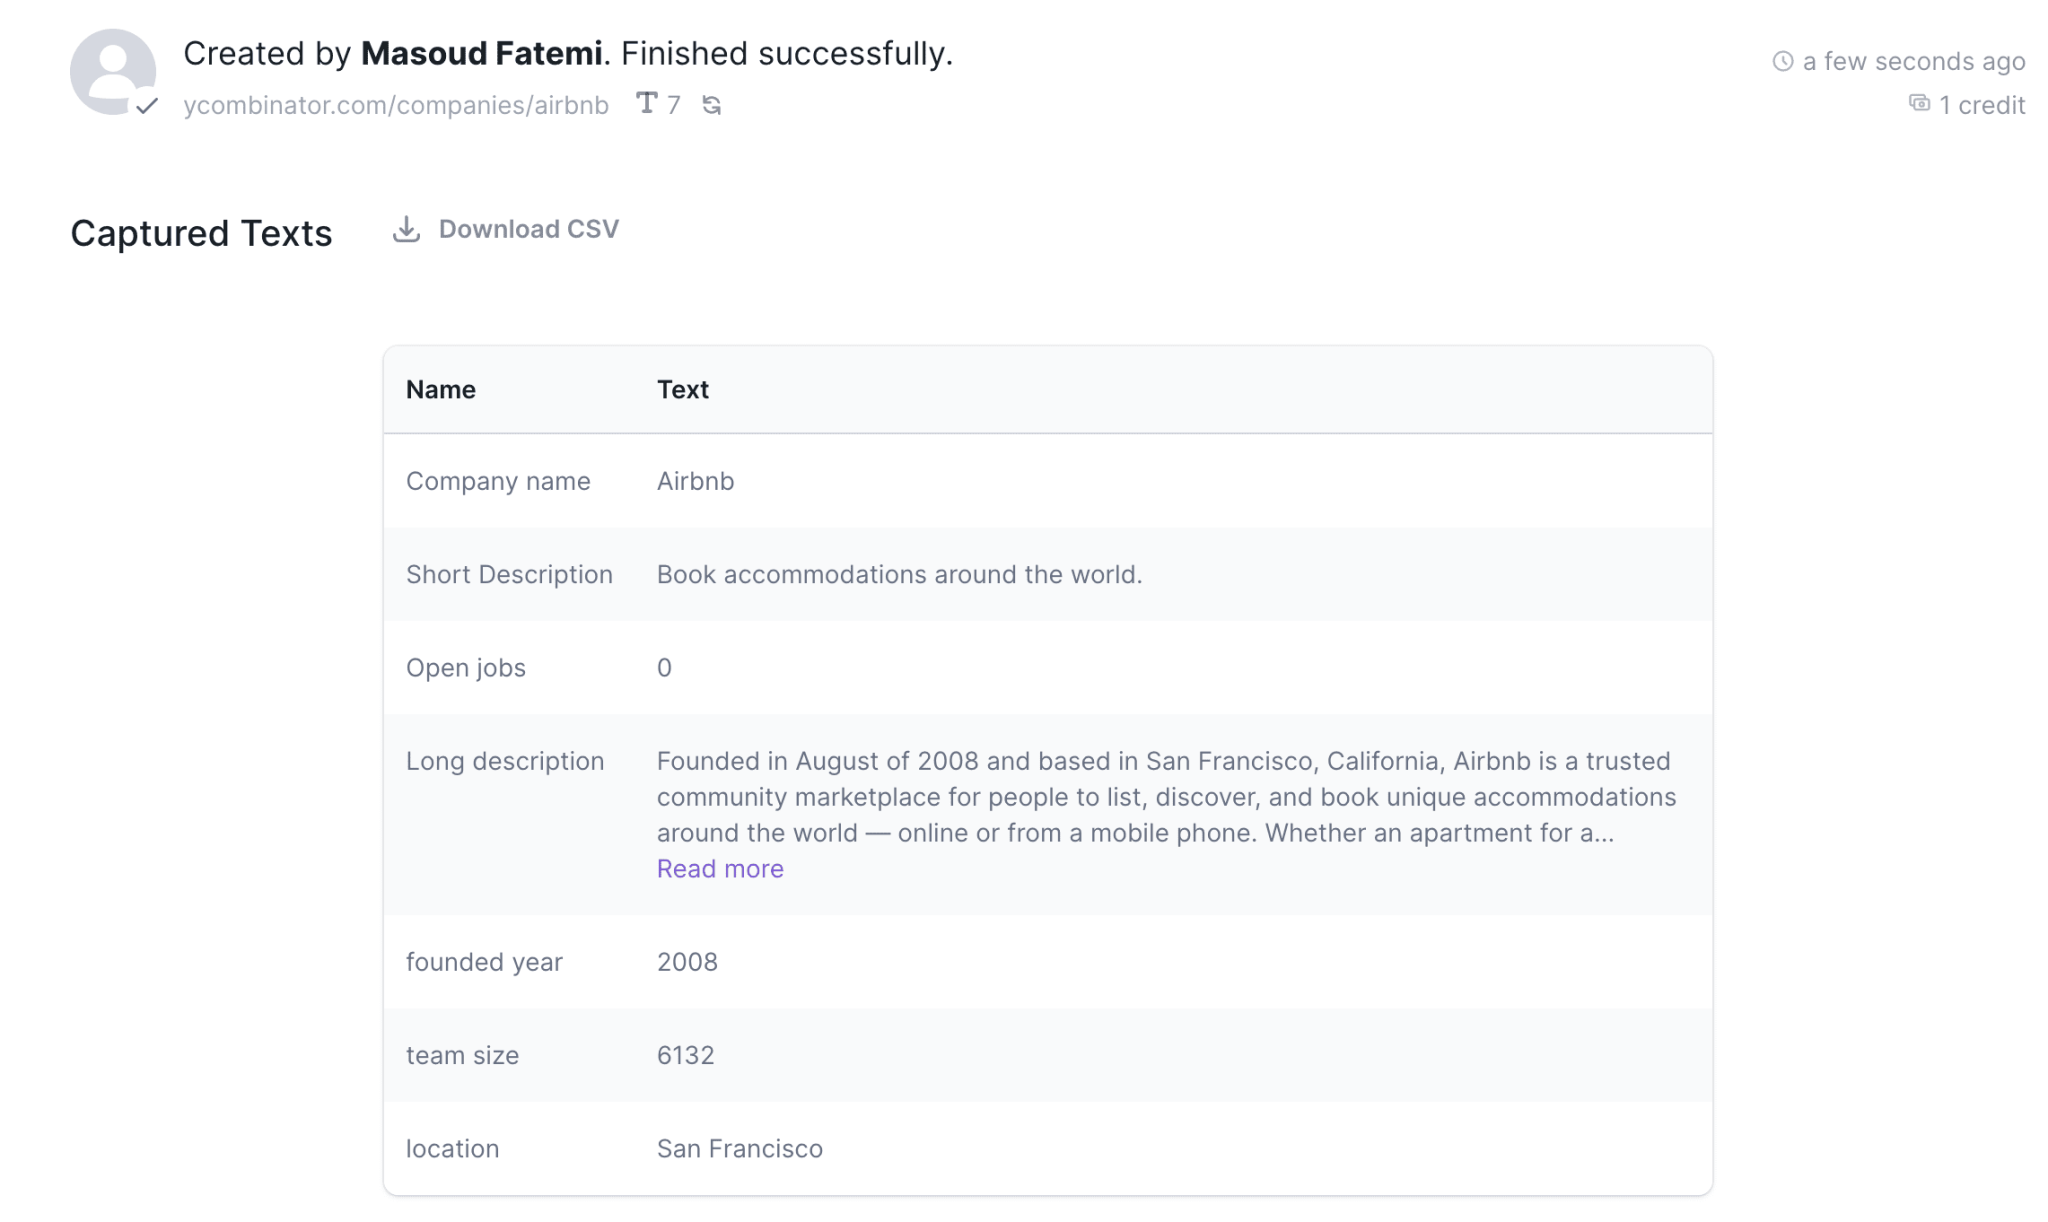
2- You need to train another bot to extract company information from YC's company page. The result will be as shown below.
3- Before opening the creation workflow, you need to integrate the second robot to one of the data collection interfaces in order to record data from multiple runs. For this example, we will choose [Integration with Google Forms]
4- Now, in your Browse AI In the Control Panel, find the Workflow section and click the Add New Workflow button.
5- Give your workflow a name and select the first robot, then click next.
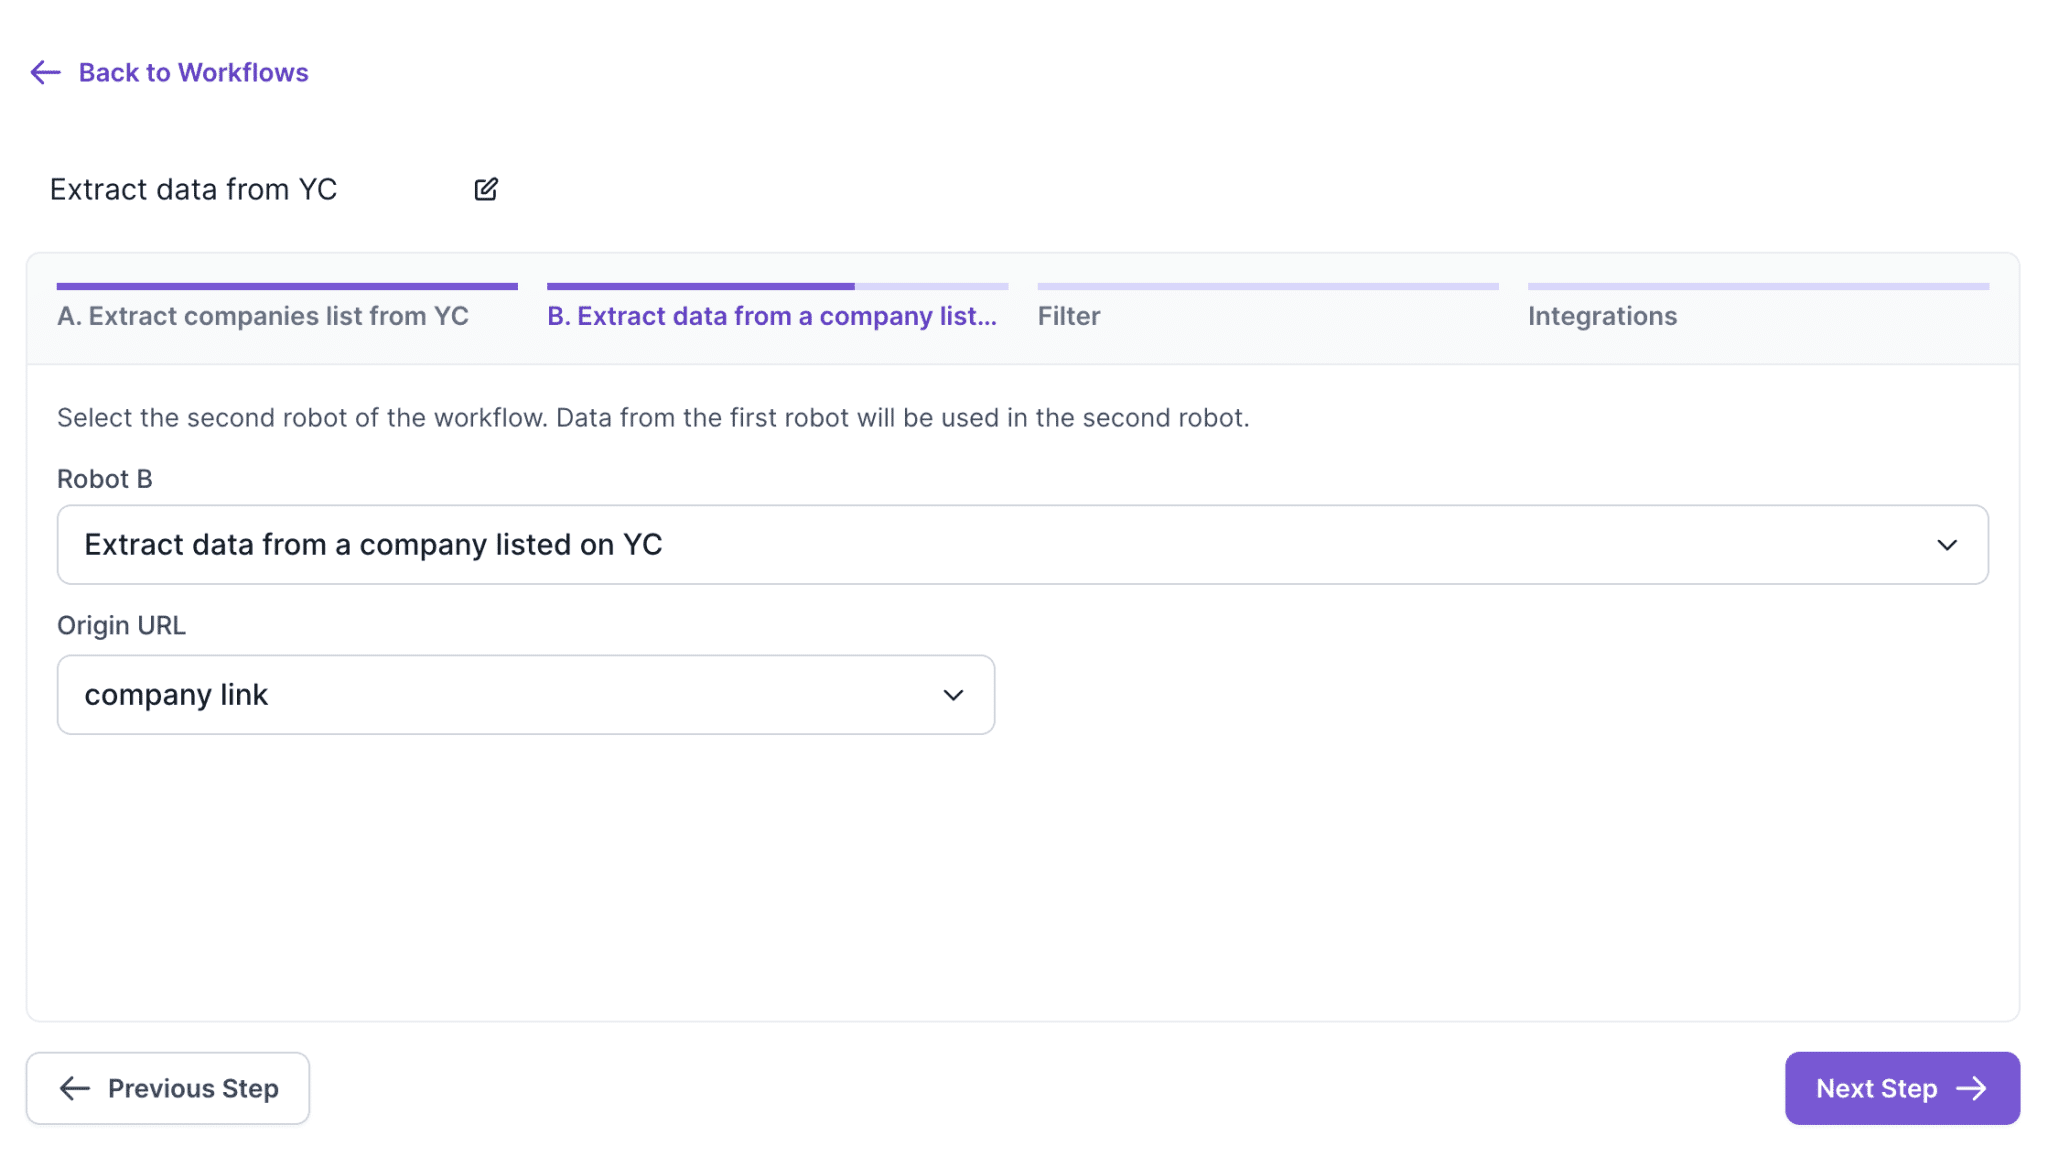
6- Now in step B select the second bot and also you need to select a data point that you wish to transfer from the first bot to the second bot. In this example, we got the link to the profile page from YC, so I would select that and move on to the next step.
7- Next, you can decide when to run the second bot with the following four options:
- always
- When Robot A detects a change in the monitoring process
- When Robot A discovers new items during the monitoring process
- When Robot A identifies new items or changes in the monitoring process
We would choose "always".
8- After completing the last step, your workflow is ready to start. If you have turned on Google Forms synchronization, the corresponding prompt message will be displayed on the console. If you haven't started any integration yet, you need to turn it on right away because you may need to run hundreds or thousands of tasks at the same time, and using an integration tool like Google Forms or Webhooks is the most efficient way to manage large amounts of data.
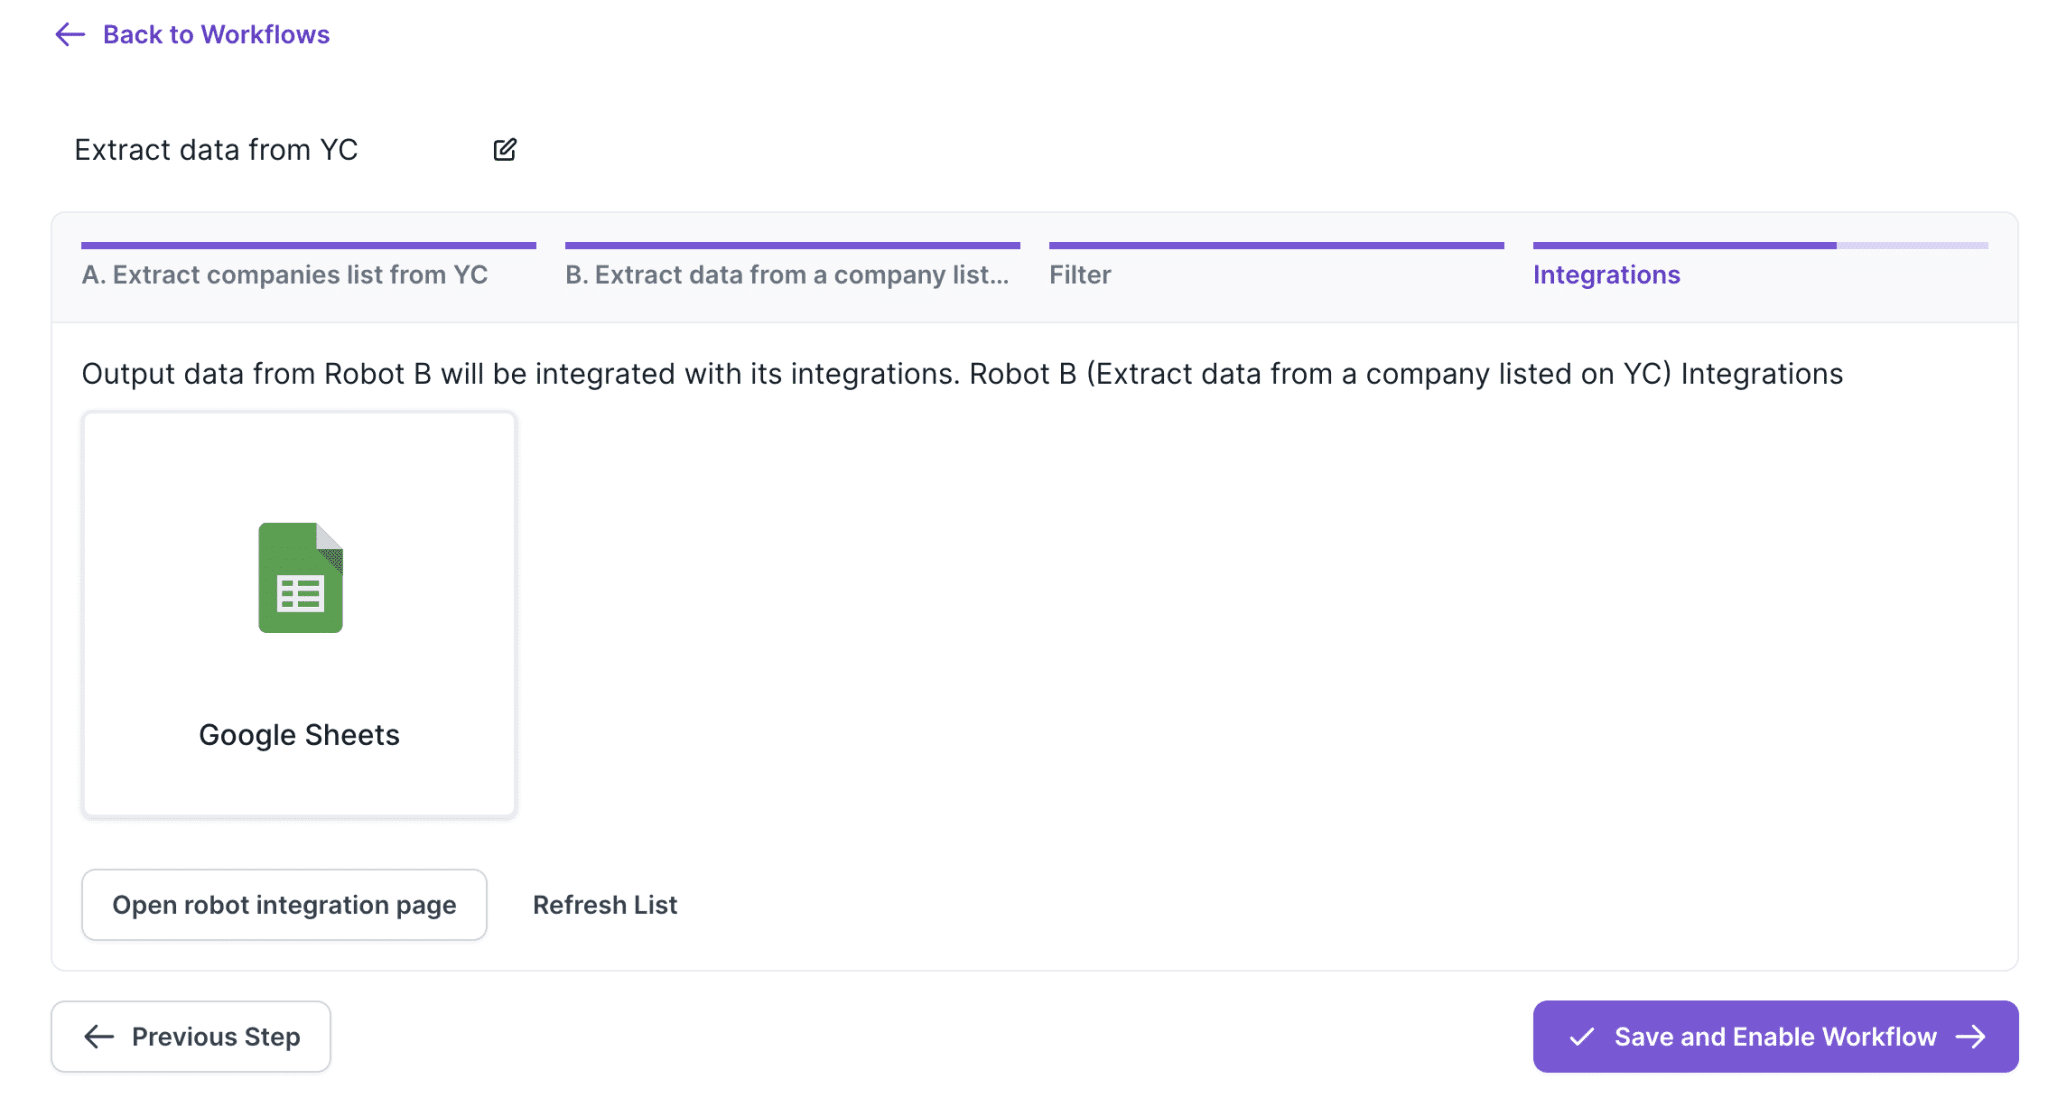
9- Once you have saved and started the workflow, you can initialize it in such a way that it runs a task on robot A. In this way, Browse AI will use Robot A to fetch the link to the company's data page from YC and transfer it to Robot B, which will then start a batch run. In this way, Robot B will have access to all the data it needs.
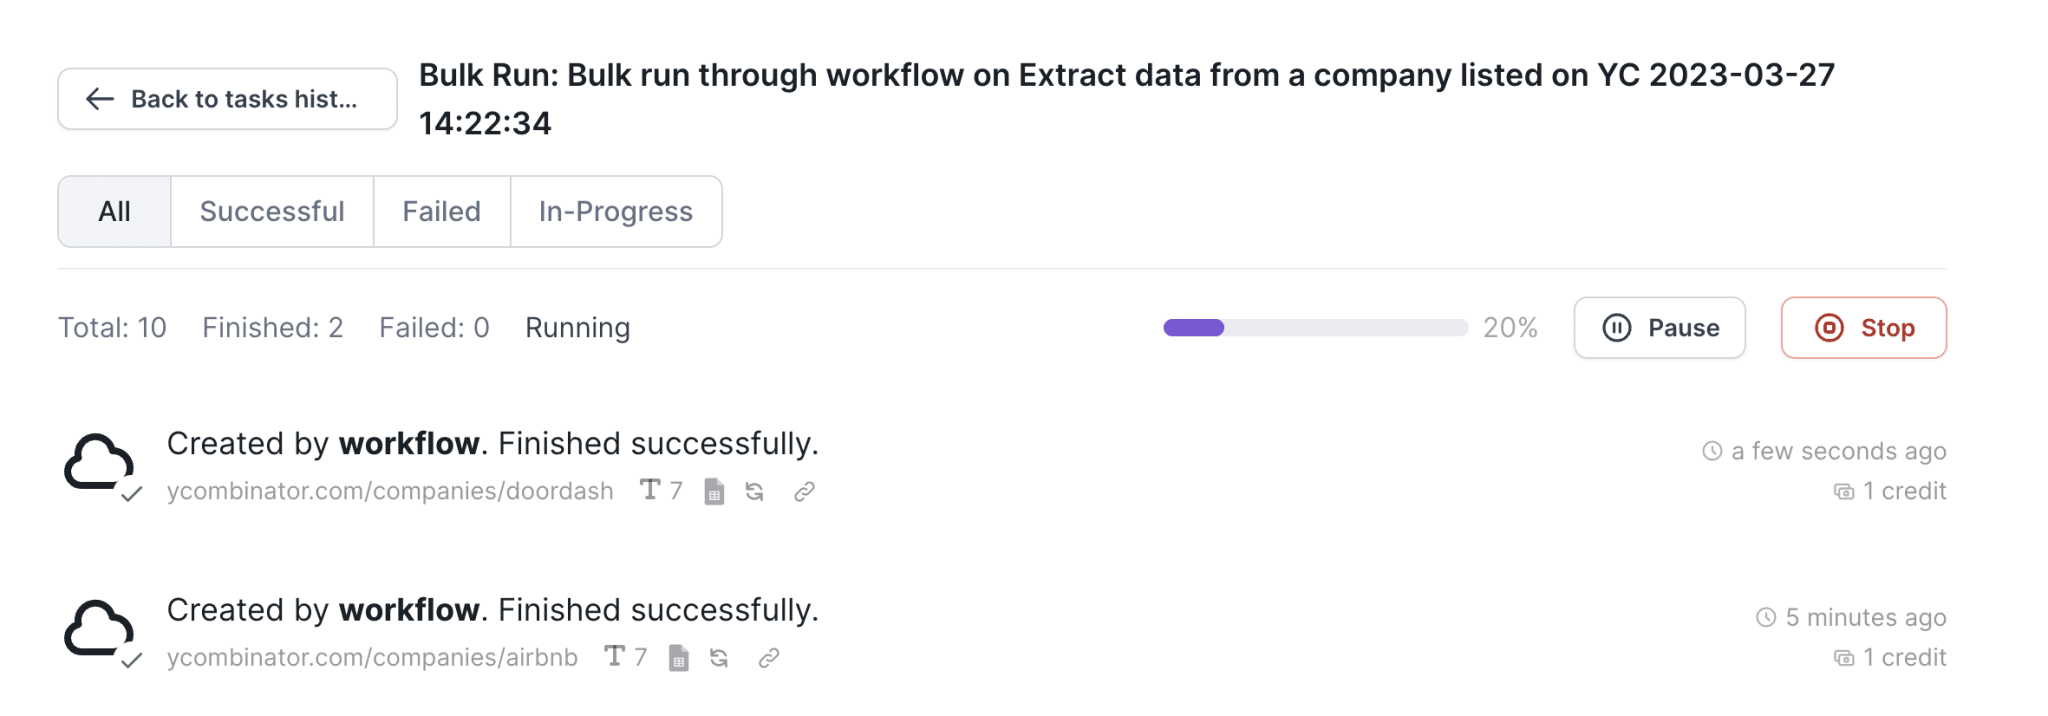
10- On Robot B's page, you can see the data obtained from YC's company profile page in one batch run.
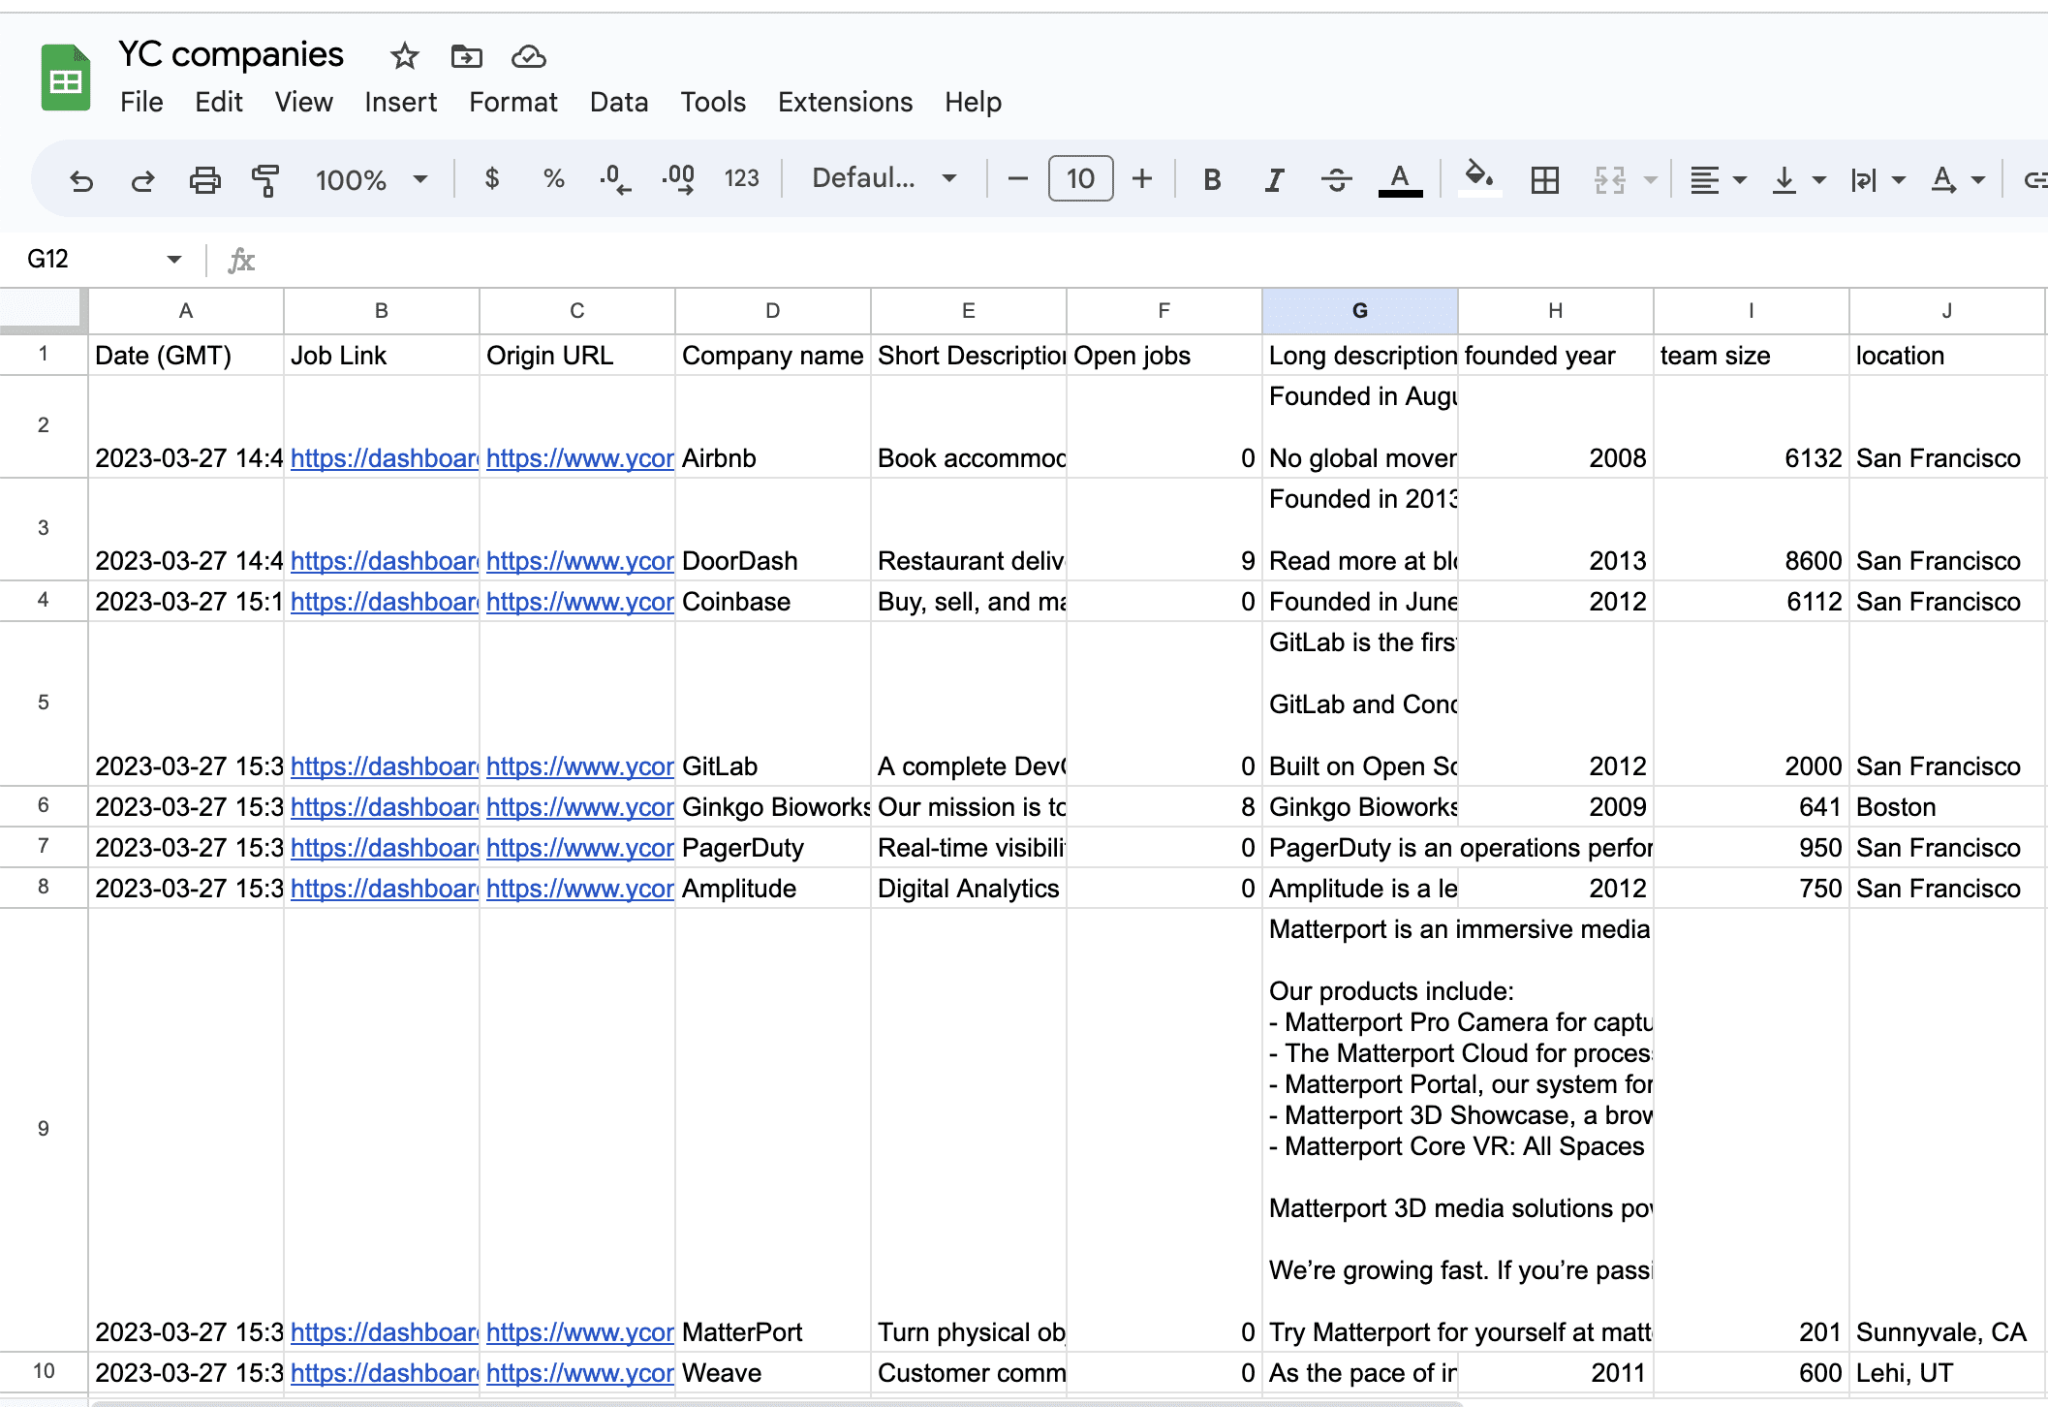
If you look at your Google Forms file now, you can see that each company's data has been added to your file line by line.
Workflow is an efficient and proven tool for automating data extraction, whether it's getting data from a detail page, performing a batch run, or extracting data from multiple sources, making workflow more routine and concise.
© Copyright notes
Article copyright AI Sharing Circle All, please do not reproduce without permission.
Related posts

No comments...

