BizyAir: plugin to run ComfyUI cloud nodes locally, relies on Silicon Mobility free APIs
General Introduction
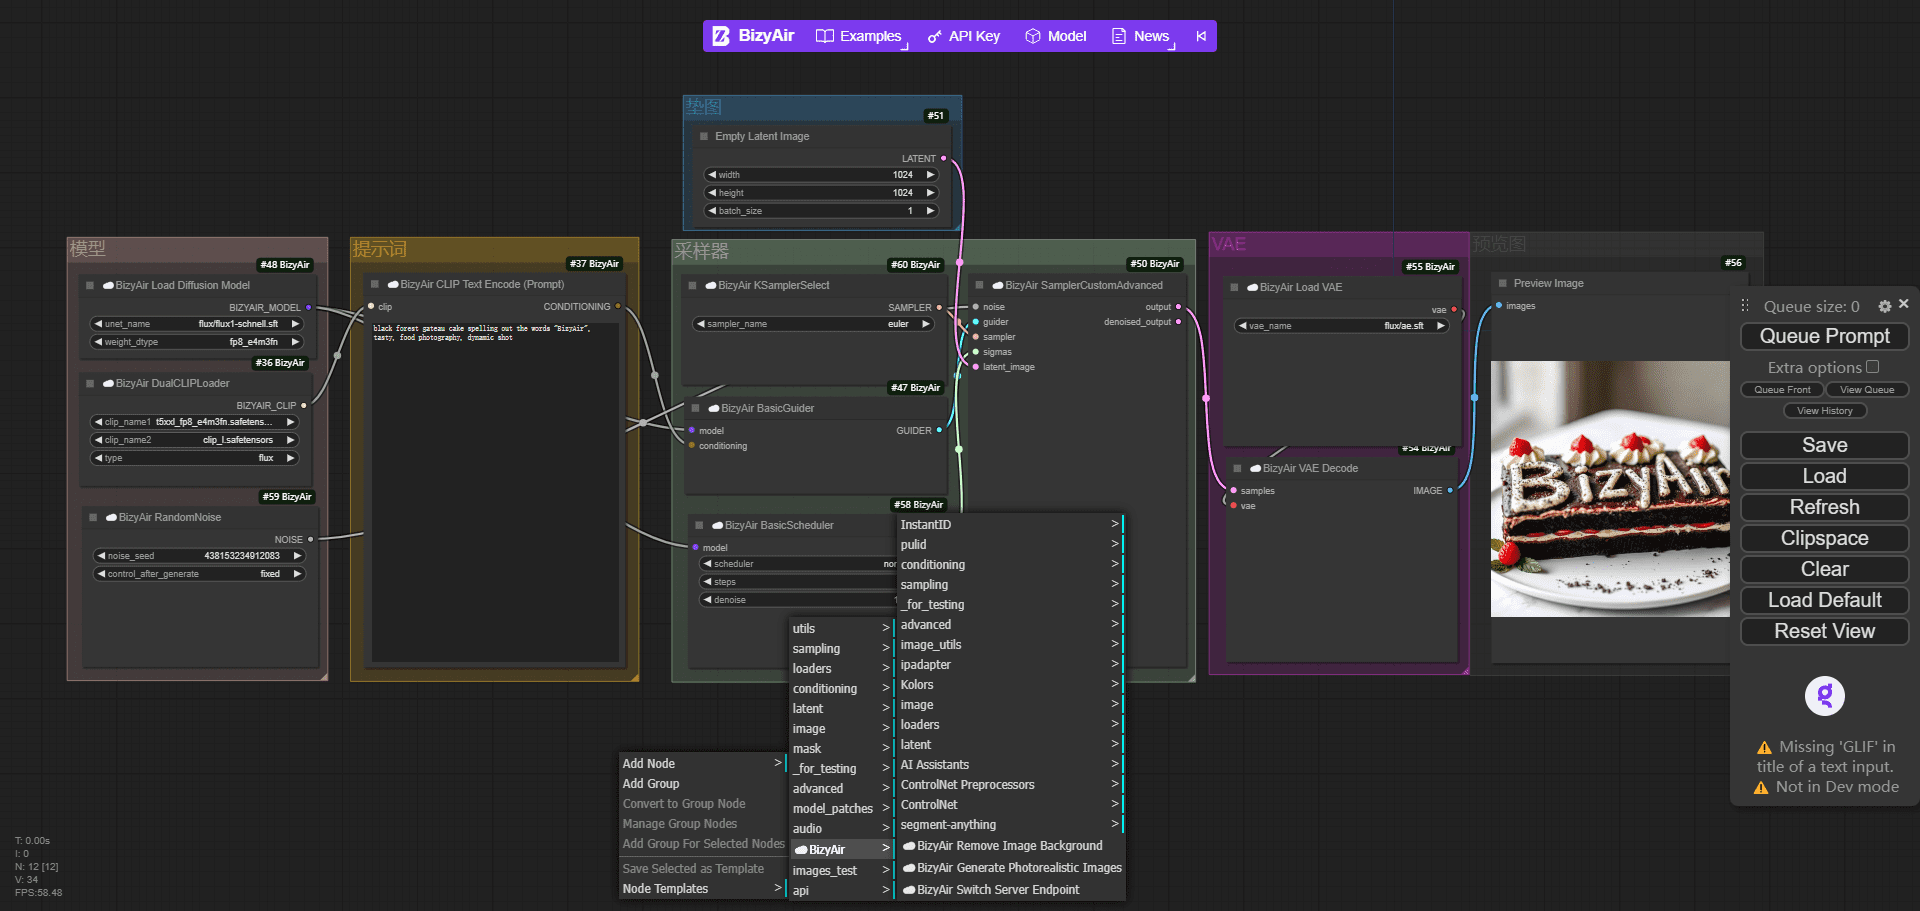
BizyAir is a collection of ComfyUI nodes designed to help users overcome environmental and hardware constraints to easily generate high-quality content. It supports a variety of models and nodes, including Stable Diffusion 3.5, ControlNet, FLUX mode, etc. It provides rich functionality and flexible operation for various image generation and processing needs.
Relying on BizyAir, you can run ComfyUI in any low-computer, supporting a wide range of models and nodes. For simple experience, you can download the one-click installer with BizyAir integrated in the article, and the official ComfyUI client is recommended for formal use:Welcome to ComfyUI Desktop Edition, officially open for user download!
Function List
- Support for Stable Diffusion 3.5
- Provides multiple ControlNet modes (Canny, Depth, Blur, etc.)
- Supports FLUX Fill, ControlNet, and Redux modes
- Provision of PixelWave Flux.1-dev text to image node
- Support for Segment-Anything nodes
- Support for VLModels and PuLID workflows
- Allow users to share custom LoRAs
- Provide model upload progress bar function
- Support for InstantID and custom LoRA model runs
- Provide ultimateSDupscale node
- Provide JoyCaption node
- Support for multiple new base models (ControlNet, LoRA, IPAdapter, etc.)
- Provides a super-resolution node that magnifies the image four times
Using Help
Installation process
BizyAir offers several installation methods:
- Installation via ComfyUI Manager: Make sure ComfyUI has installed ComfyUI Manager, search for BizyAir and click "Install" to complete the installation.
- Installation via git clone: Download the BizyAir repository into the custom_nodes subdirectory of ComfyUI and restart ComfyUI.
cd /path/to/ComfyUI/custom_nodes && git clone https://github.com/siliconflow/BizyAir.git - Installation via Comfy CLI: Ensure that pip and comfy-cli are installed, and use the following command to install BizyAir:
comfy node install bizyair - Download ComfyUI for Windows Portable (with BizyAir integration): Select the appropriate download link according to the user's region, NA/EU users to usethis linkThe Chinese users use thethis linkThe
- Setting the API KEY: Set your API KEY when you use it for the first time. get it from here:Silicon-based Flow Registry Portal
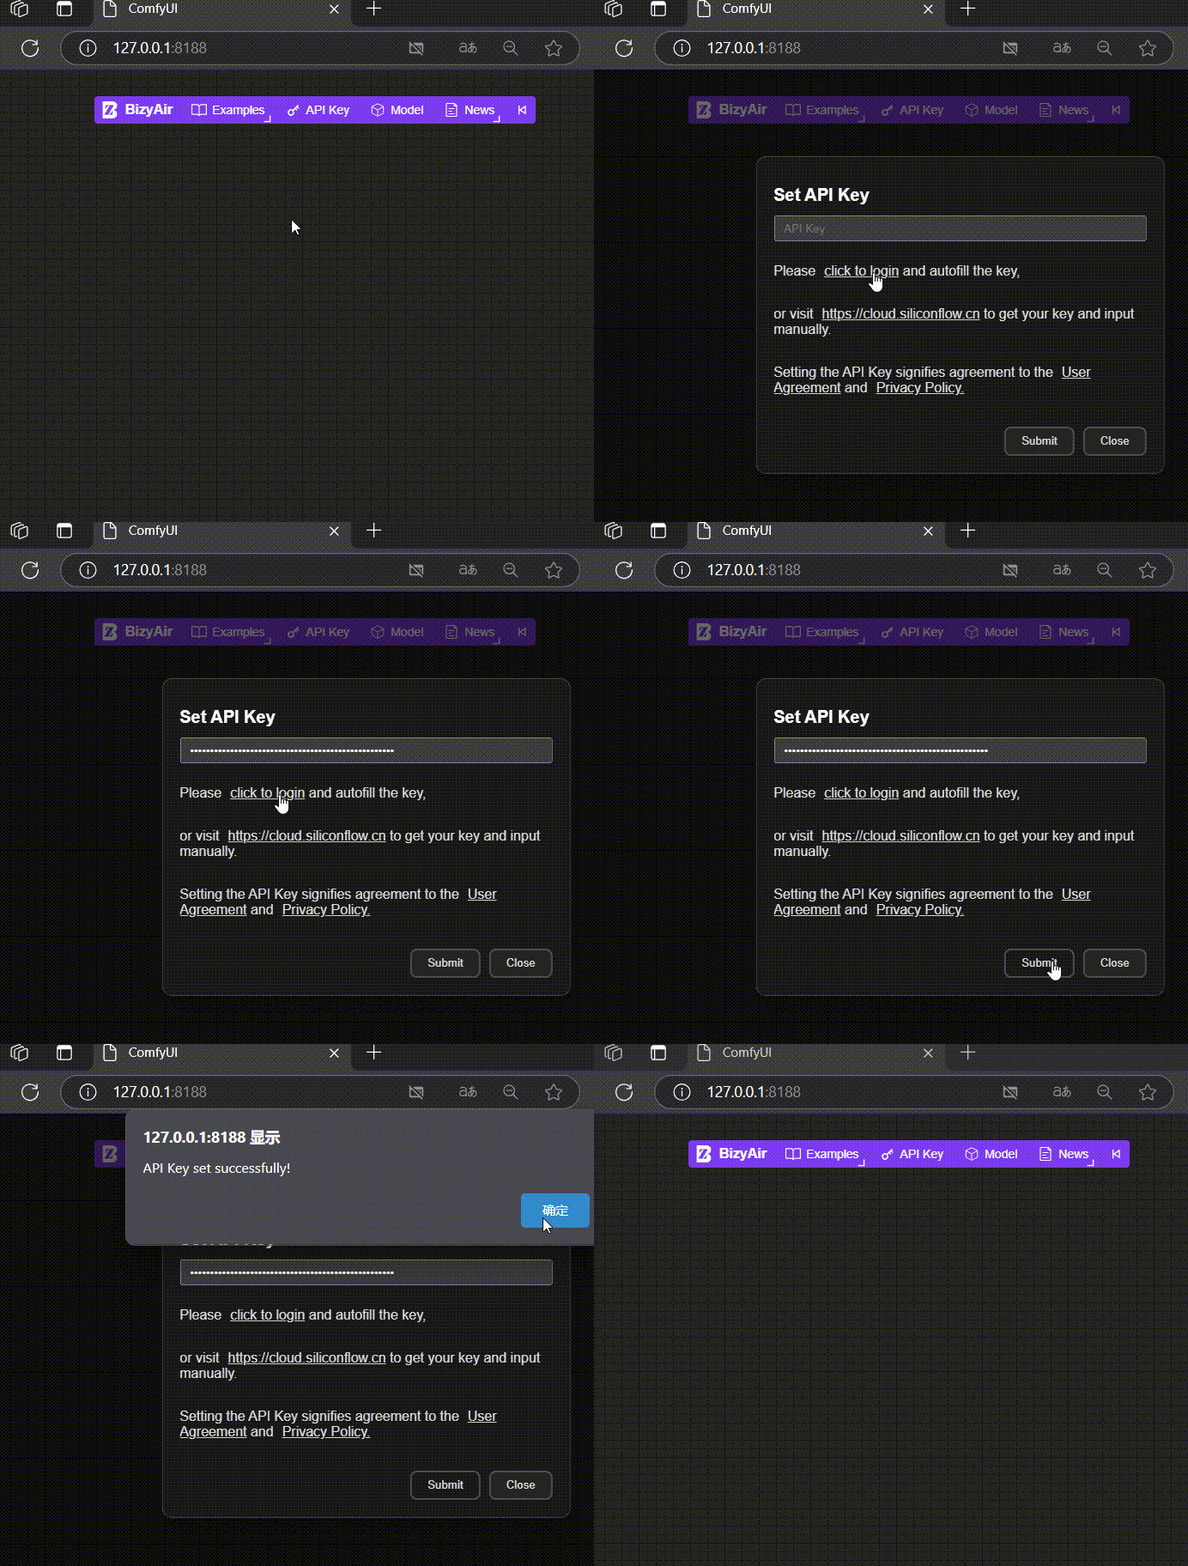
After installing the BizyAir plugin, set the API KEY obtained in the silicon-based flow
Function Operation Guide
The first step in using BizyAir starts with running the workflow example::
BizyAir provides several workflow examples that can be loaded by clicking the "BizyAir Workflow Examples" button.

Running the first example in BizyAir
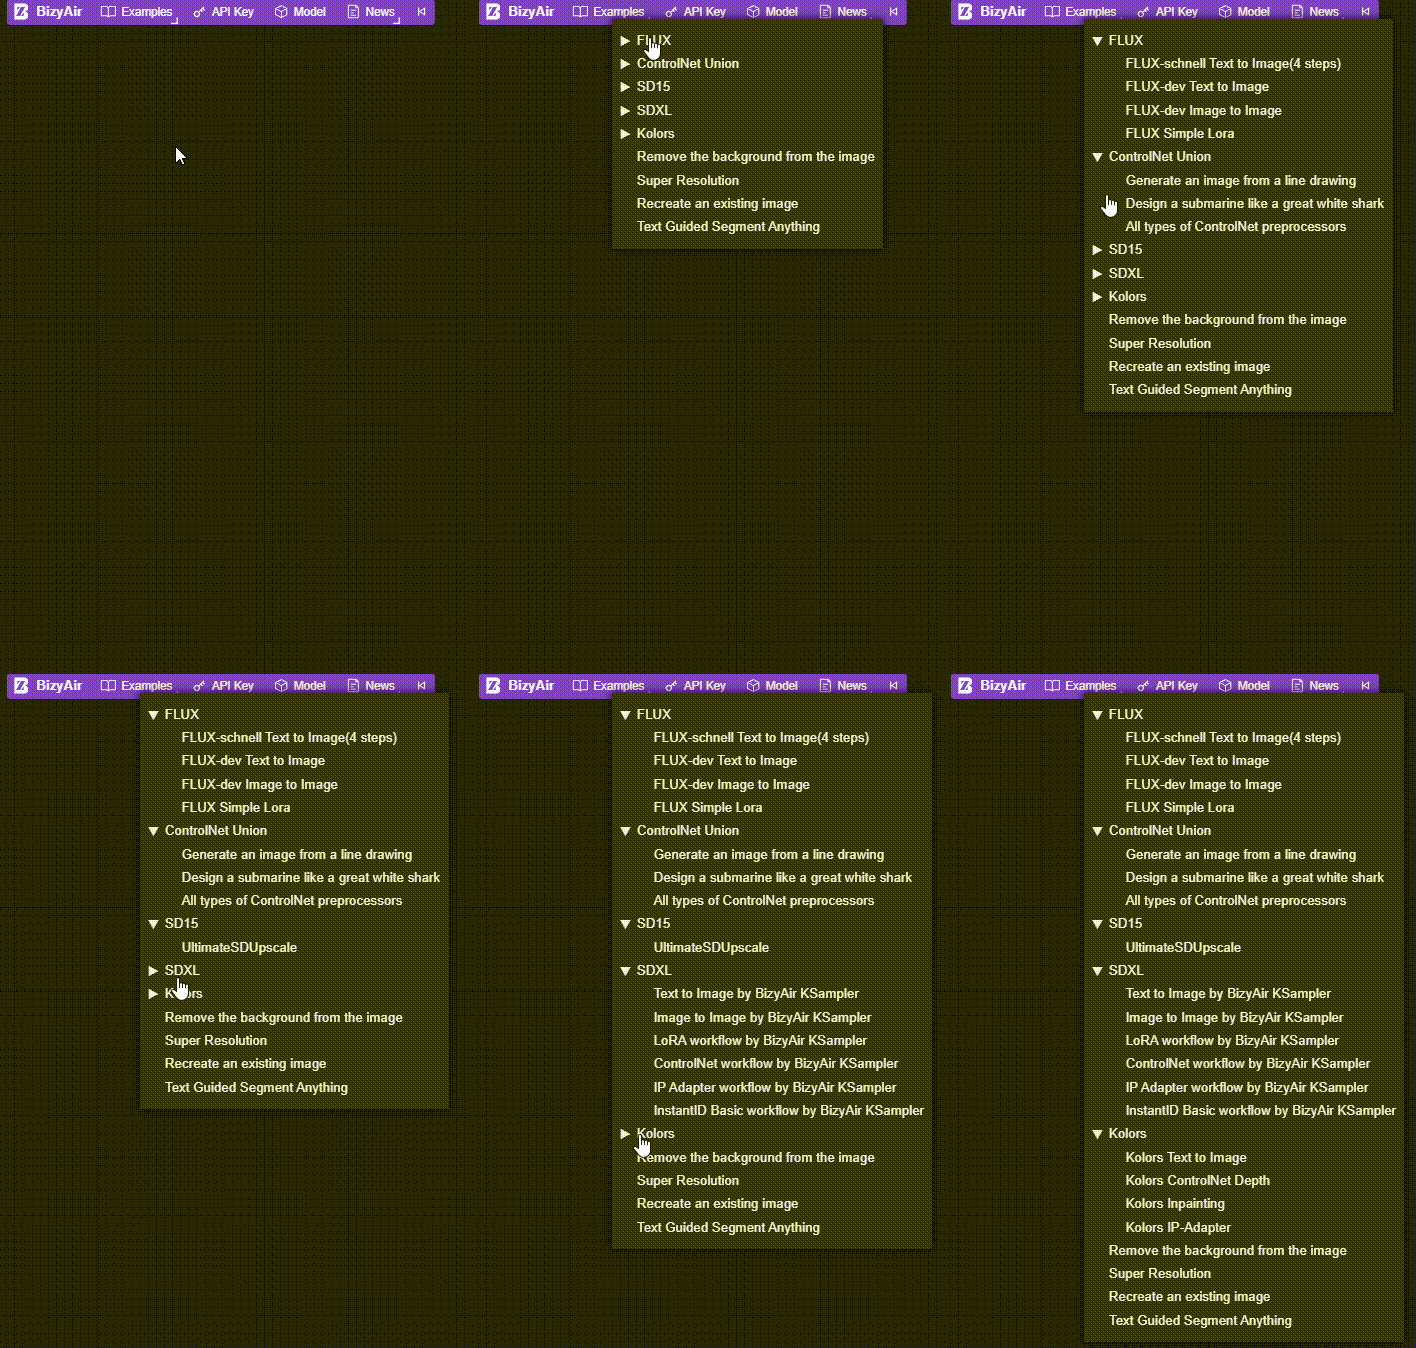
BizyAir Example Collection
BizyAir detailed nodes/functions:
- Stable Diffusion 3.5: Select the Stable Diffusion 3.5 node in ComfyUI and enter a text description to generate a high quality image.
- ControlNet mode: Select the desired ControlNet mode (e.g. Canny, Depth, Blur) and adjust the parameters to generate an image that meets the requirements.
- FLUX mode: Select FLUX Fill, ControlNet, or Redux mode and enter text or images to generate the appropriate content.
- PixelWave Flux.1-dev: Select the PixelWave Flux.1-dev node and enter a text description to generate an image.
- Segment-Anything node: Select the Segment-Anything node and enter text or box the region for image segmentation.
- VLModels and PuLID workflows: Select the appropriate node and follow the tutorial to generate the desired content.
- Custom LoRAs to share: Upload custom LoRAs to share with other users.
- Model upload progress bar: While uploading a model, view the progress bar to see the progress of the upload.
- InstantID and custom LoRA model runs: Select InstantID or Custom LoRA model node, enter parameters and run the model.
- ultimateSDupscale node: Select the ultimateSDupscale node and input the image for super-resolution processing.
- JoyCaption node: Select the JoyCaption node and enter a text description to generate the image.
© Copyright notes
Article copyright AI Sharing Circle All, please do not reproduce without permission.
Related articles

No comments...

