BibiGPT: A Complete Guide to Syncing AI Audio/Video Summarized Content to Notion, Flybook, Obsidian, and 10+ Other Platforms
introductory
In the era of information explosion, how to efficiently process and summarize audio and video content has become a need for many users.BibiGPT, a powerful AI audio and video summarization tool, has recently introduced a new feature that allows you to sync your summarized content to multiple platforms such as Email, Notion, Flomo, Flybook, Readwise, Roam Research, Roam Quick Capture, Tana, Obsidian, and Logseq, among many other platforms. This feature not only improves your work efficiency, but also makes information management more flexible and convenient.
Overview of BibiGPT's features
BibiGPT is an AI tool that supports audio and video summarization using multimodal big models such as GPT-4o, Gemini Pro 1.5, Claude 3.5 Sonnet, etc., which can be used to summarize video content on B-site. Its core features include:
- Full Platform Support: In addition to B station, it also supports multiple platforms and local files such as YouTube, Xiaohongshu, Shake, Shutterbug, Baidu.com, AliYunDisk, podcasts, conference recordings, and web pages.
- Multiple Outputs: Generate mind maps, transcribed subtitle lists and AI rewrite article views, support multiple large language models and personalized summary output.
- easy-to-use: Supports WeChat Assistant and iOS shortcut commands for smoother operation.
List of supported synchronization platforms
BibiGPT supports synchronization across multiple platforms, allowing you to seamlessly integrate summary content into your workflow. Below is a list of currently supported synchronization platforms:
- Email: You can email summaries directly to yourself or team members for easy sharing and archiving.
- Notion: Synchronize summary content to Notion to easily manage and organize information and improve team collaboration efficiency.
- Flomo: Record inspiration and ideas through Flomo to ensure important information is not missed.
- obscure or illegible writing: Share summaries in Flybook for easy access and discussion among team members at any time.
- Readwise: Import summarized content into Readwise to help you better manage and review your knowledge.
- Roam Research: In-depth note taking in Roam Research facilitates the construction of a personal body of knowledge.
- Roam Quick Capture: Quickly capture summaries through your browser to improve the efficiency of information access.
- Tana: Organize and manage summaries in Tana to ensure information is systematized.
- Obsidian: Import the summarized content into Obsidian for your in-depth analysis and links to related knowledge.
- Logseq: Dynamic notes are taken in Logseq to ensure that information is updated and utilized in real time.
With these multi-platform synchronization features, BibiGPT not only optimizes your summarization experience, but also provides more possibilities for information management and sharing. Whether in work or study, BibiGPT can be your indispensable assistant.
How to synchronize operations
Email synchronization
step by step instructions
- Visit the account binding page: First, log in to your BibiGPT account and navigate to the "Bindings" option in the "Account Settings". On this page, you will see several configurations, including the Email address configuration.
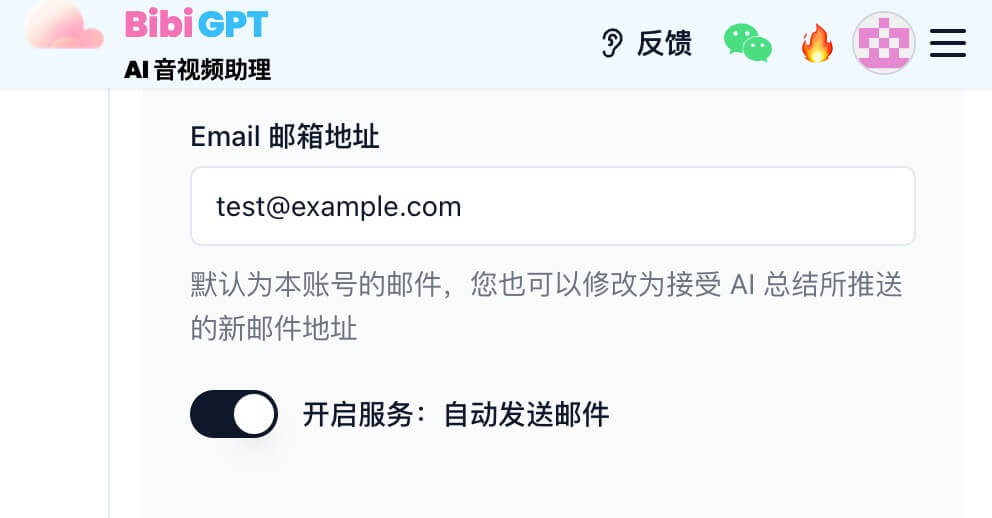
- Enter e-mail address: In the Email email address configuration item, enter the email address that you want to receive AI summary pushes. Make sure you enter the correct email address to receive emails.
- Enable automatic sending service: Once you have finished entering your email address, find the "Enable Service: Automatically Send Email" button and click on it to activate this feature. You will be prompted to confirm the settings, after that, your mailbox will be synchronized with BibiGPT.
- Save Settings: Scroll to the bottom of the page and click on the "Save" button to ensure that all changes are recorded. This step is critical to ensure that your settings take effect.
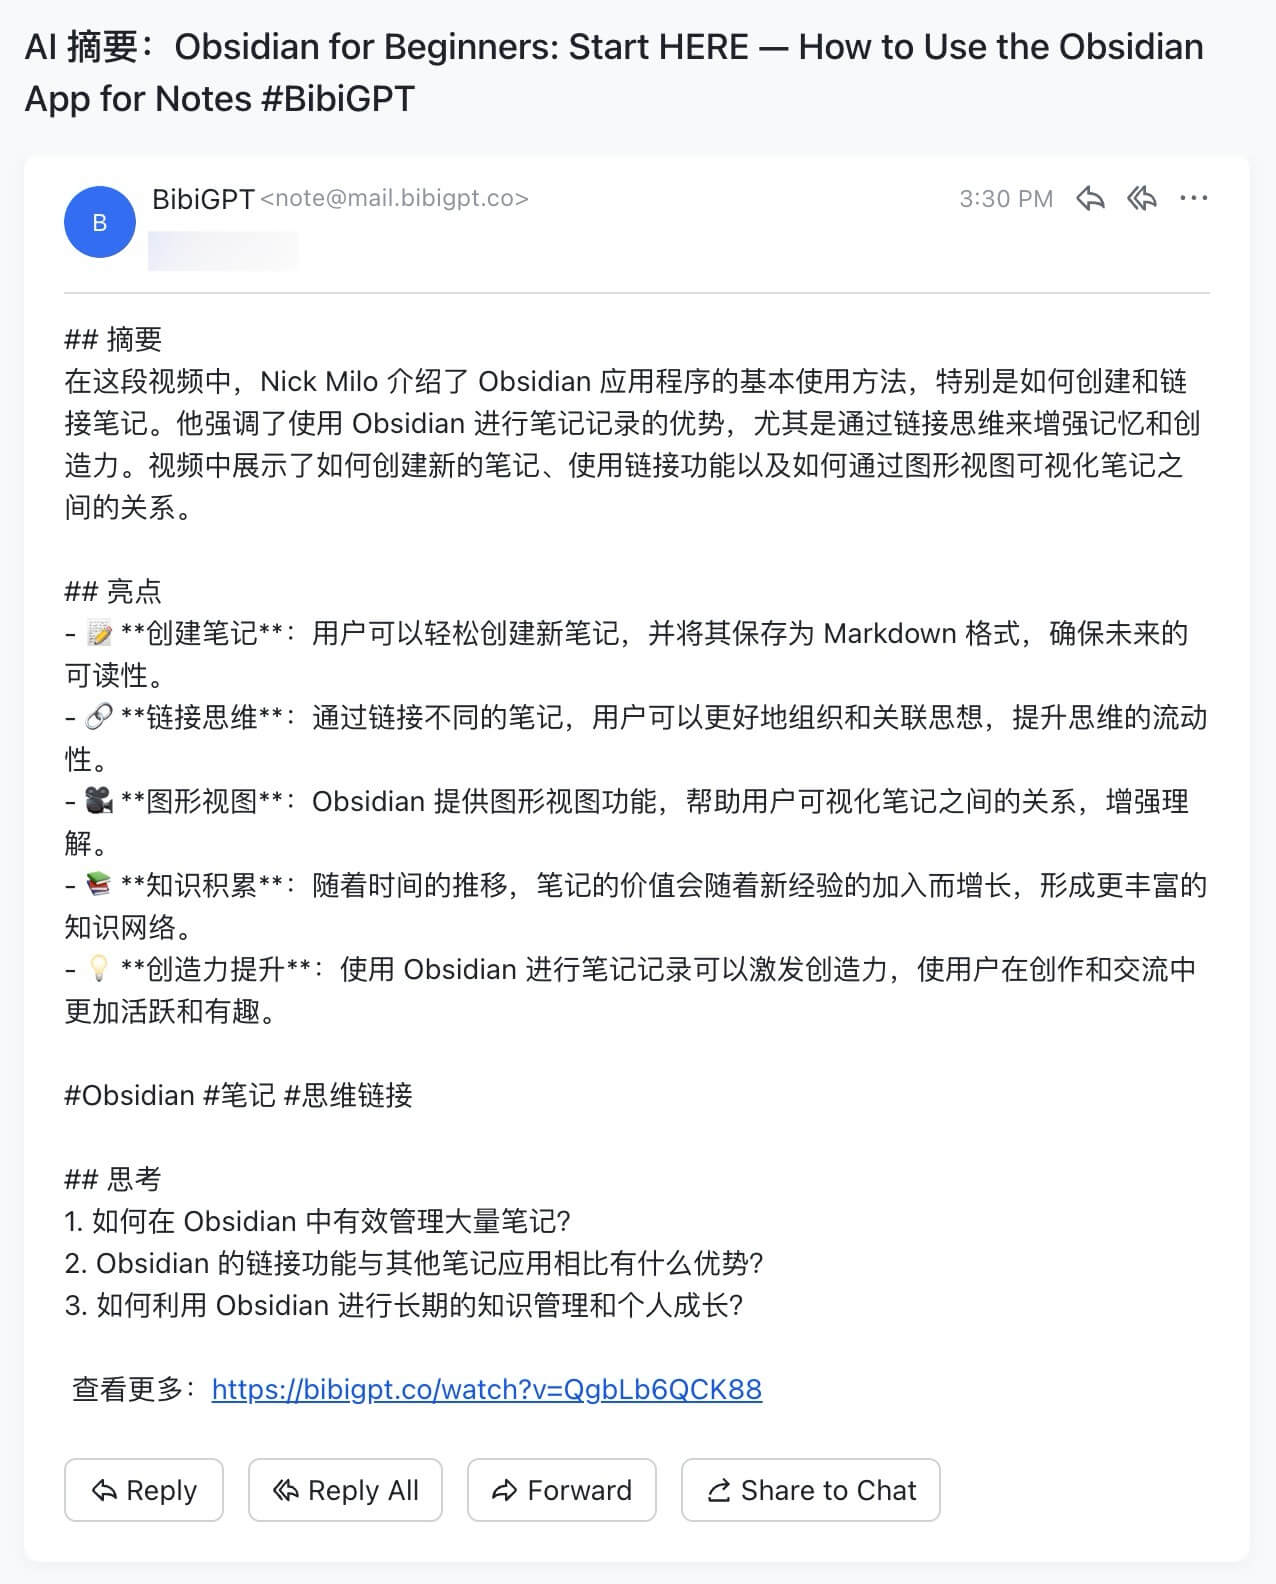
After configuring the above steps, every time BibiGPT completes an audio/video summary, the relevant content will be automatically sent to your designated email address. This feature not only improves work efficiency, but also ensures that you can get important information anytime and anywhere, which helps you study and work.
Notion synchronization
step by step instructions
- Visit the account binding page: First, log in to your BibiGPT account and navigate to the "Bindings" option in the "Account Settings" section. Here, you will see several configuration options, including Notion Token configuration.
- Get Notion Token: Click the following link to visit Notion's integration page:Notion Integration Page(opens in a new tab). On this page, you will need to create a new integration and the system will generate a unique Notion Token for you. be sure to copy the Token for subsequent use.
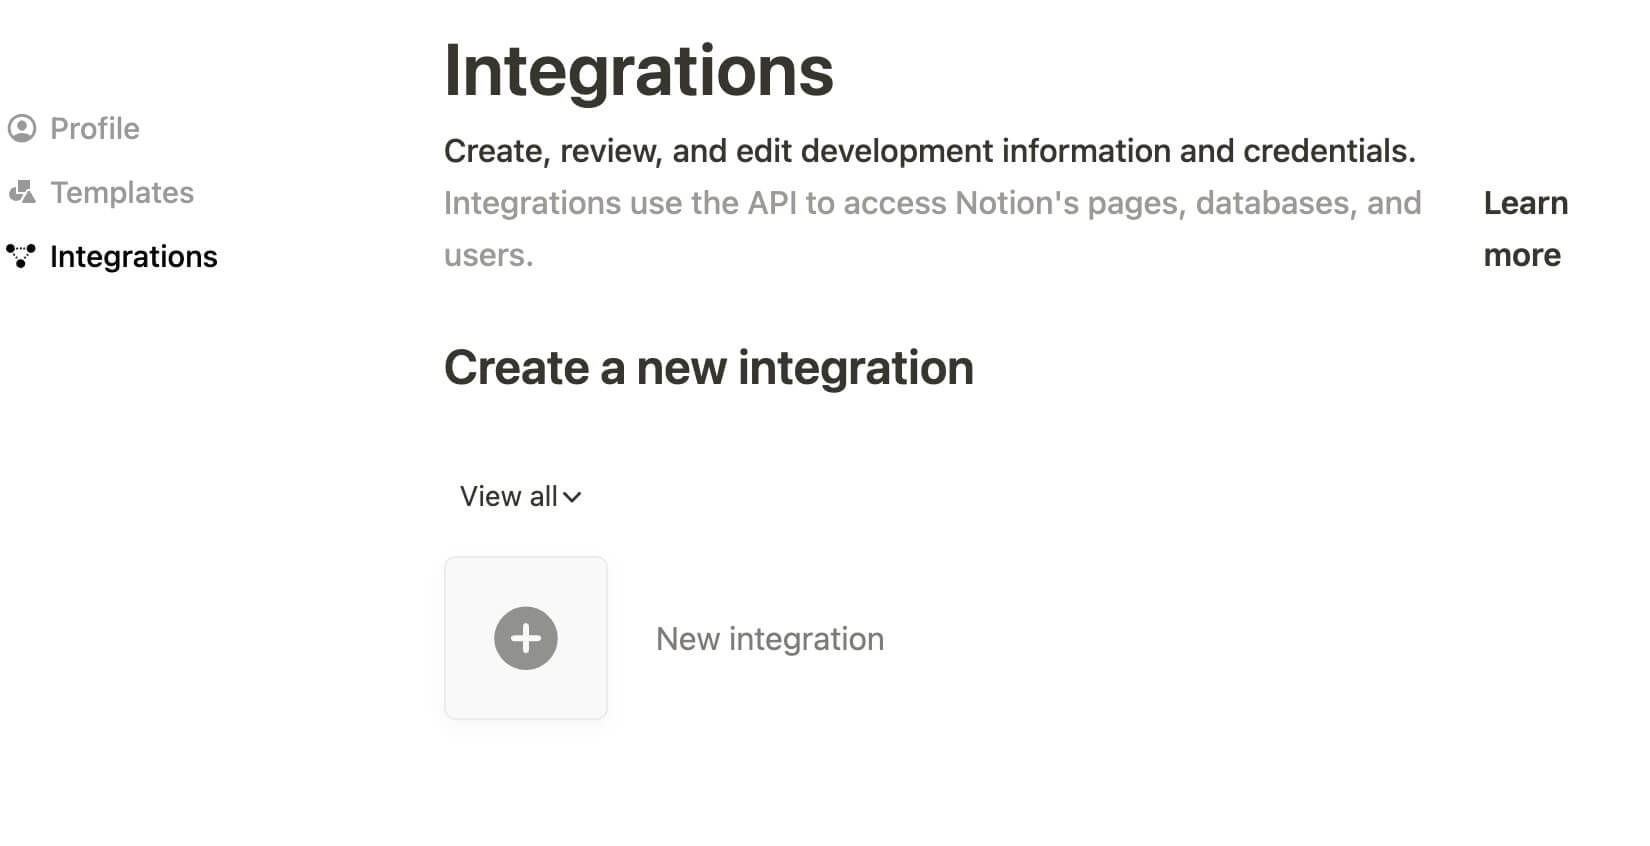
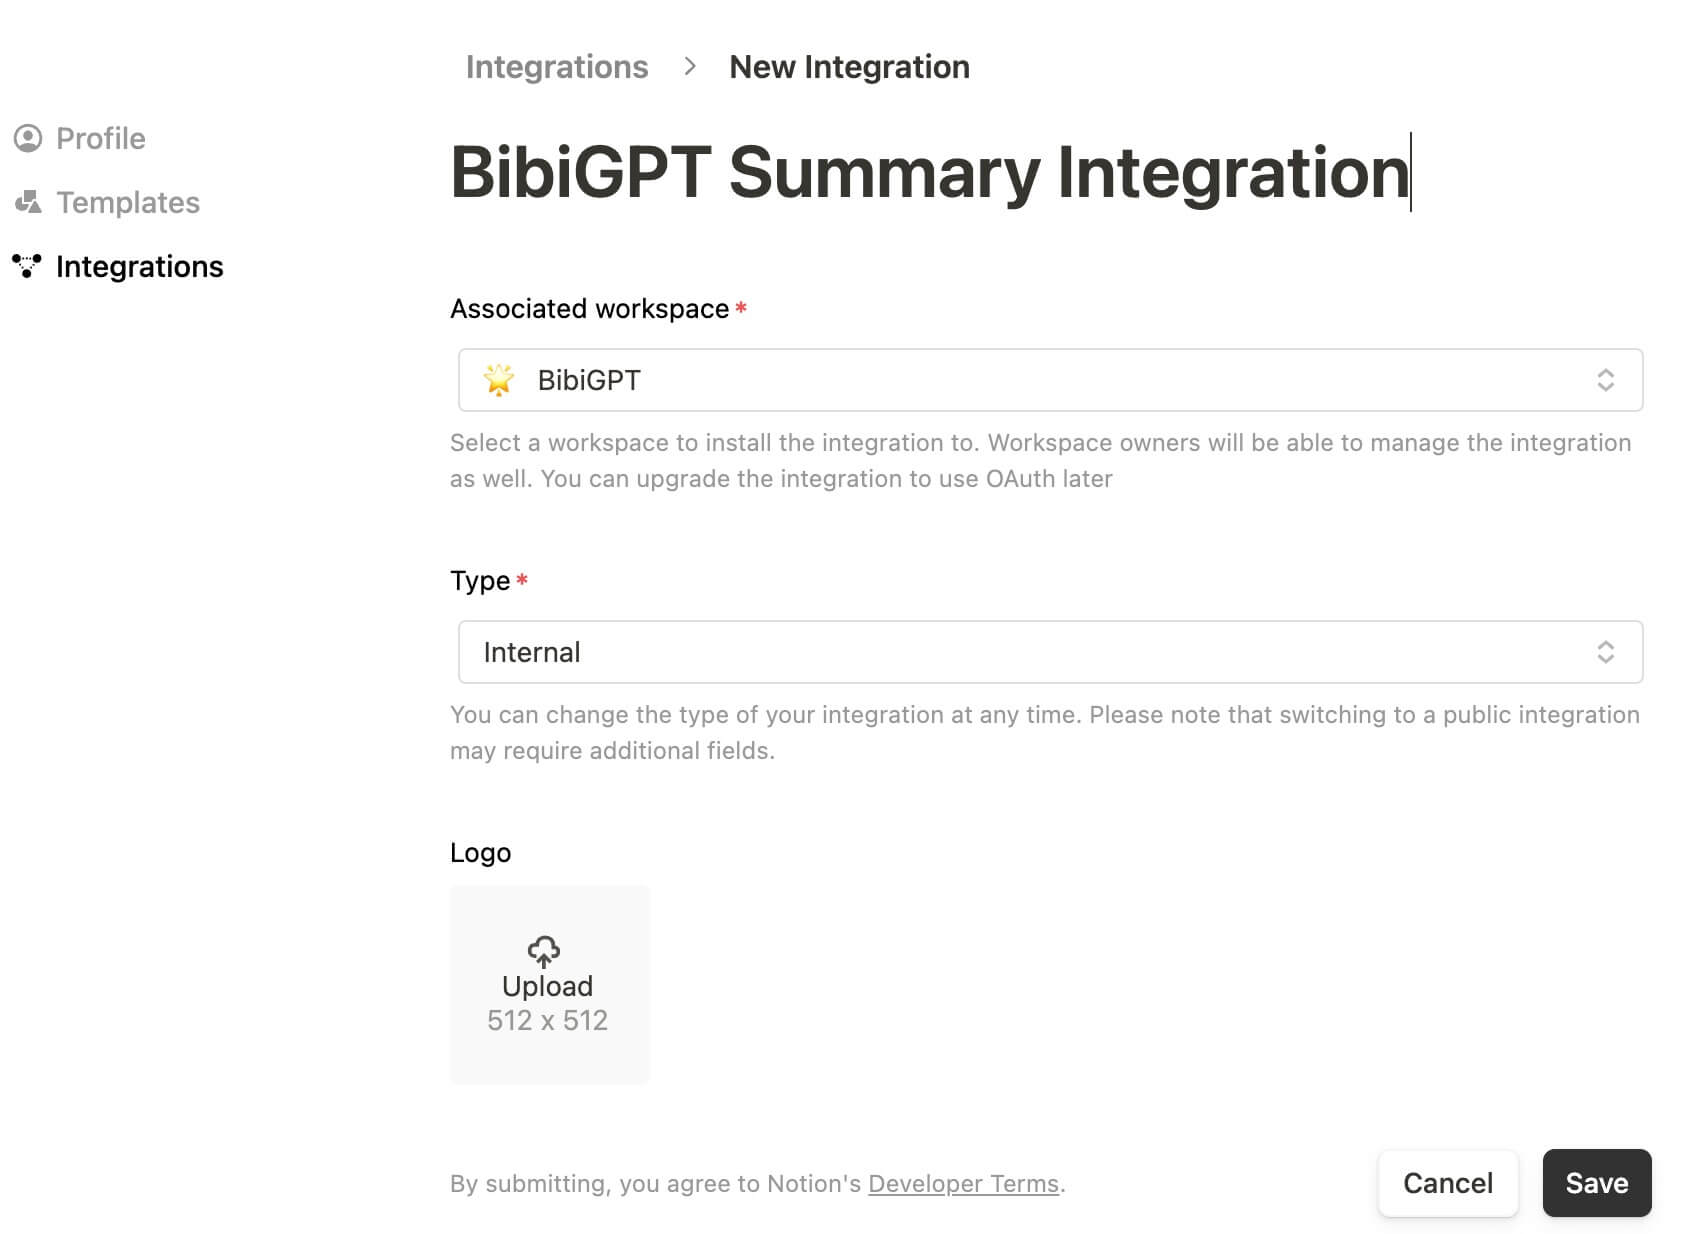
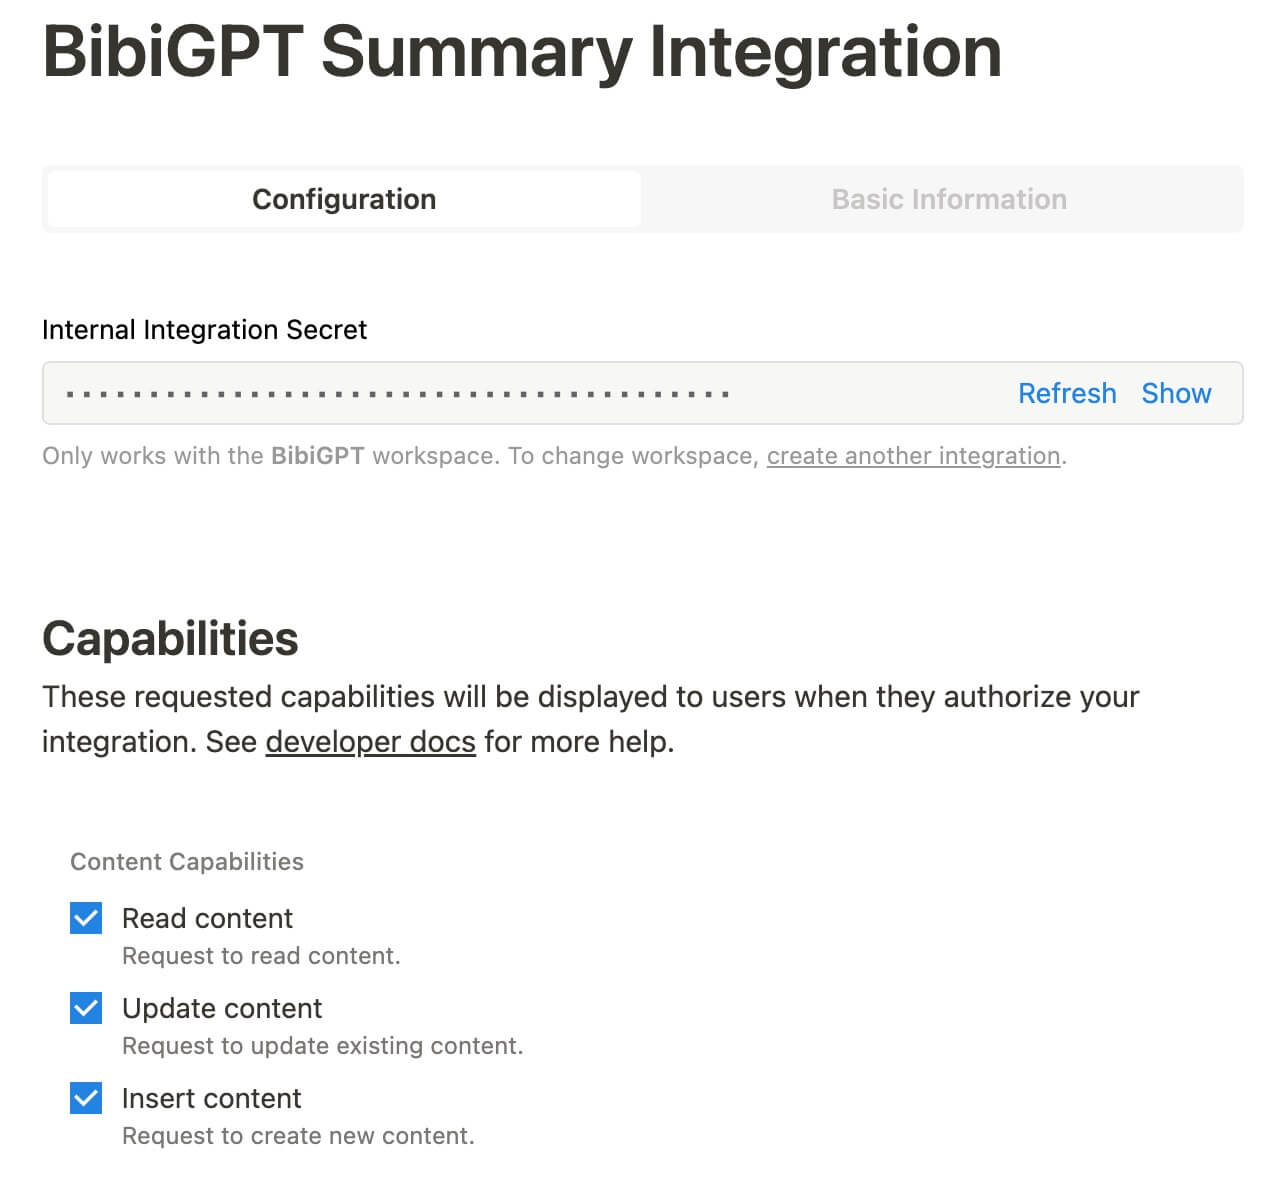
- Paste the Token into the configuration item: Return to BibiGPT's account binding page and paste the Notion Token you just copied into the Notion Token configuration item. Make sure the input is correct to ensure the normal use of subsequent functions.
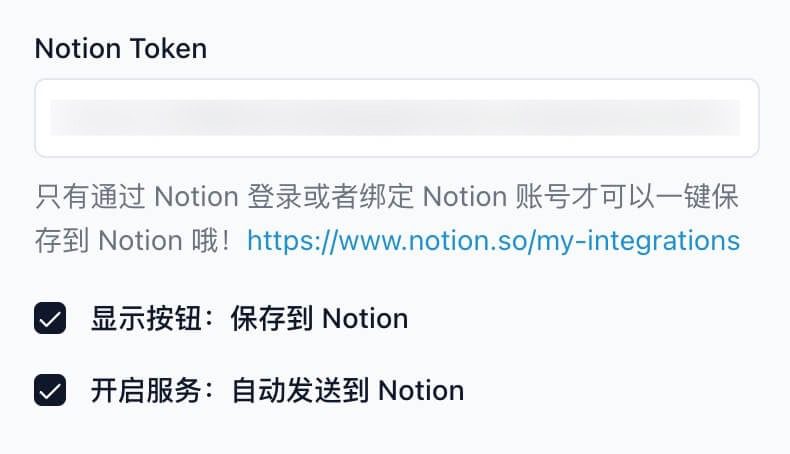
- Select Function Options: After the Token is pasted, you can choose whether to turn on the "Show Button: Save to Notion" or "Turn on Service: Automatically Send to Notion" feature, depending on your needs. The former allows you to manually save the AI summary to Notion after generating it, while the latter will automatically send the summary to Notion.
- Save Settings: Scroll to the bottom of the page and click on the "Save" button to ensure that all changes are recorded. This step is critical to ensure that your settings take effect.
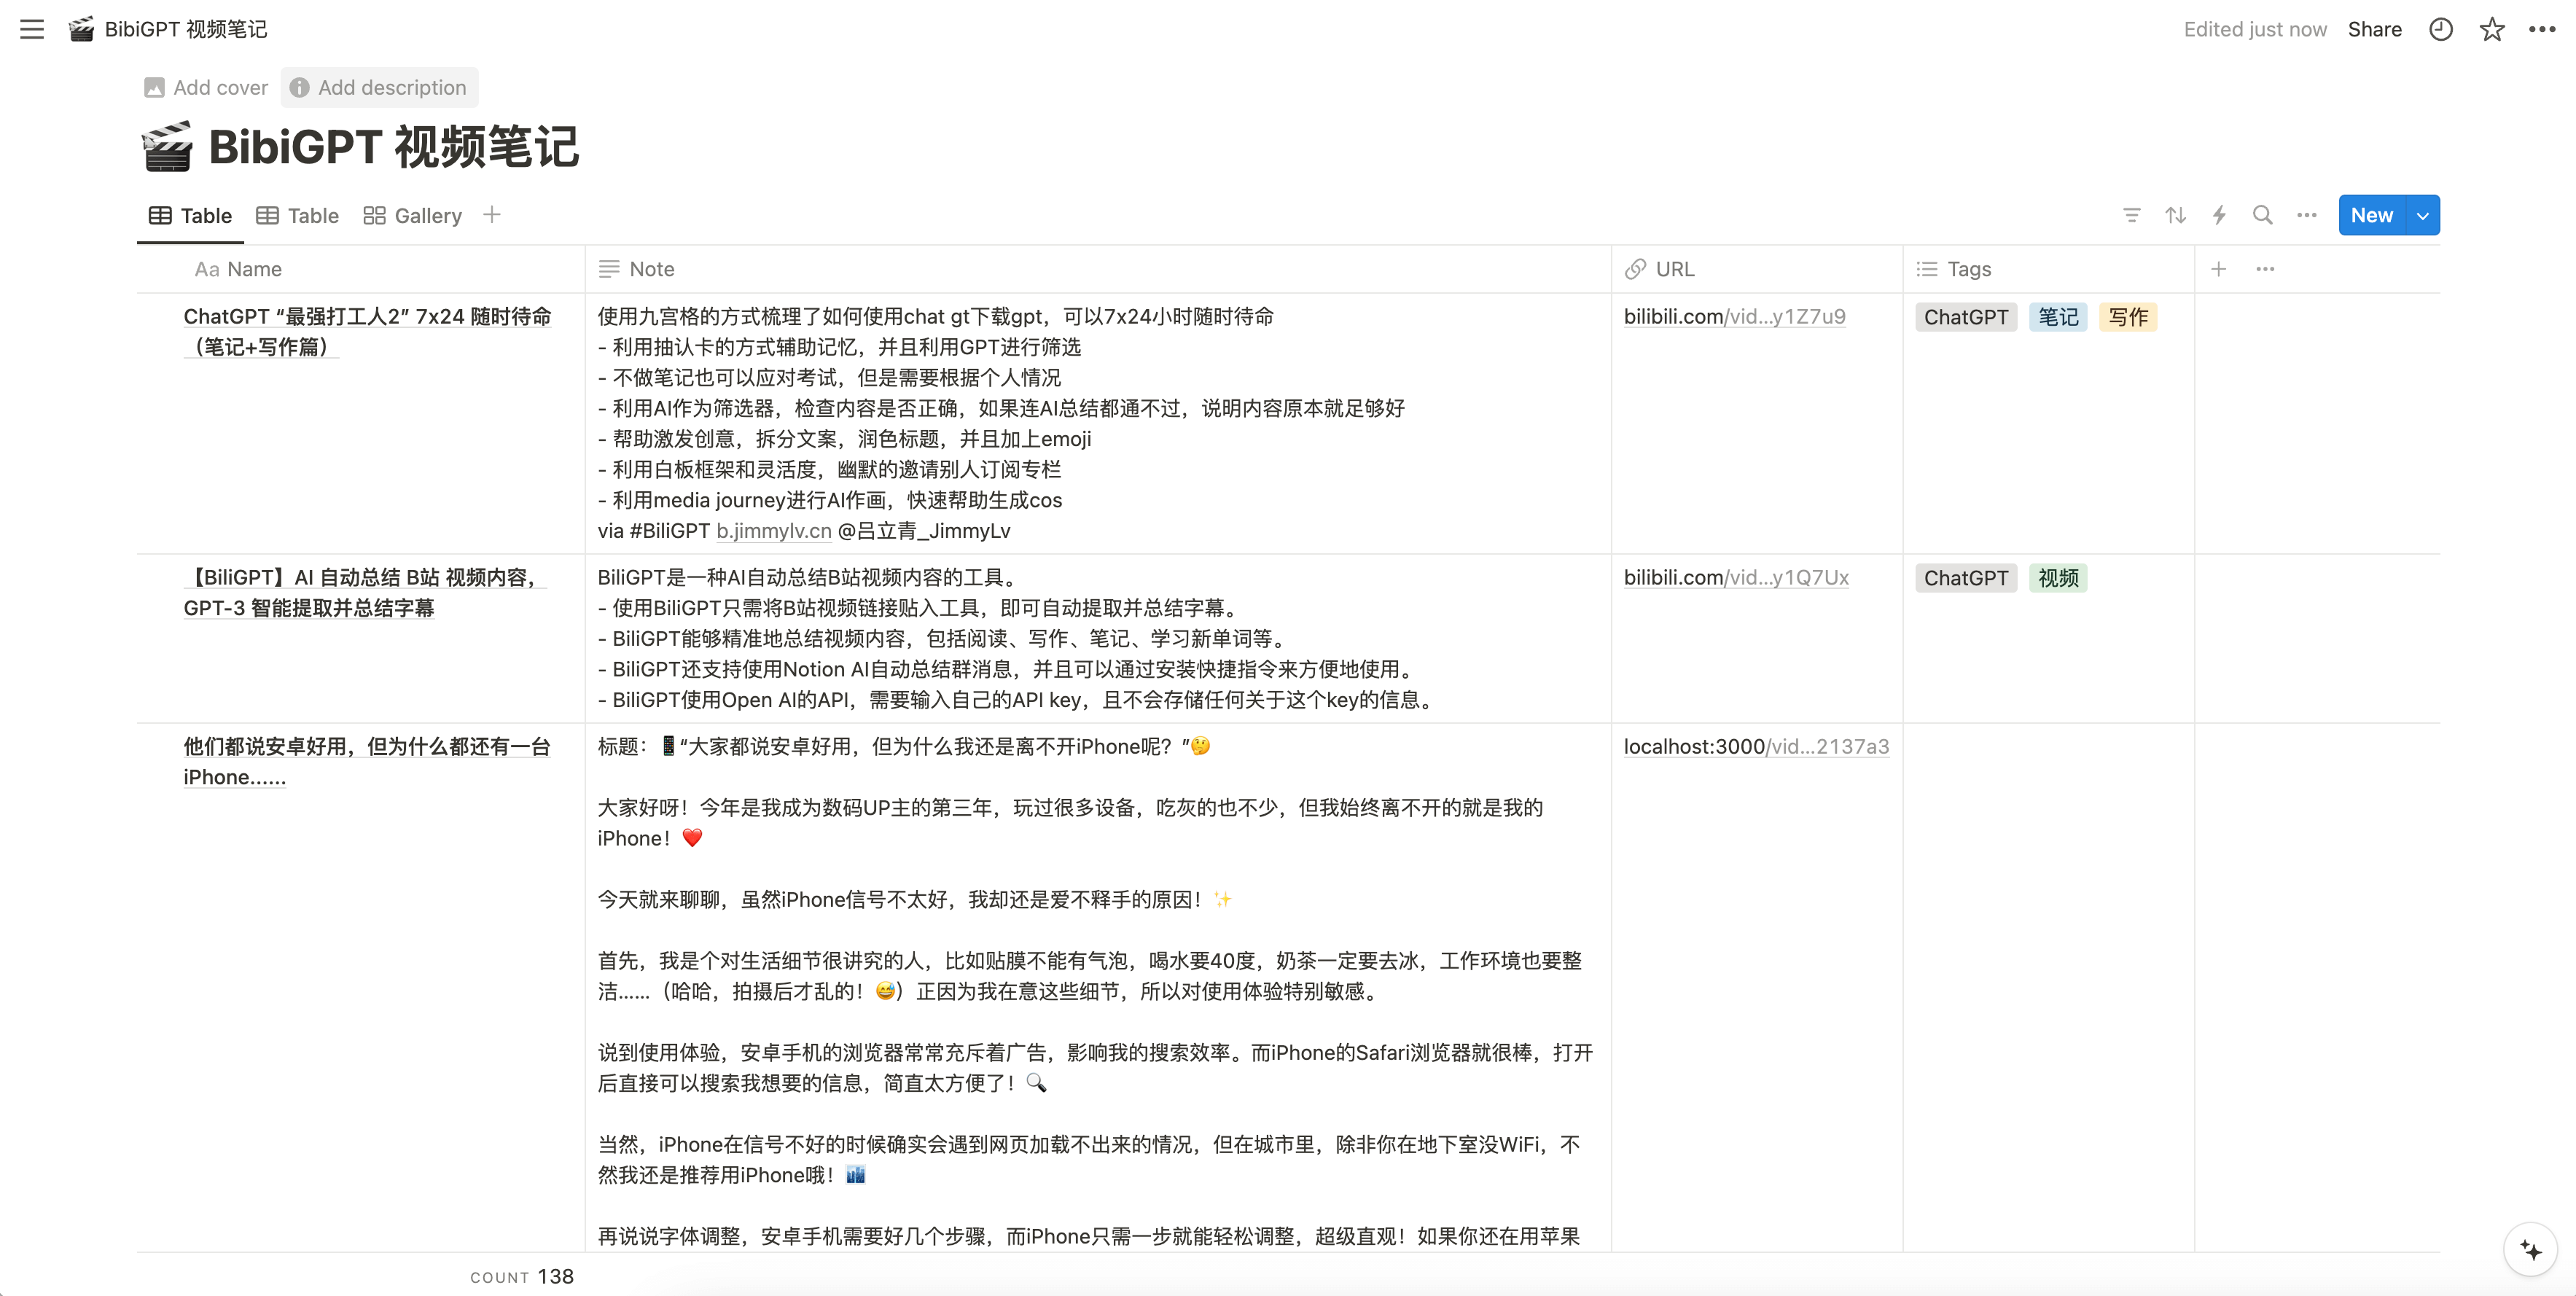
After completing the above steps, you will be able to easily sync the audio and video summaries generated by BibiGPT to Notion, a feature that will help you manage and organize information more efficiently and make your workflow smoother.
Flomo synchronization
step by step instructions
- Visit the account binding page: First, log in to your BibiGPT account and navigate to the "Bindings" option in the "Account Settings". Here, you will see several configuration options, including the Flomo Webhook configuration.
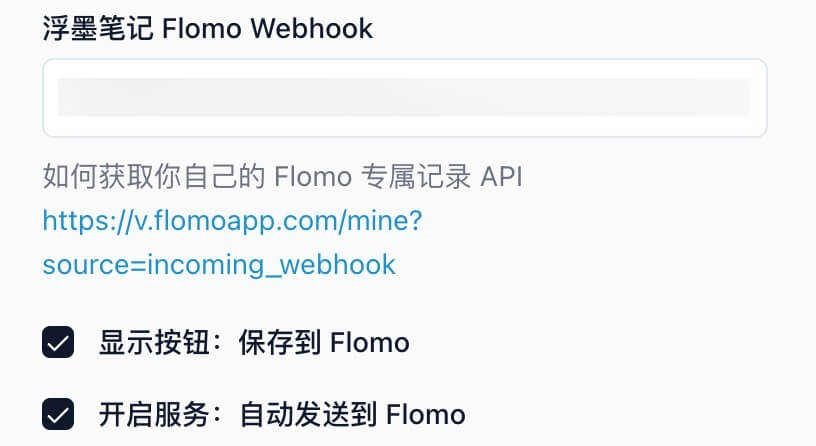
- Duplicate Proprietary Records API: Under Floating Ink Notes Flomo Webhook Configuration, click on the link to access Flomo's proprietary logging API page:Flomo Exclusive Records API Links(opens in a new tab)Copy the link to your record API. On the page, find and click on the "Copy Link" button to access your proprietary records API.
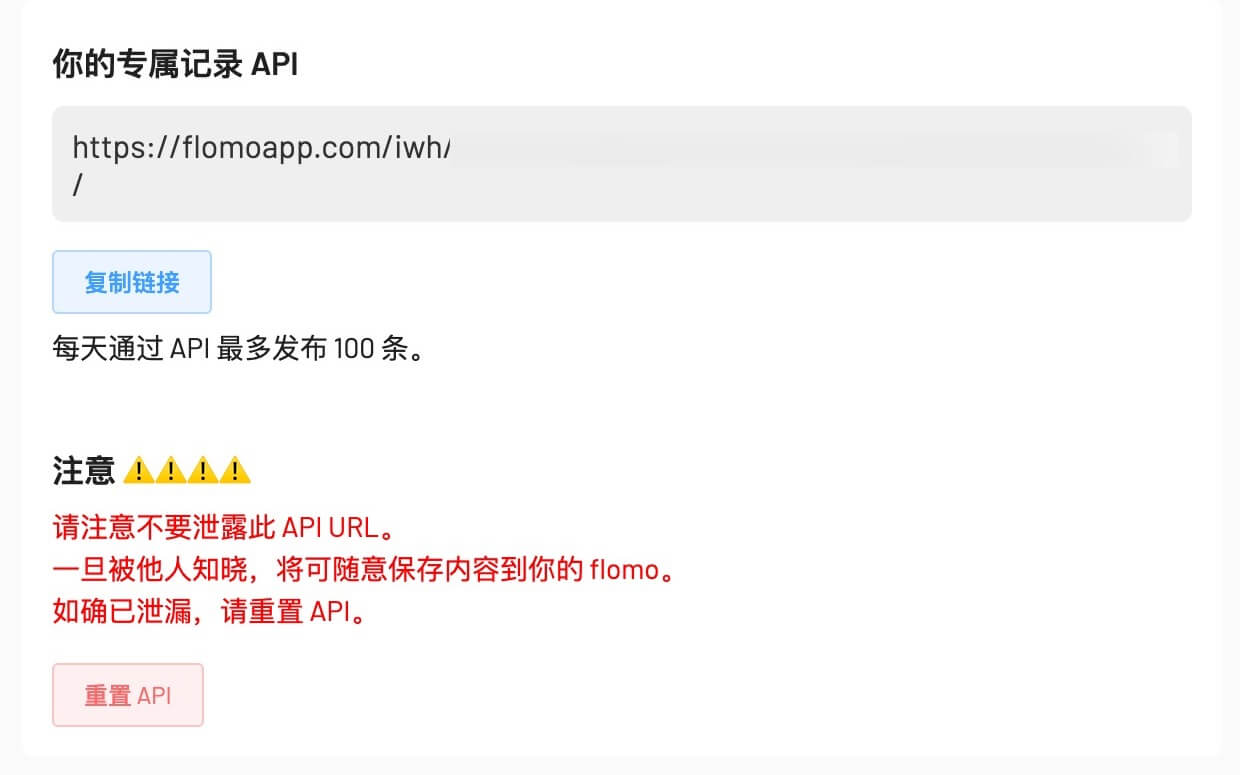
- Paste the API and configure the optionsReturn to BibiGPT's account binding page, and paste the API you just copied into the configuration input box of Flomo Webhook. After that, choose whether to enable "Save to Flomo" or "Auto Send to Flomo" function as needed. The former allows you to manually save the AI summary to Flomo after generating it, while the latter will automatically send the summary to Flomo.
- Save Settings: Scroll to the bottom of the page and click on the "Save" button to ensure that all changes are recorded. This step is critical to ensure that your settings take effect.
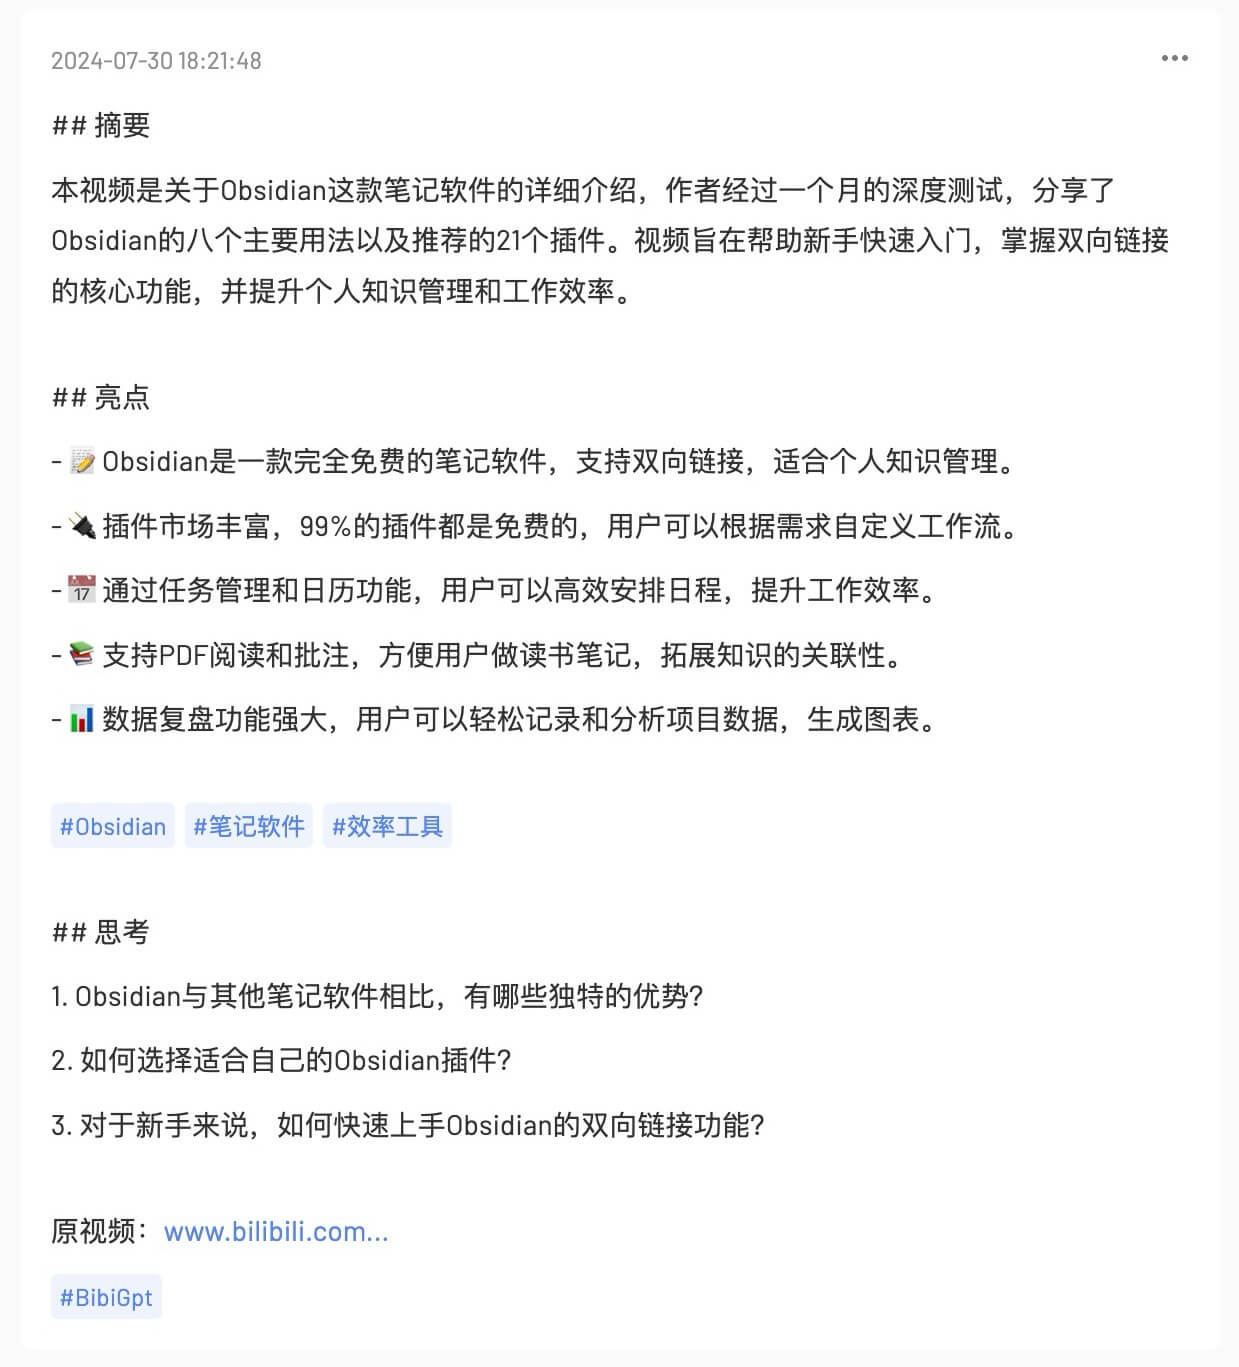
After completing the above steps, you will be able to easily synchronize the audio and video summaries generated by BibiGPT to Flomo, helping you better manage and record important information. The realization of this feature will greatly enhance your work efficiency and allow you to access the knowledge and data you need anytime and anywhere.
Flying Book Synchronization
step by step instructions
- Visit the account binding page: First, log in to your BibiGPT account and navigate to the Bindings option in Account Settings. Here, you will see several configuration options, including the Flybook Webhook configuration.
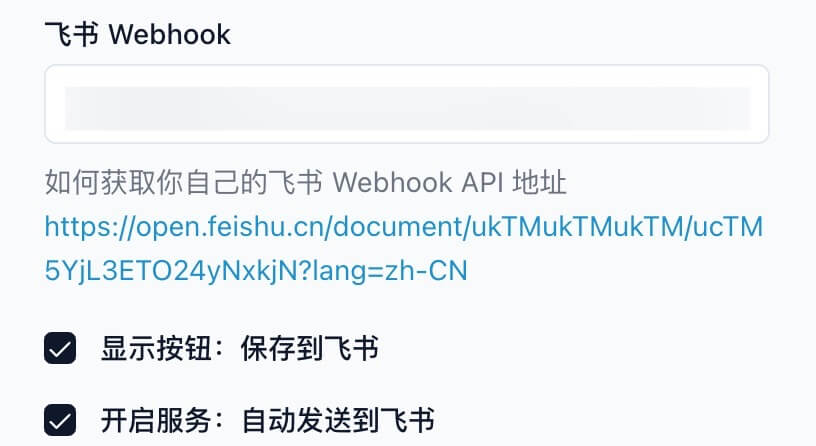
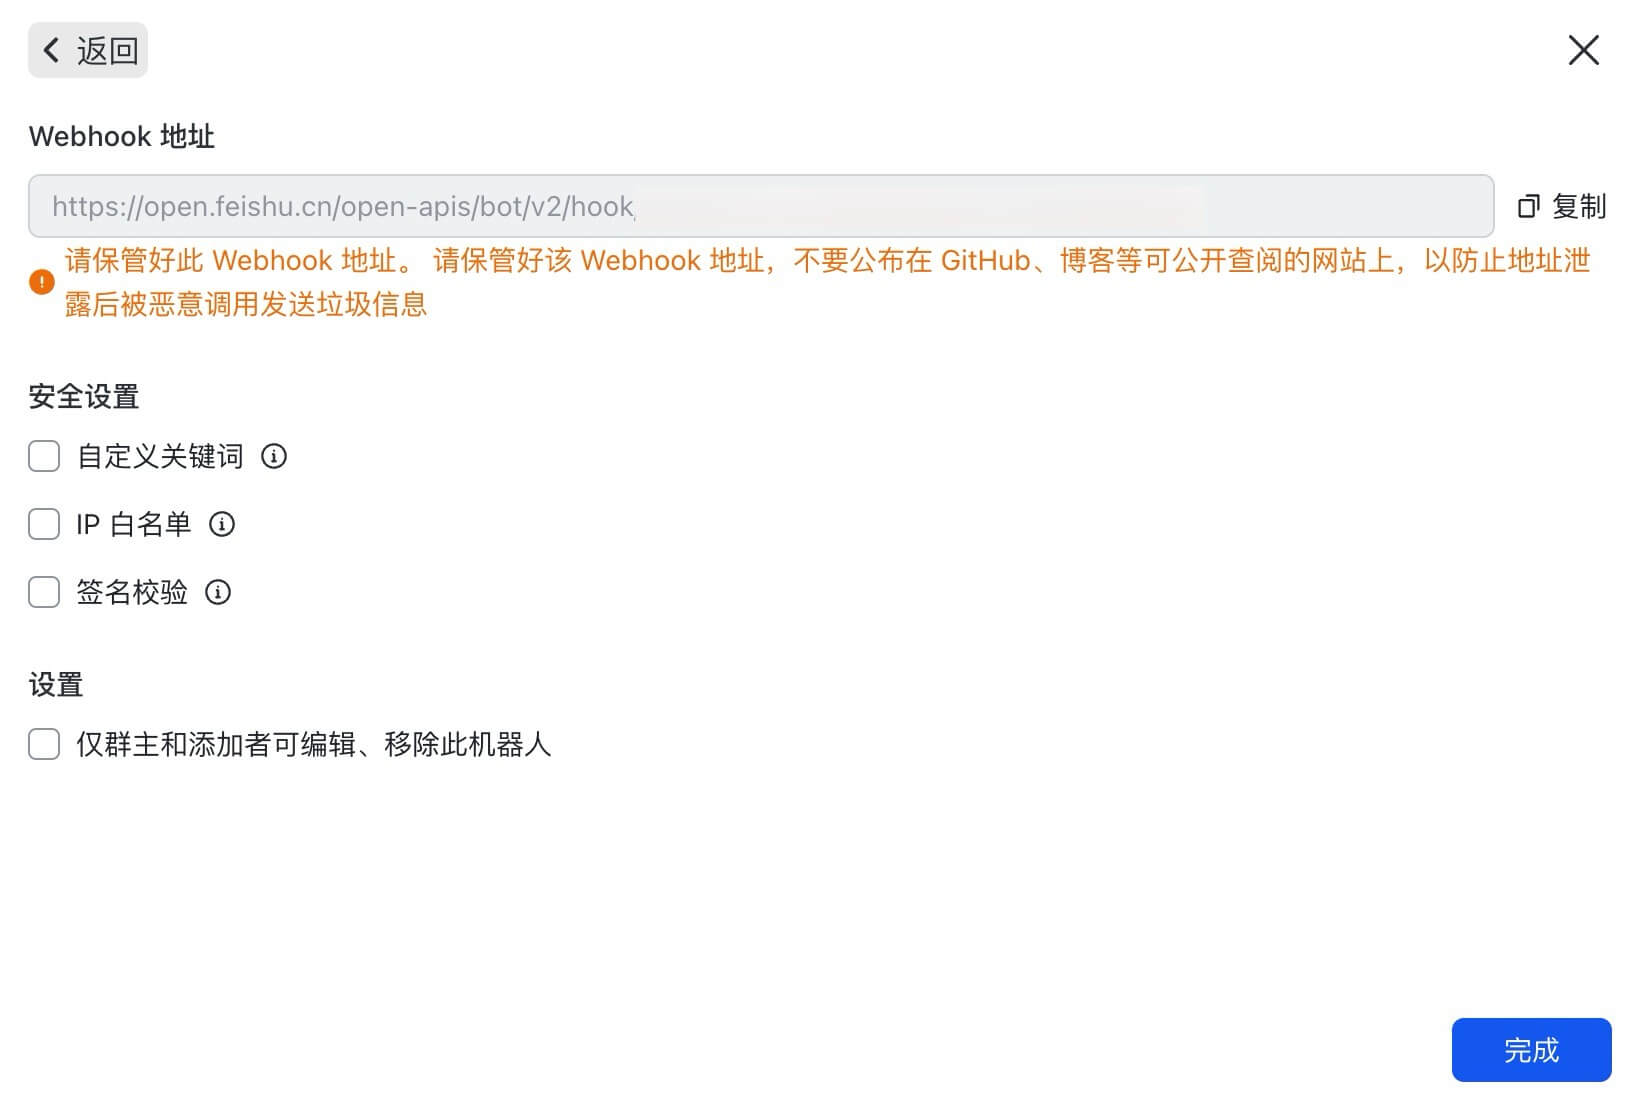
- Get Webhook Address: Click on the link below the Flying Book Webhook Configuration item to access theCustomized Robot User Guide - Development Guide - Development Documentation - Flying Book Open Platform(opens in a new tab). On the page you will find detailed steps on how to add a custom bot to a group and get a Webhook address.
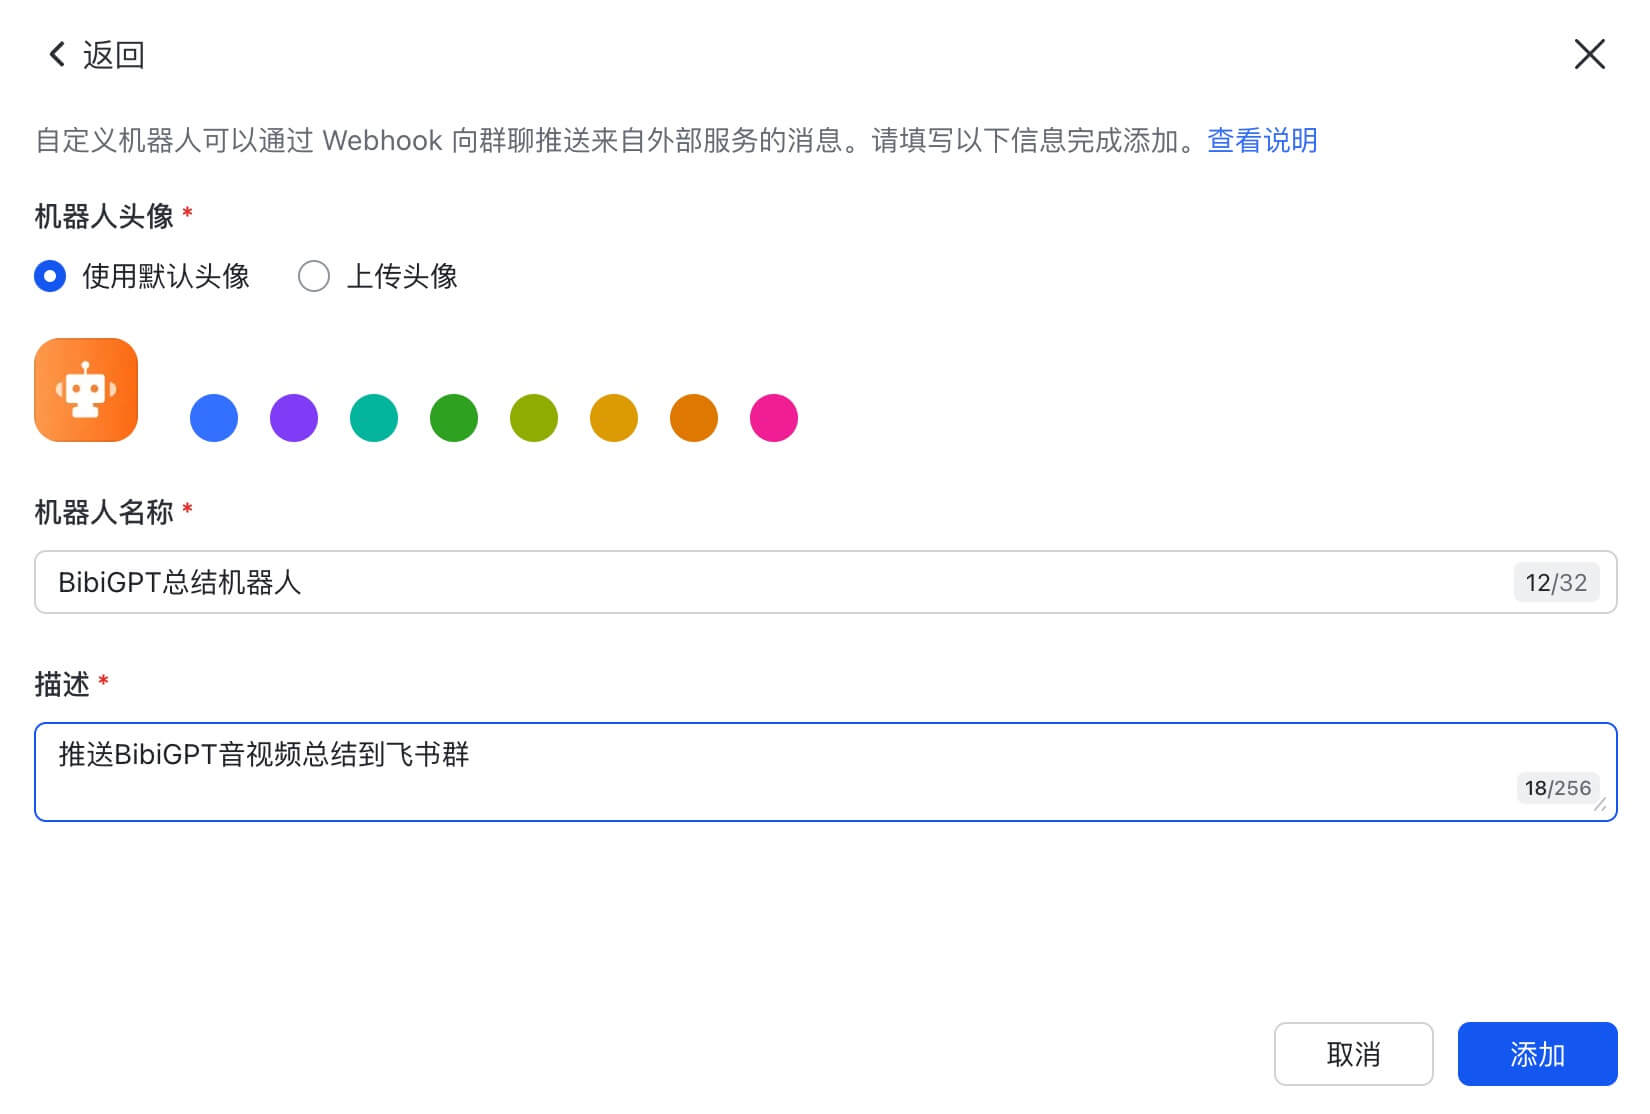
- Configuring the Webhook Address: Back to the account binding page of BibiGPT, paste the Flying Book Webhook address you just got into the input box of Flying Book Webhook Configuration item. Then, according to your needs, choose whether to enable "Show Button: Save to Flybook" or "Enable Service: Send to Flybook Automatically". The former allows you to manually save the AI summary to Flybook after generating it, while the latter will automatically send the summary to Flybook.
- Save Settings: Scroll to the bottom of the page and click on the "Save" button to ensure that all changes are recorded. This step is critical to ensure that your settings take effect.
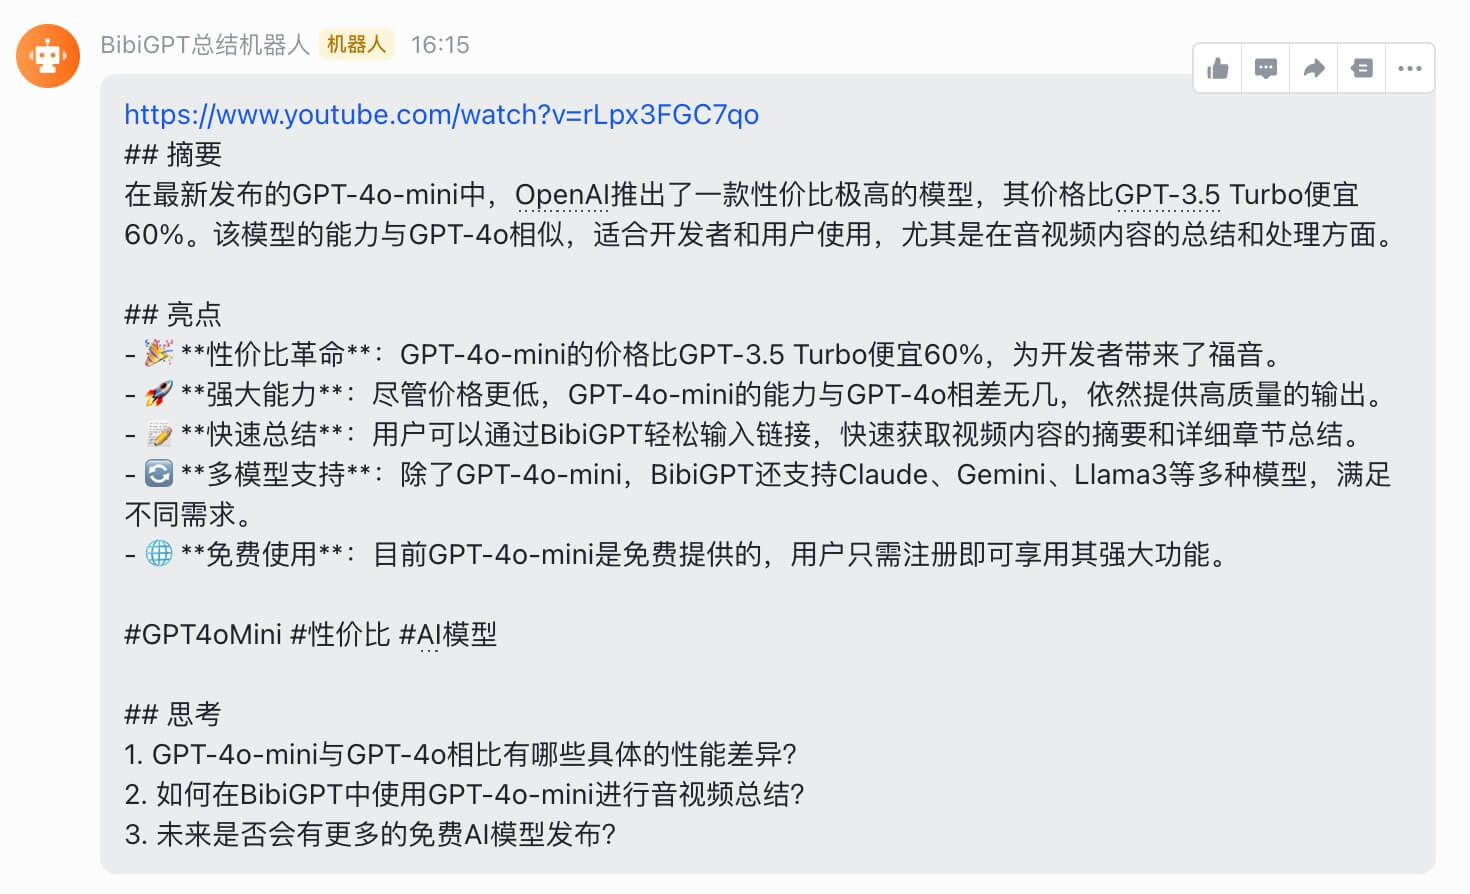
After completing the above steps, you will be able to smoothly synchronize the audio and video summaries generated by BibiGPT to Flybook, which will enhance your work efficiency and make it easy for you to access and share important information at any time.
Readwise synchronization
step by step instructions
- Visit the account binding page: First, log in to your BibiGPT account and navigate to the "Bindings" option in the "Account Settings" section. Here you will see the Readwise Token Configuration item, ready for synchronization settings.
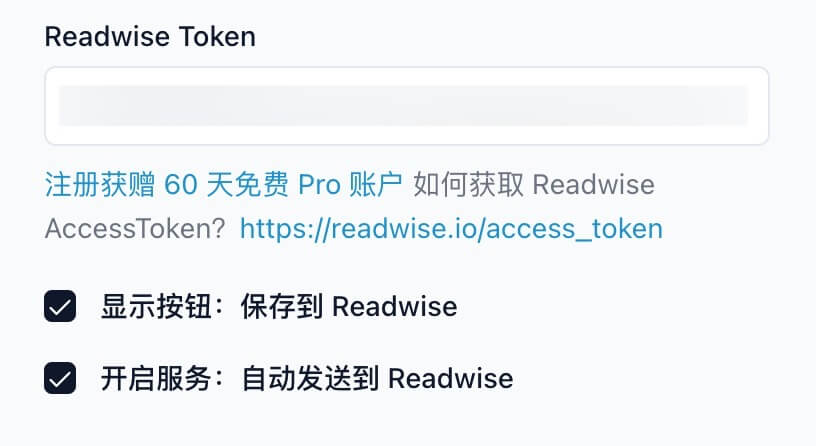
- Register for a Readwise account: If you don't already have a Readwise account, you can click on theReadwise(opens in a new tab)link to register. After registering, you will receive a free 60-day Pro Member account and Reader access to the full functionality of Readwise.
- Get Access Token: After registering or already being a Readwise member, go toAccess Token | Readwise(opens in a new tab)Link. On the Readwise website, click the "Get Access Token" button to generate your Access Token.
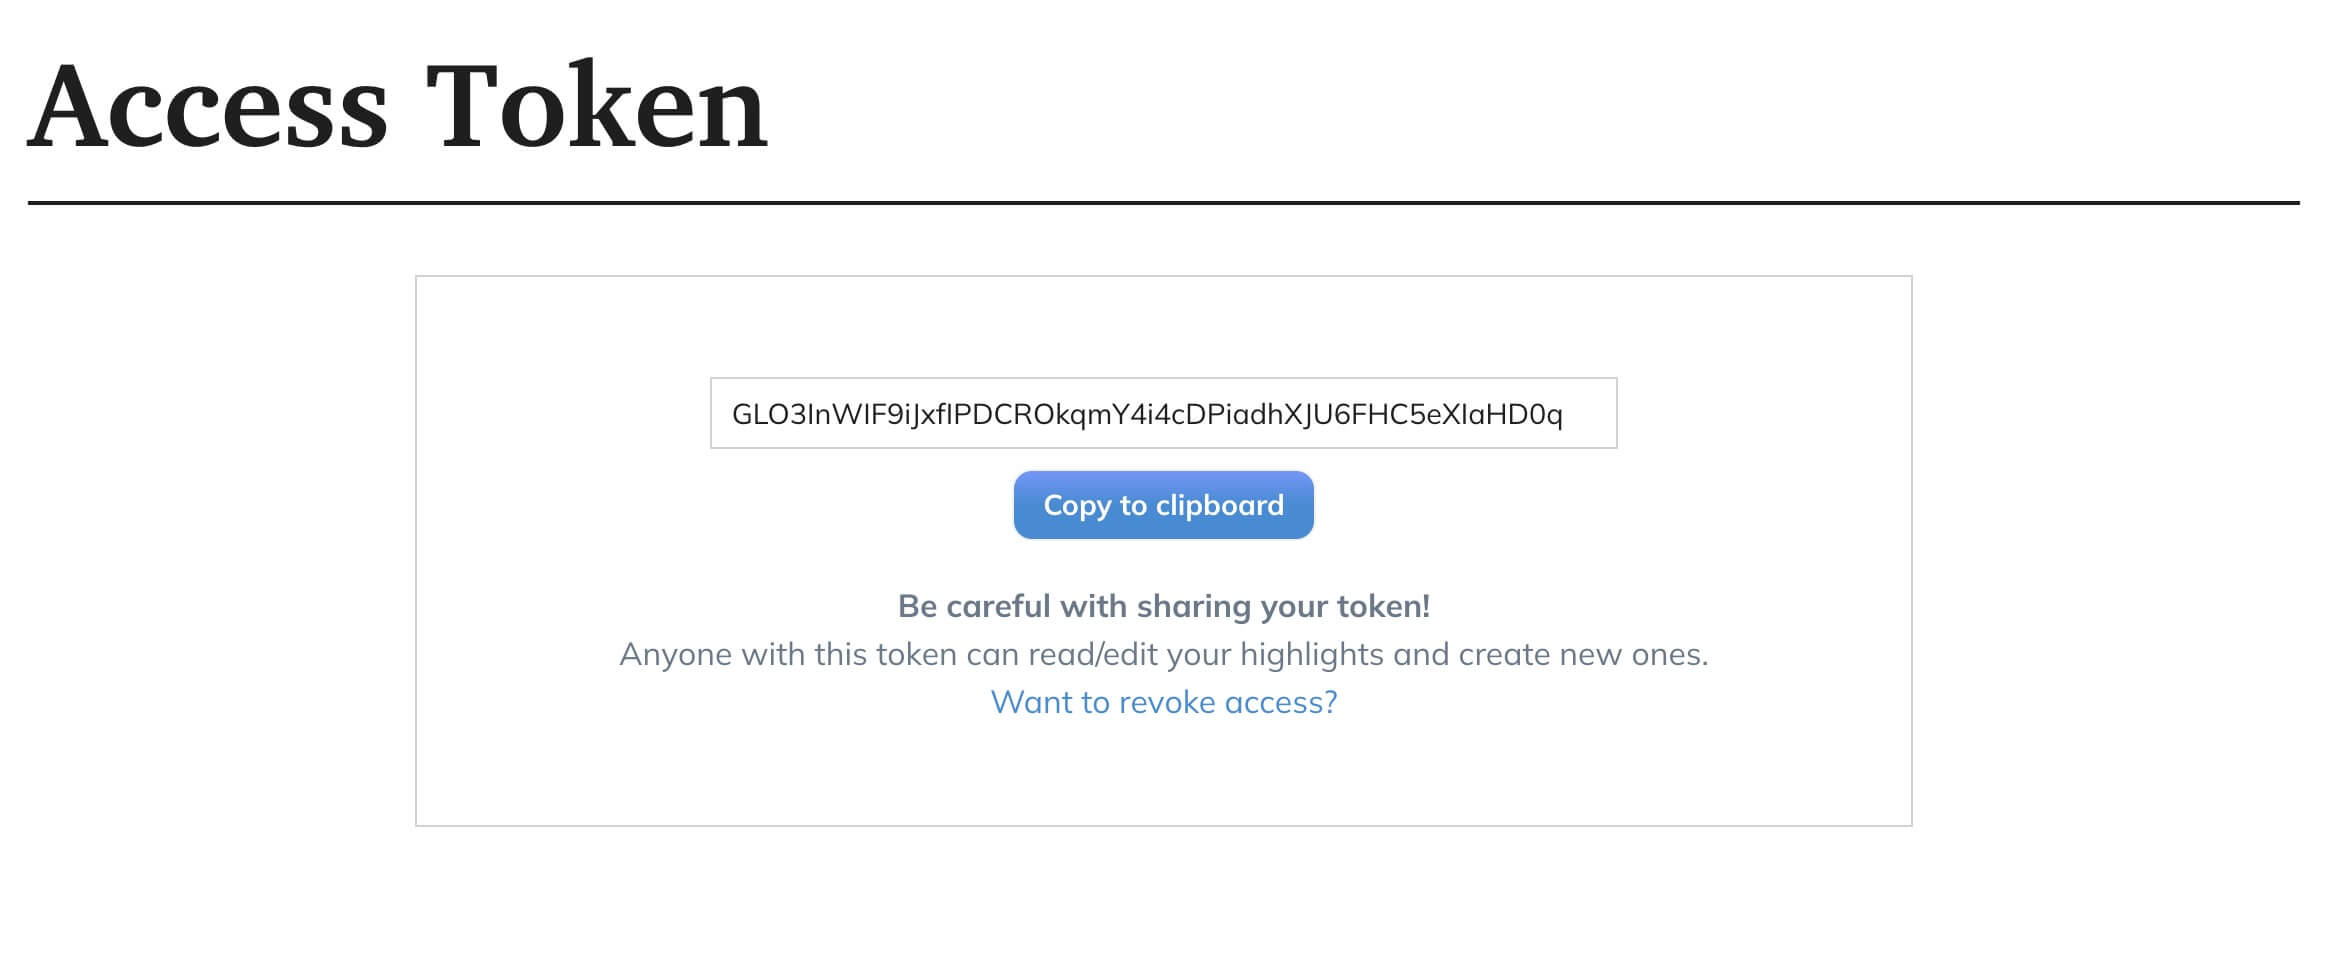
- Paste the Token and configure the options: Go back to BibiGPT's Account Binding page and paste the token you just got into the Readwise Token Configuration item. next, you can choose whether to enable the "Show Button: Save to Readwise" or "Automatically Send to Readwise" feature. Readwise" feature. The former allows you to manually save the AI summary to Readwise after it has been generated, while the latter will automatically send the summary to Readwise.
- Save Settings: Scroll to the bottom of the page and click on the "Save" button to ensure that all changes are recorded. This step is critical to ensure that your settings take effect.
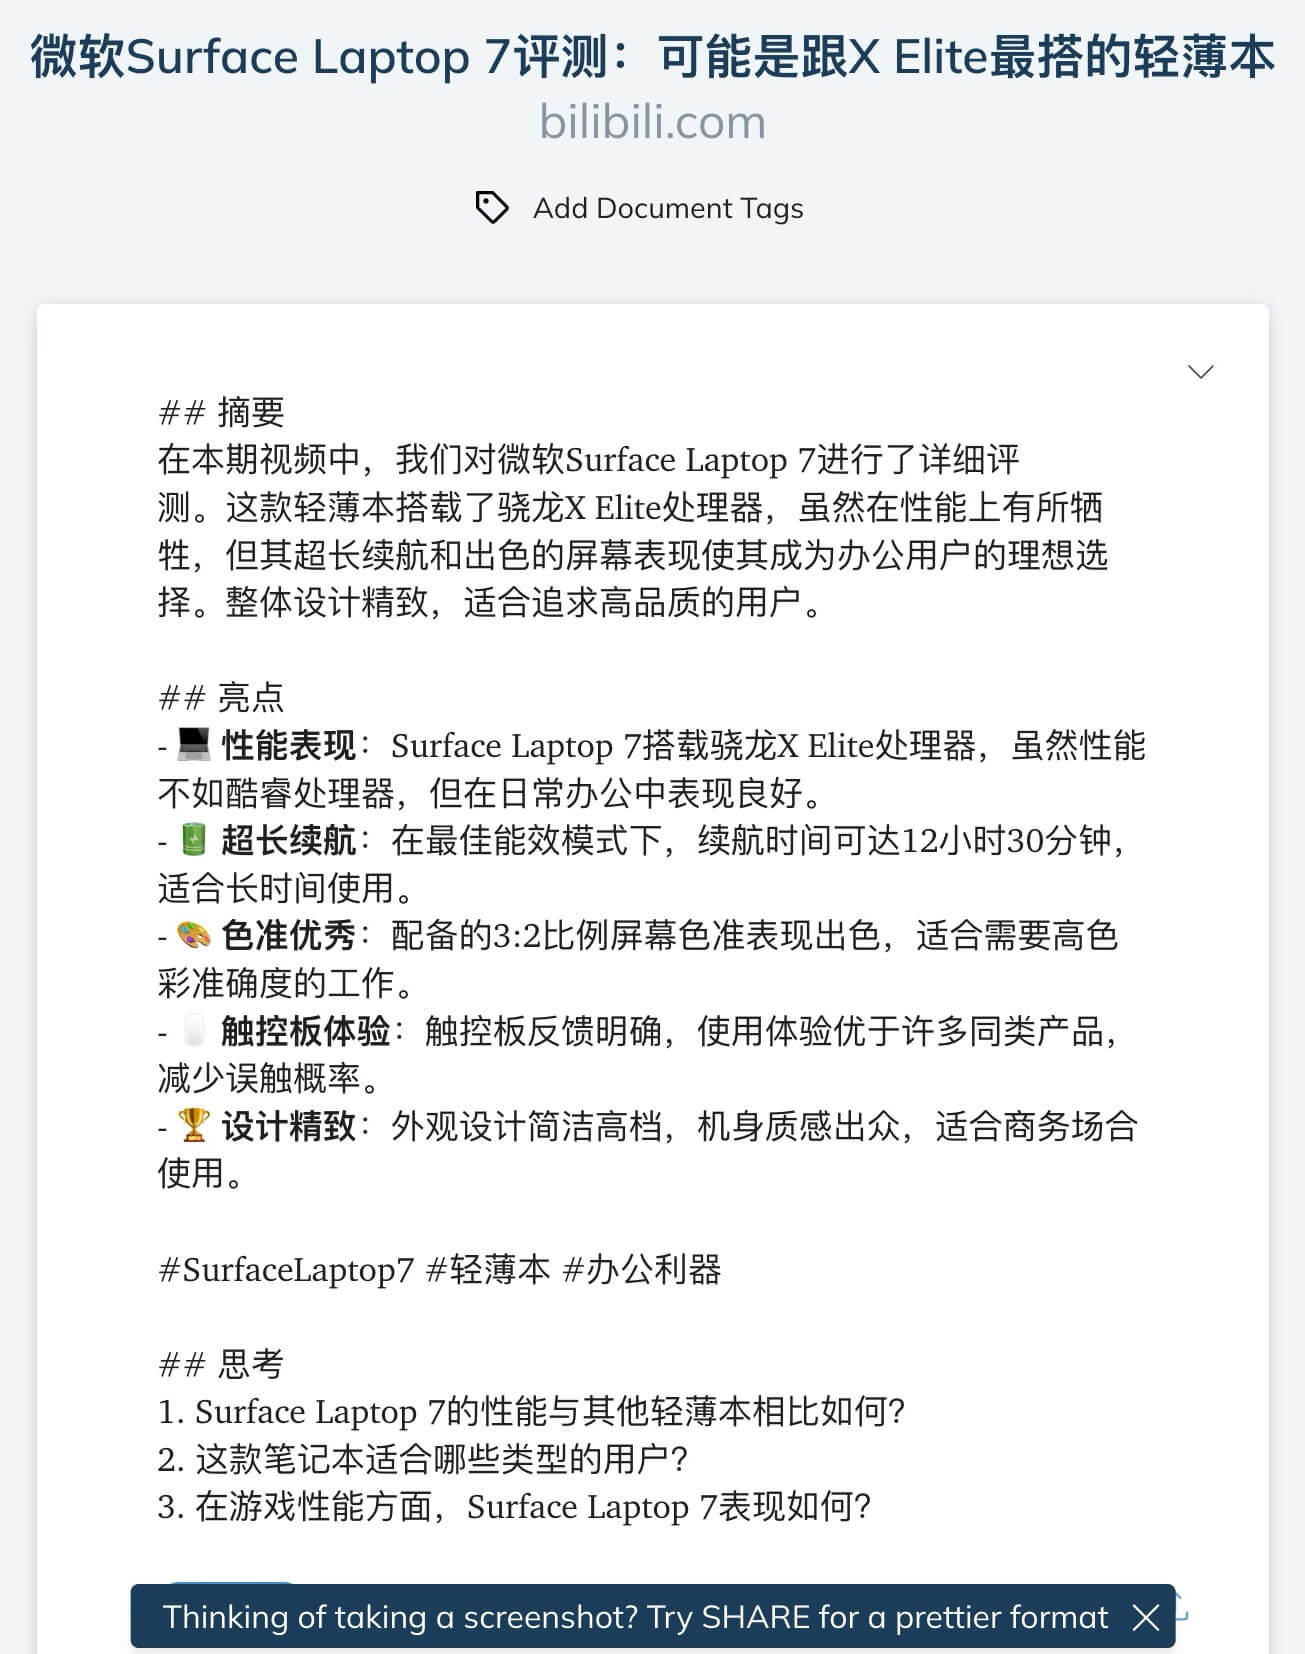
After completing the above steps, you will be able to easily synchronize the audio and video summaries generated by BibiGPT to Readwise, helping you to better manage and review important information. The introduction of this feature not only improves your work efficiency, but also makes knowledge management more convenient.
Tana synchronization
step by step instructions
- Visit the account binding pageFirst, log in to your BibiGPT account and go to the "Bindings" option in "Account Settings". On this page, you will find the Tana Token Configuration item and you are ready to proceed.
- Get Tana Token: Go to Tana's official documentation and visit the following link to get your Tana API Token:Tana API Token Acquisition Link(opens in a new tab). By following the guidelines in the documentation, you will be able to generate and copy your Tana Token without any problems.
- Paste Token: Return to BibiGPT's account binding page and paste the Tana Token you just copied into the corresponding Tana Token configuration item.
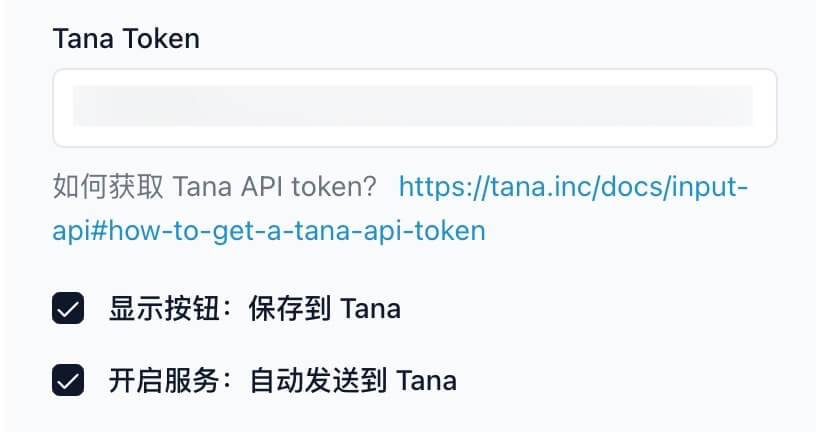
- Configuring Synchronization Options: Depending on your needs, choose whether to turn on the "Show Button: Save to Tana" or "Turn on Service: Send to Tana Automatically" feature. The former allows you to manually save AI summaries to Tana after they are generated, while the latter automatically sends them to Tana.
- Save Settings: Scroll to the bottom of the page and click on the "Save" button to ensure that all changes are recorded. This step is critical to ensure that your settings take effect.
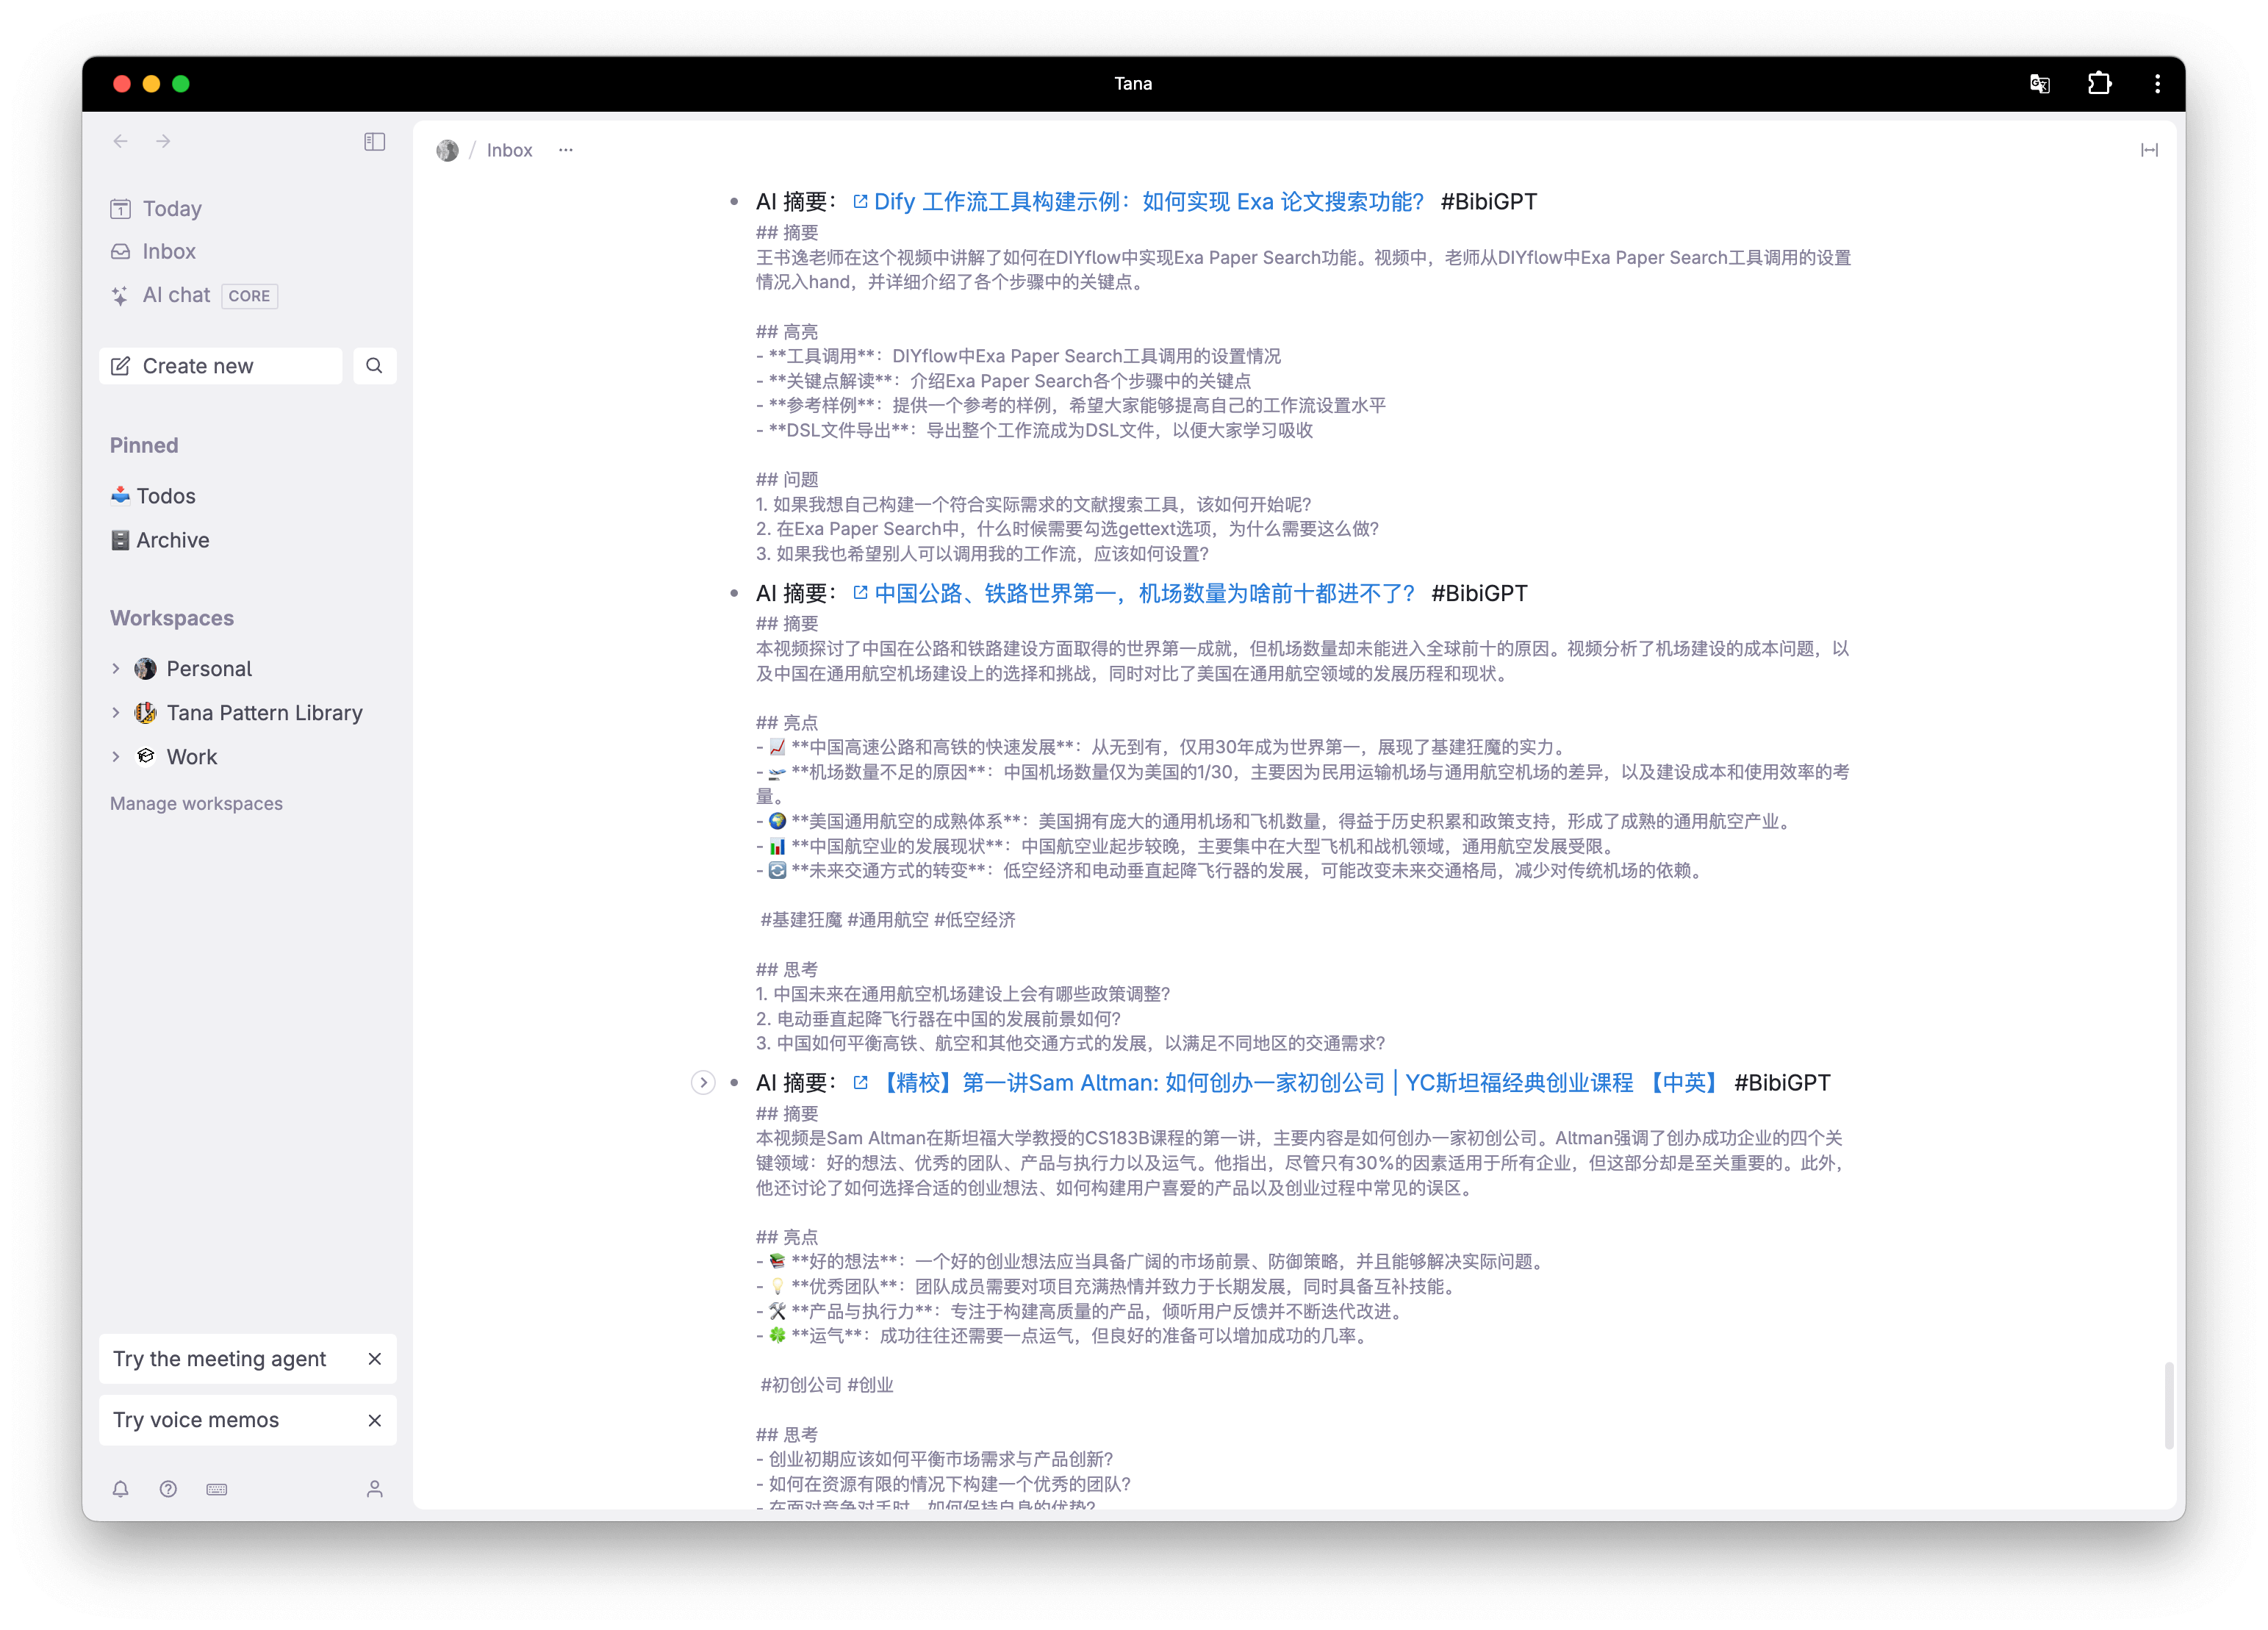
After completing the above steps, you will be able to efficiently synchronize the audio and video summaries generated by BibiGPT to Tana, helping you better organize and manage important information. This feature will greatly enhance your work efficiency and allow you to access the knowledge and data you need anytime, anywhere.
Obsidian synchronization
step by step instructions
- Visit the account binding page: First, log in to your BibiGPT account and navigate to the "Bindings" option in the "Account Settings". Here you will find the "Save to Obsidian" configuration option, make sure it is enabled.

- Save Settings: Scroll to the bottom of the page and click on the "Save" button to ensure that all changes are recorded. This step is critical to ensure that your settings take effect.
- Executive AI Summary: After completing the audio/video summary, you can find the "Save to Obsidian" button in the bottom area of the summary. Clicking on this button will make the current AI summary ready for synchronization.
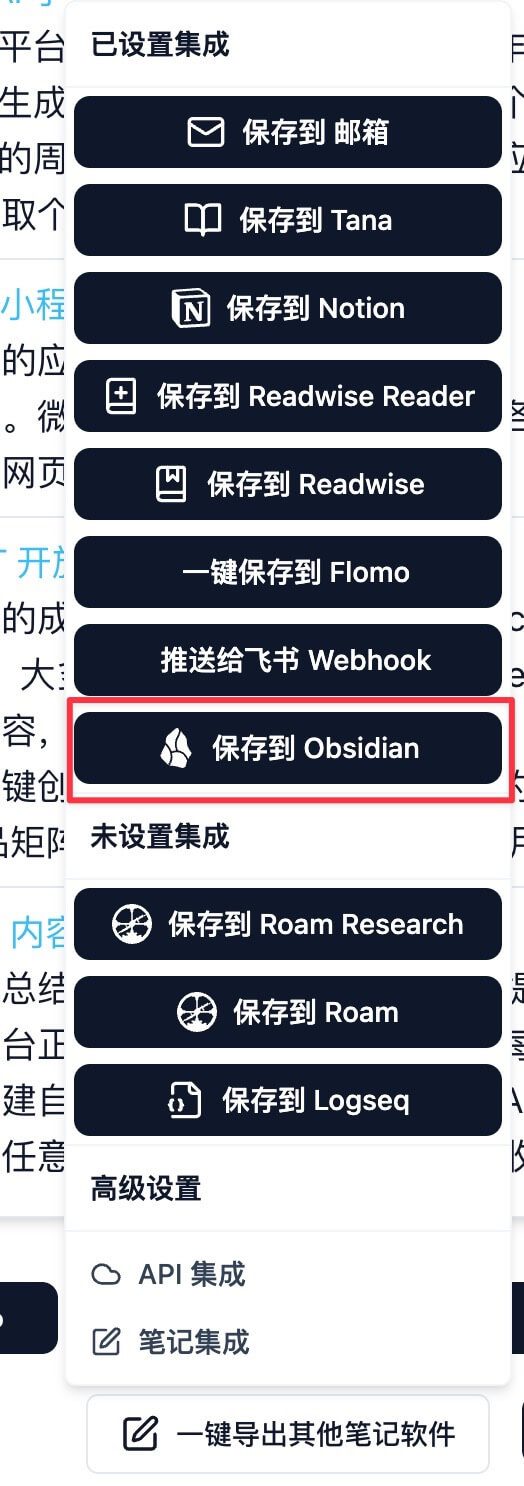
- Processing Permission Requests: If your browser pops up a permission request window, click "Allow" to ensure that BibiGPT can access your Obsidian app. Please note, make sure you have installed the Obsidian app on your device.
- Create a folder and save itAfter completing the above steps, BibiGPT will automatically create a new folder named "BibiGPT" in the Obsidian app and save the current AI summaries as a local file. You can easily find and manage these summaries in Obsidian to improve your knowledge management efficiency.
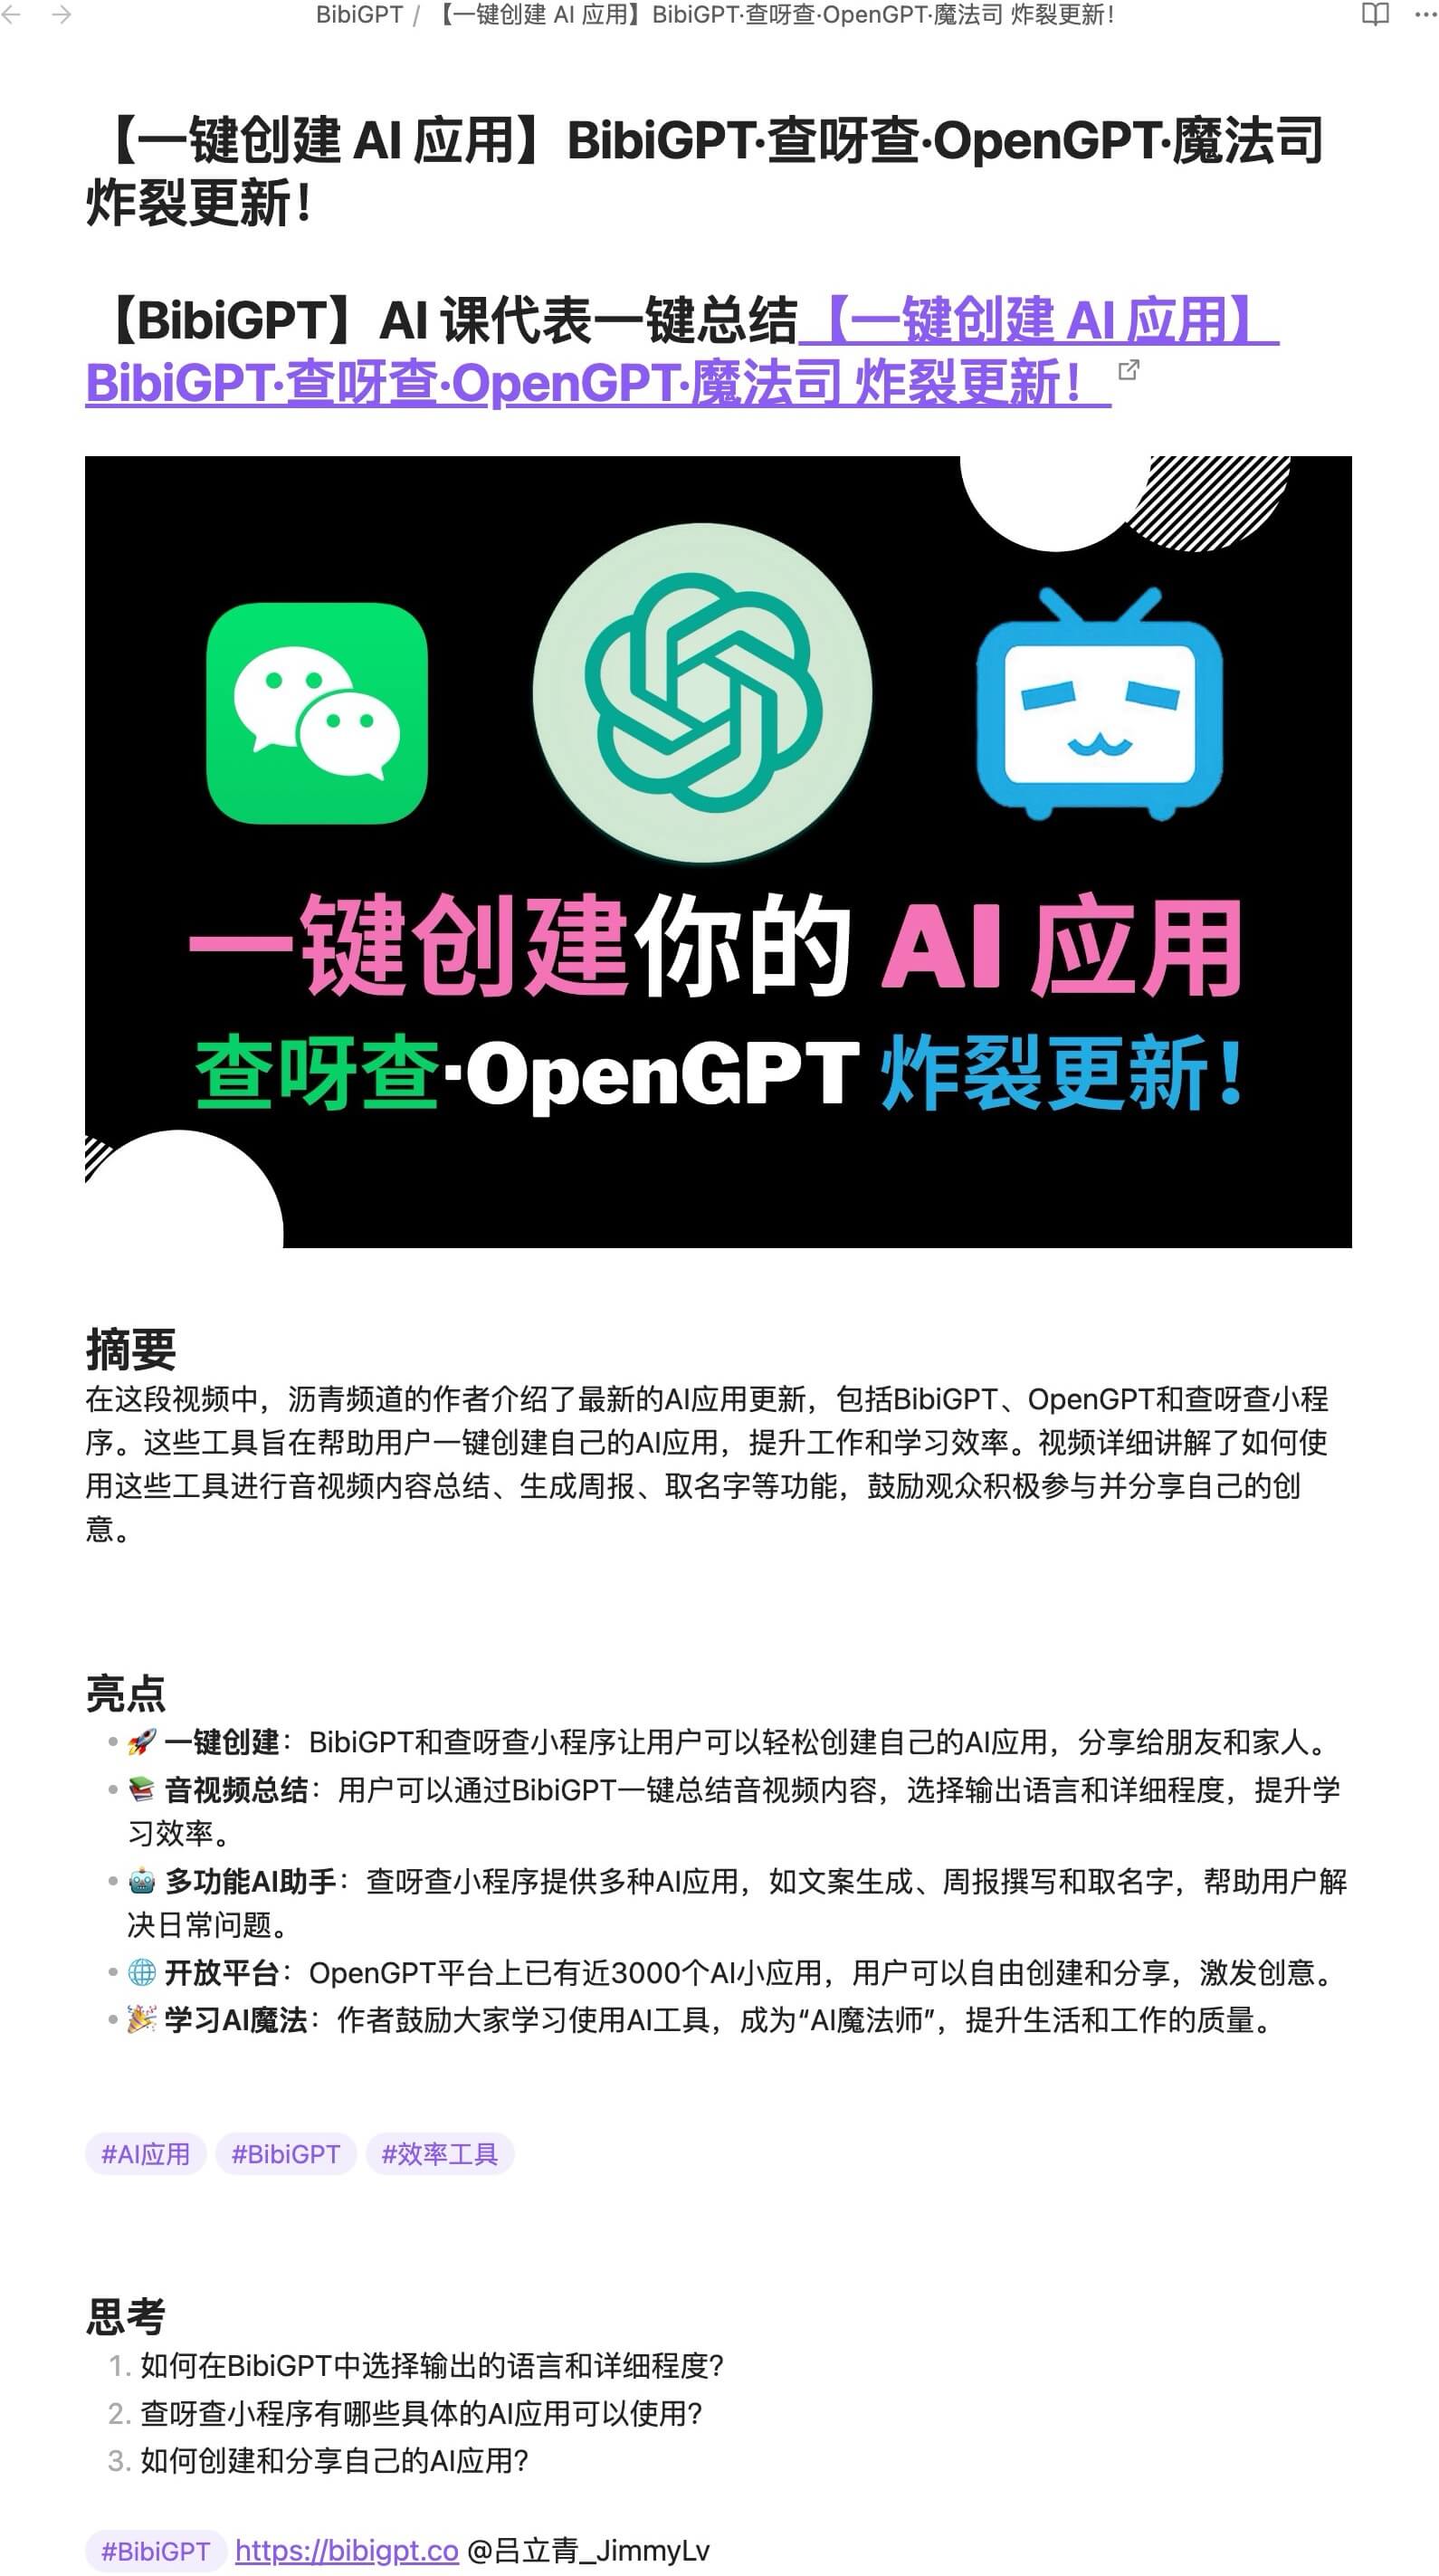
With the above steps, you can conveniently sync the audio and video summaries generated by BibiGPT to Obsidian, helping you better organize and review important information. This feature provides powerful support for your learning and work, allowing you to access the knowledge you need anytime, anywhere.
In addition, Obsidian provides a powerful URL Scheme feature that allows you to manipulate content in Obsidian via specific URLs. You can refer to the Obsidian URL Scheme(opens in a new tab) Learn more.
Logseq synchronization
step by step instructions
- Find the Logseq synchronization option: On the BibiGPT Account Binding page, locate and turn on the Logseq Synchronization option. This is usually displayed as a checkbox or on/off button.

- Save Settings: Scroll to the bottom of the page and click on the "Save" button to ensure that all changes are recorded. This step is critical to ensure that your settings take effect.
- Save to Logseq: After completing the AI summary, in the bottom area of the audio/video summary, look for and click the Save to Logseq button.
- Handling permission pop-ups: If a permission pop-up appears in your browser, be sure to click Allow to ensure that the synchronization operation runs smoothly. Also, make sure you have the Logseq app installed.
- Automatic synchronization to Logseq: After completing the above steps, the system will automatically save the current AI summary content to the Journals same-day page of the Logseq application. In this way, you can view and manage the AI summary content in Logseq at any time and easily record the required information.
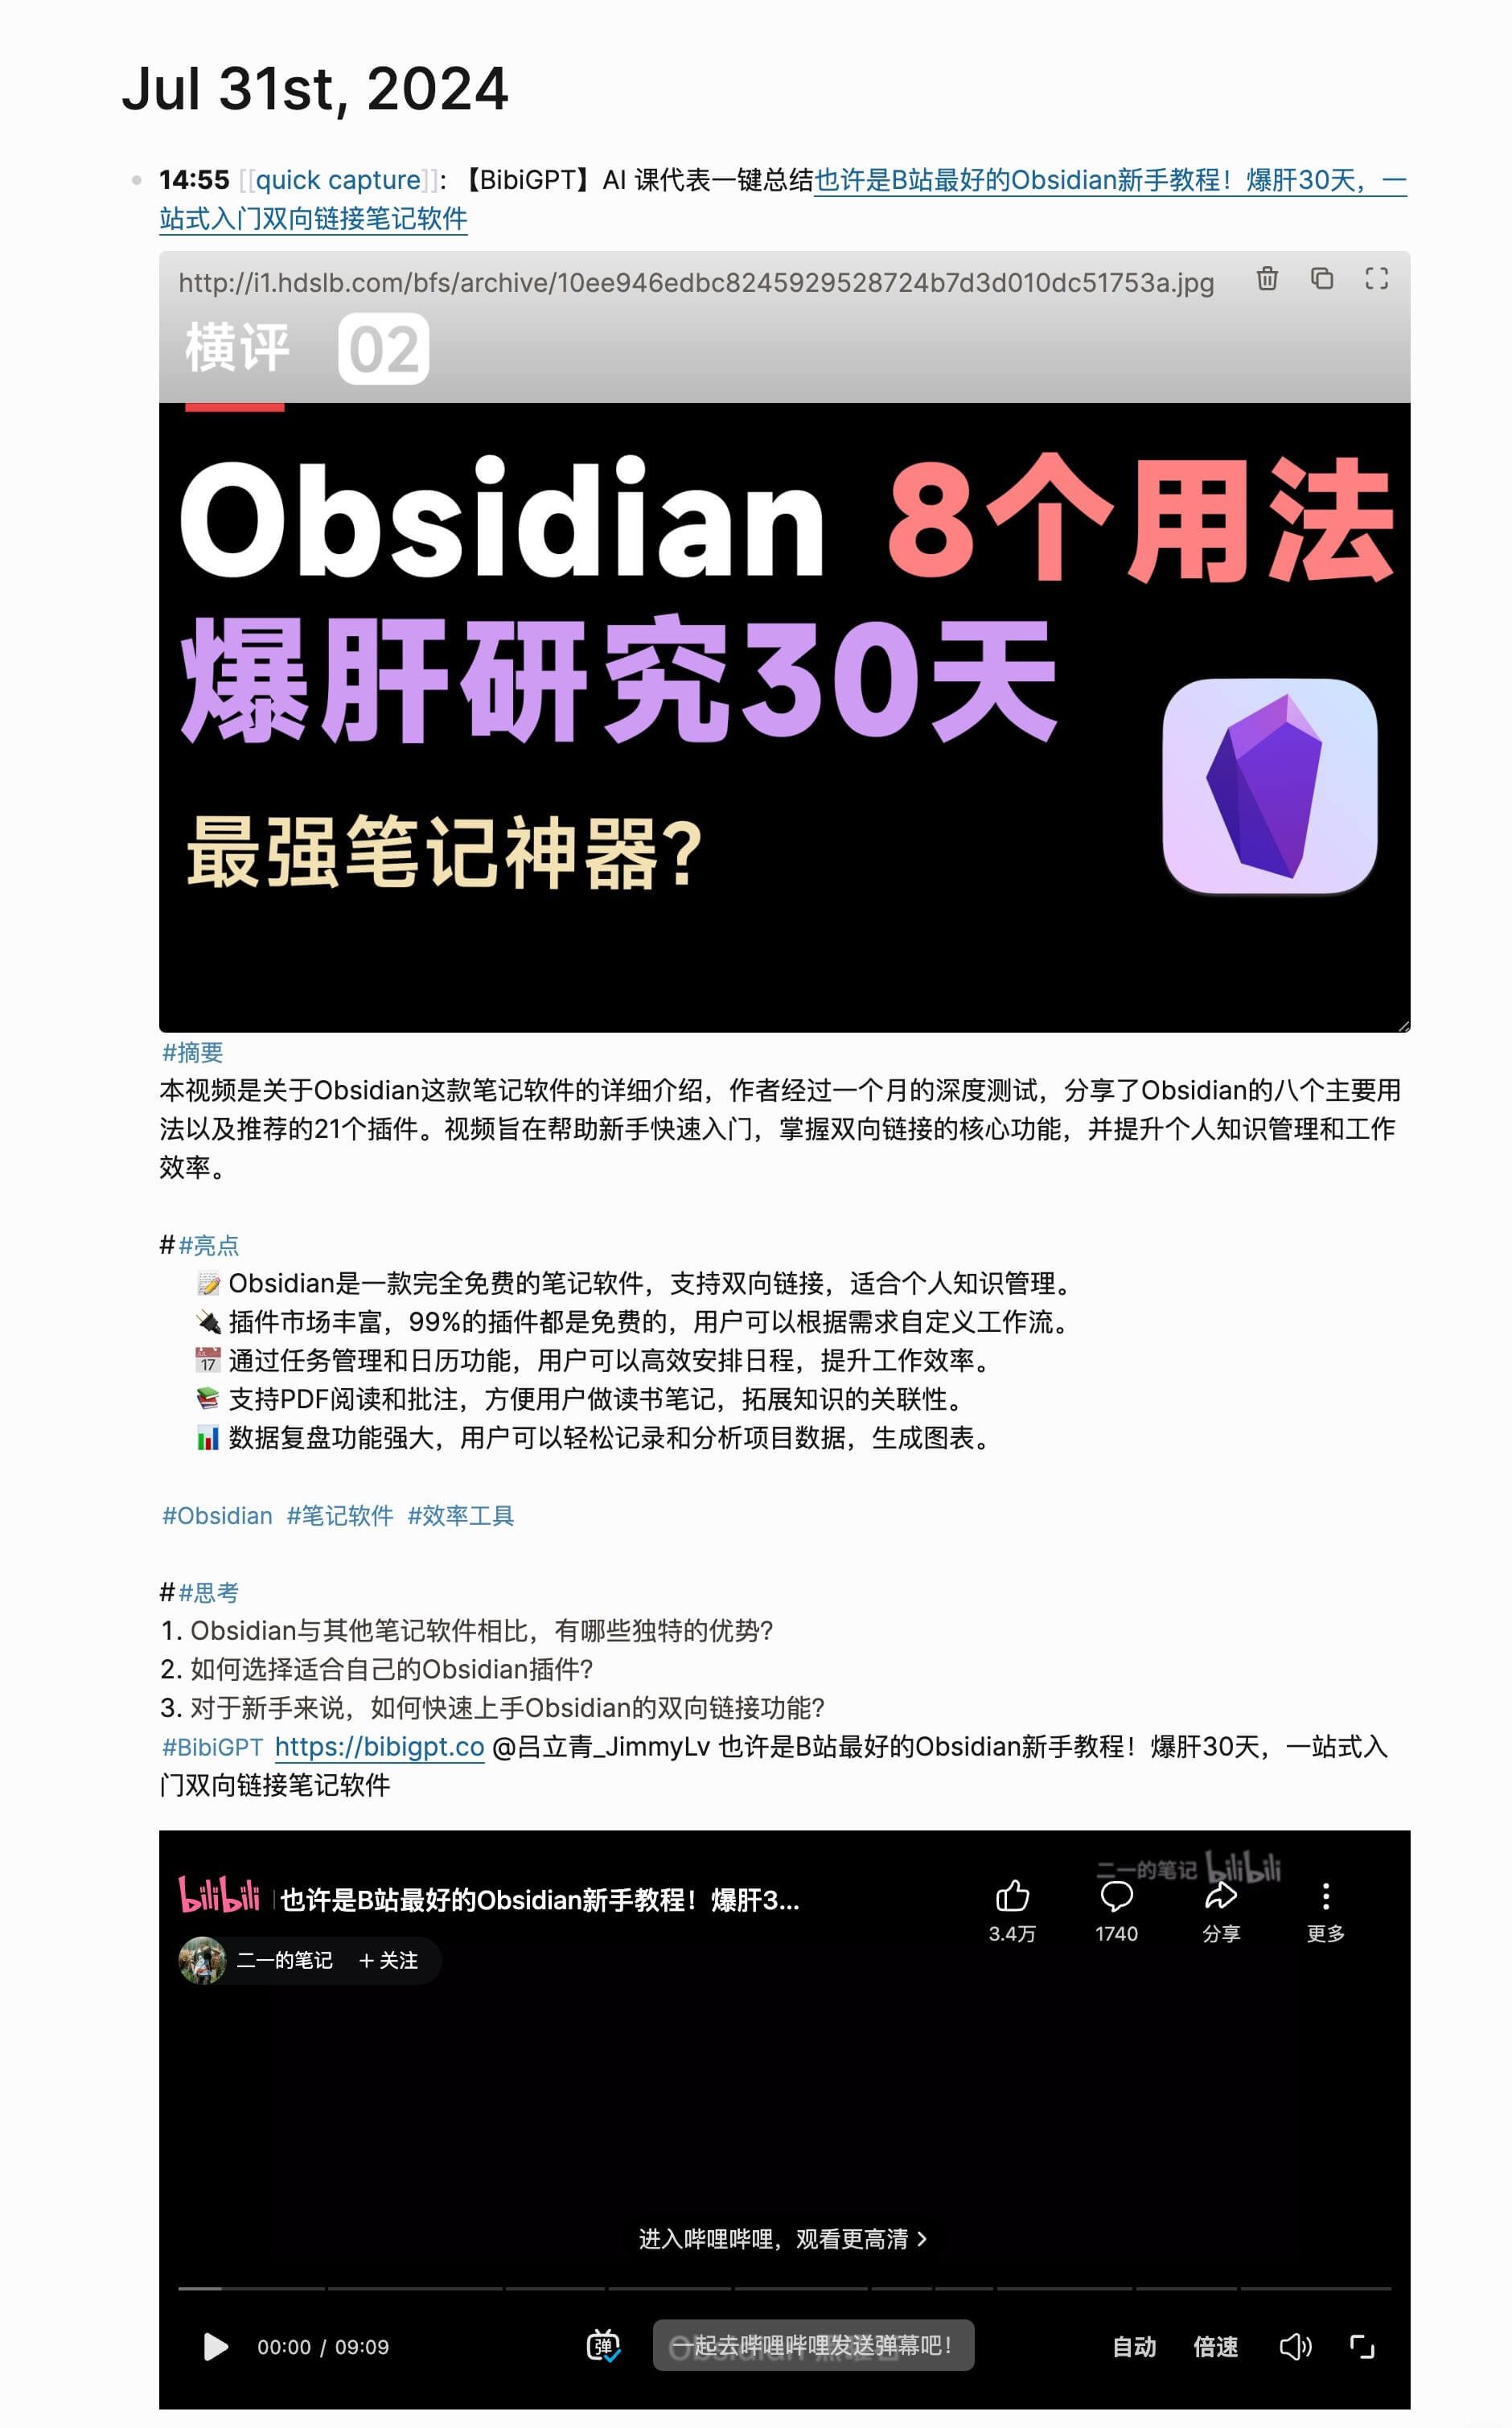
With the above steps, you can conveniently sync the audio and video summaries generated by BibiGPT to Logseq, helping you better organize and review important information.
In addition, Logseq provides a powerful URL Scheme feature that allows you to manipulate content in Logseq via specific URLs. You can refer to the Logseq URL Scheme(opens in a new tab) Learn more.
Synchronization of Roam Research
step by step instructions
- Finding Roam Research Token Configuration Items: First, locate Roam Research on BibiGPT's account binding page. Token Configuration item.
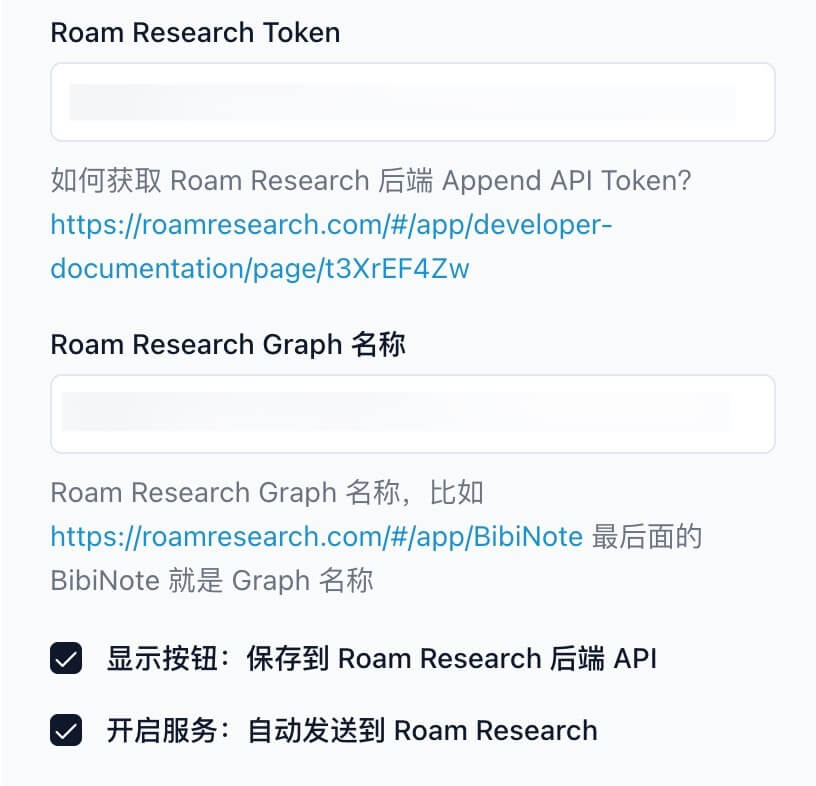
- Get Roam Research Backend Append API Token: Below the configuration item you will find a link on how to get the Roam Research back-end Append API Token, with detailed steps on how to do it.Reference Links(opens in a new tab). This will help you understand how to get Roam Research Token.
- Enter the Roam Research Graph Token: After obtaining the Graph Token for Roam Research, enter the Token you obtained in the Roam Research Token Configuration item on the BibiGPT Account Binding page.
- Enter the name of the Roam Research Graph: Fill in your Roam Research Graph name in the input box of the Roam Research Graph configuration item. You can refer to the Graph name in Roam Research, for example:https://roamresearch.com/#/app/BibiNote(opens in a new tab) BibiNote is a sample Graph name.
- Configure button or service options: In the final step, you can choose whether to turn on Show Button: Save to Roam Research Backend API or Turn on Service: Automatically Send to Roam Research. The former allows you to manually save the AI summary to Roam Research after it is generated, while the latter automatically sends the summary to Roam Research.
- Save Settings: Scroll to the bottom of the page and click on the "Save" button to ensure that all changes are recorded. This step is critical to ensure that your settings take effect.
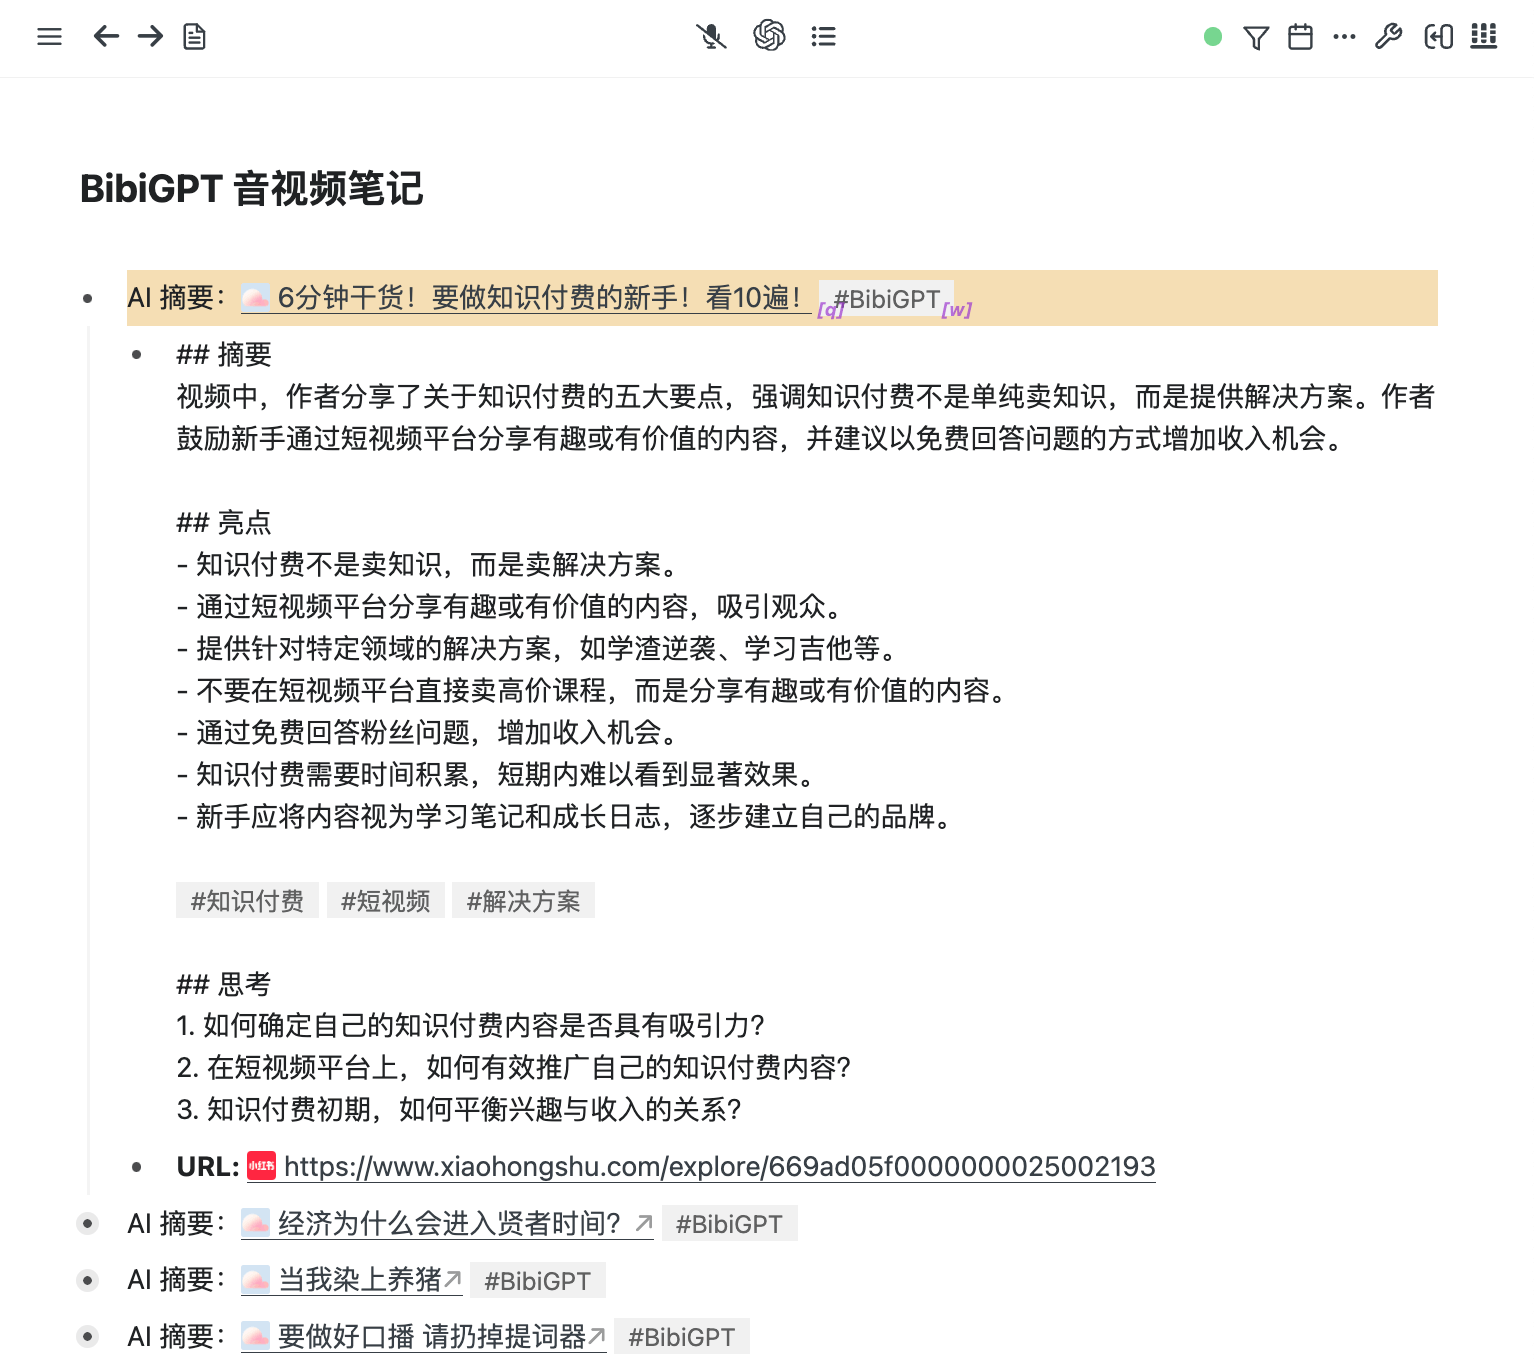
By following the steps above, you will have successfully completed the configuration of Roam Research Synchronization feature, which allows you to manage and store AI audio and video summaries from BibiGPT more conveniently, enhancing your work efficiency and information integration.
Roam Research Quick Capture synchronization
step by step instructions
- Visit the account binding pageFirst, log in to your BibiGPT account and go to the "Bindings" option in the "Account Settings". On this page, you will find the "Save to Roam Quick Capture (Browser)" configuration item, make sure this option is checked to enable synchronization.

- Save Settings: Scroll to the bottom of the page and click on the "Save" button to ensure that all changes are recorded. This step is critical to ensure that your settings take effect.
- Generating an AI summary: After completing the audio/video summary in BibiGPT, you will see the summary content displayed at the bottom of the page. At the bottom of the summary area, find the "Save to Roam" button, click it and the system will pop up the list of available graphs.
- Select Graph and save: In the pop-up Graph list, select the target Graph you wish to save your summary to, confirm your selection, click the "Save" button, and your AI summary will be automatically synchronized to the selected Roam Quick Capture.
- caveat: Please make sure that you are using the browser version of Roam Research in order to use this feature without problems. For more information on how Roam Research Quick Capture works, you can refer to the official documentation:How Roam Quick Capture works(opens in a new tab)The
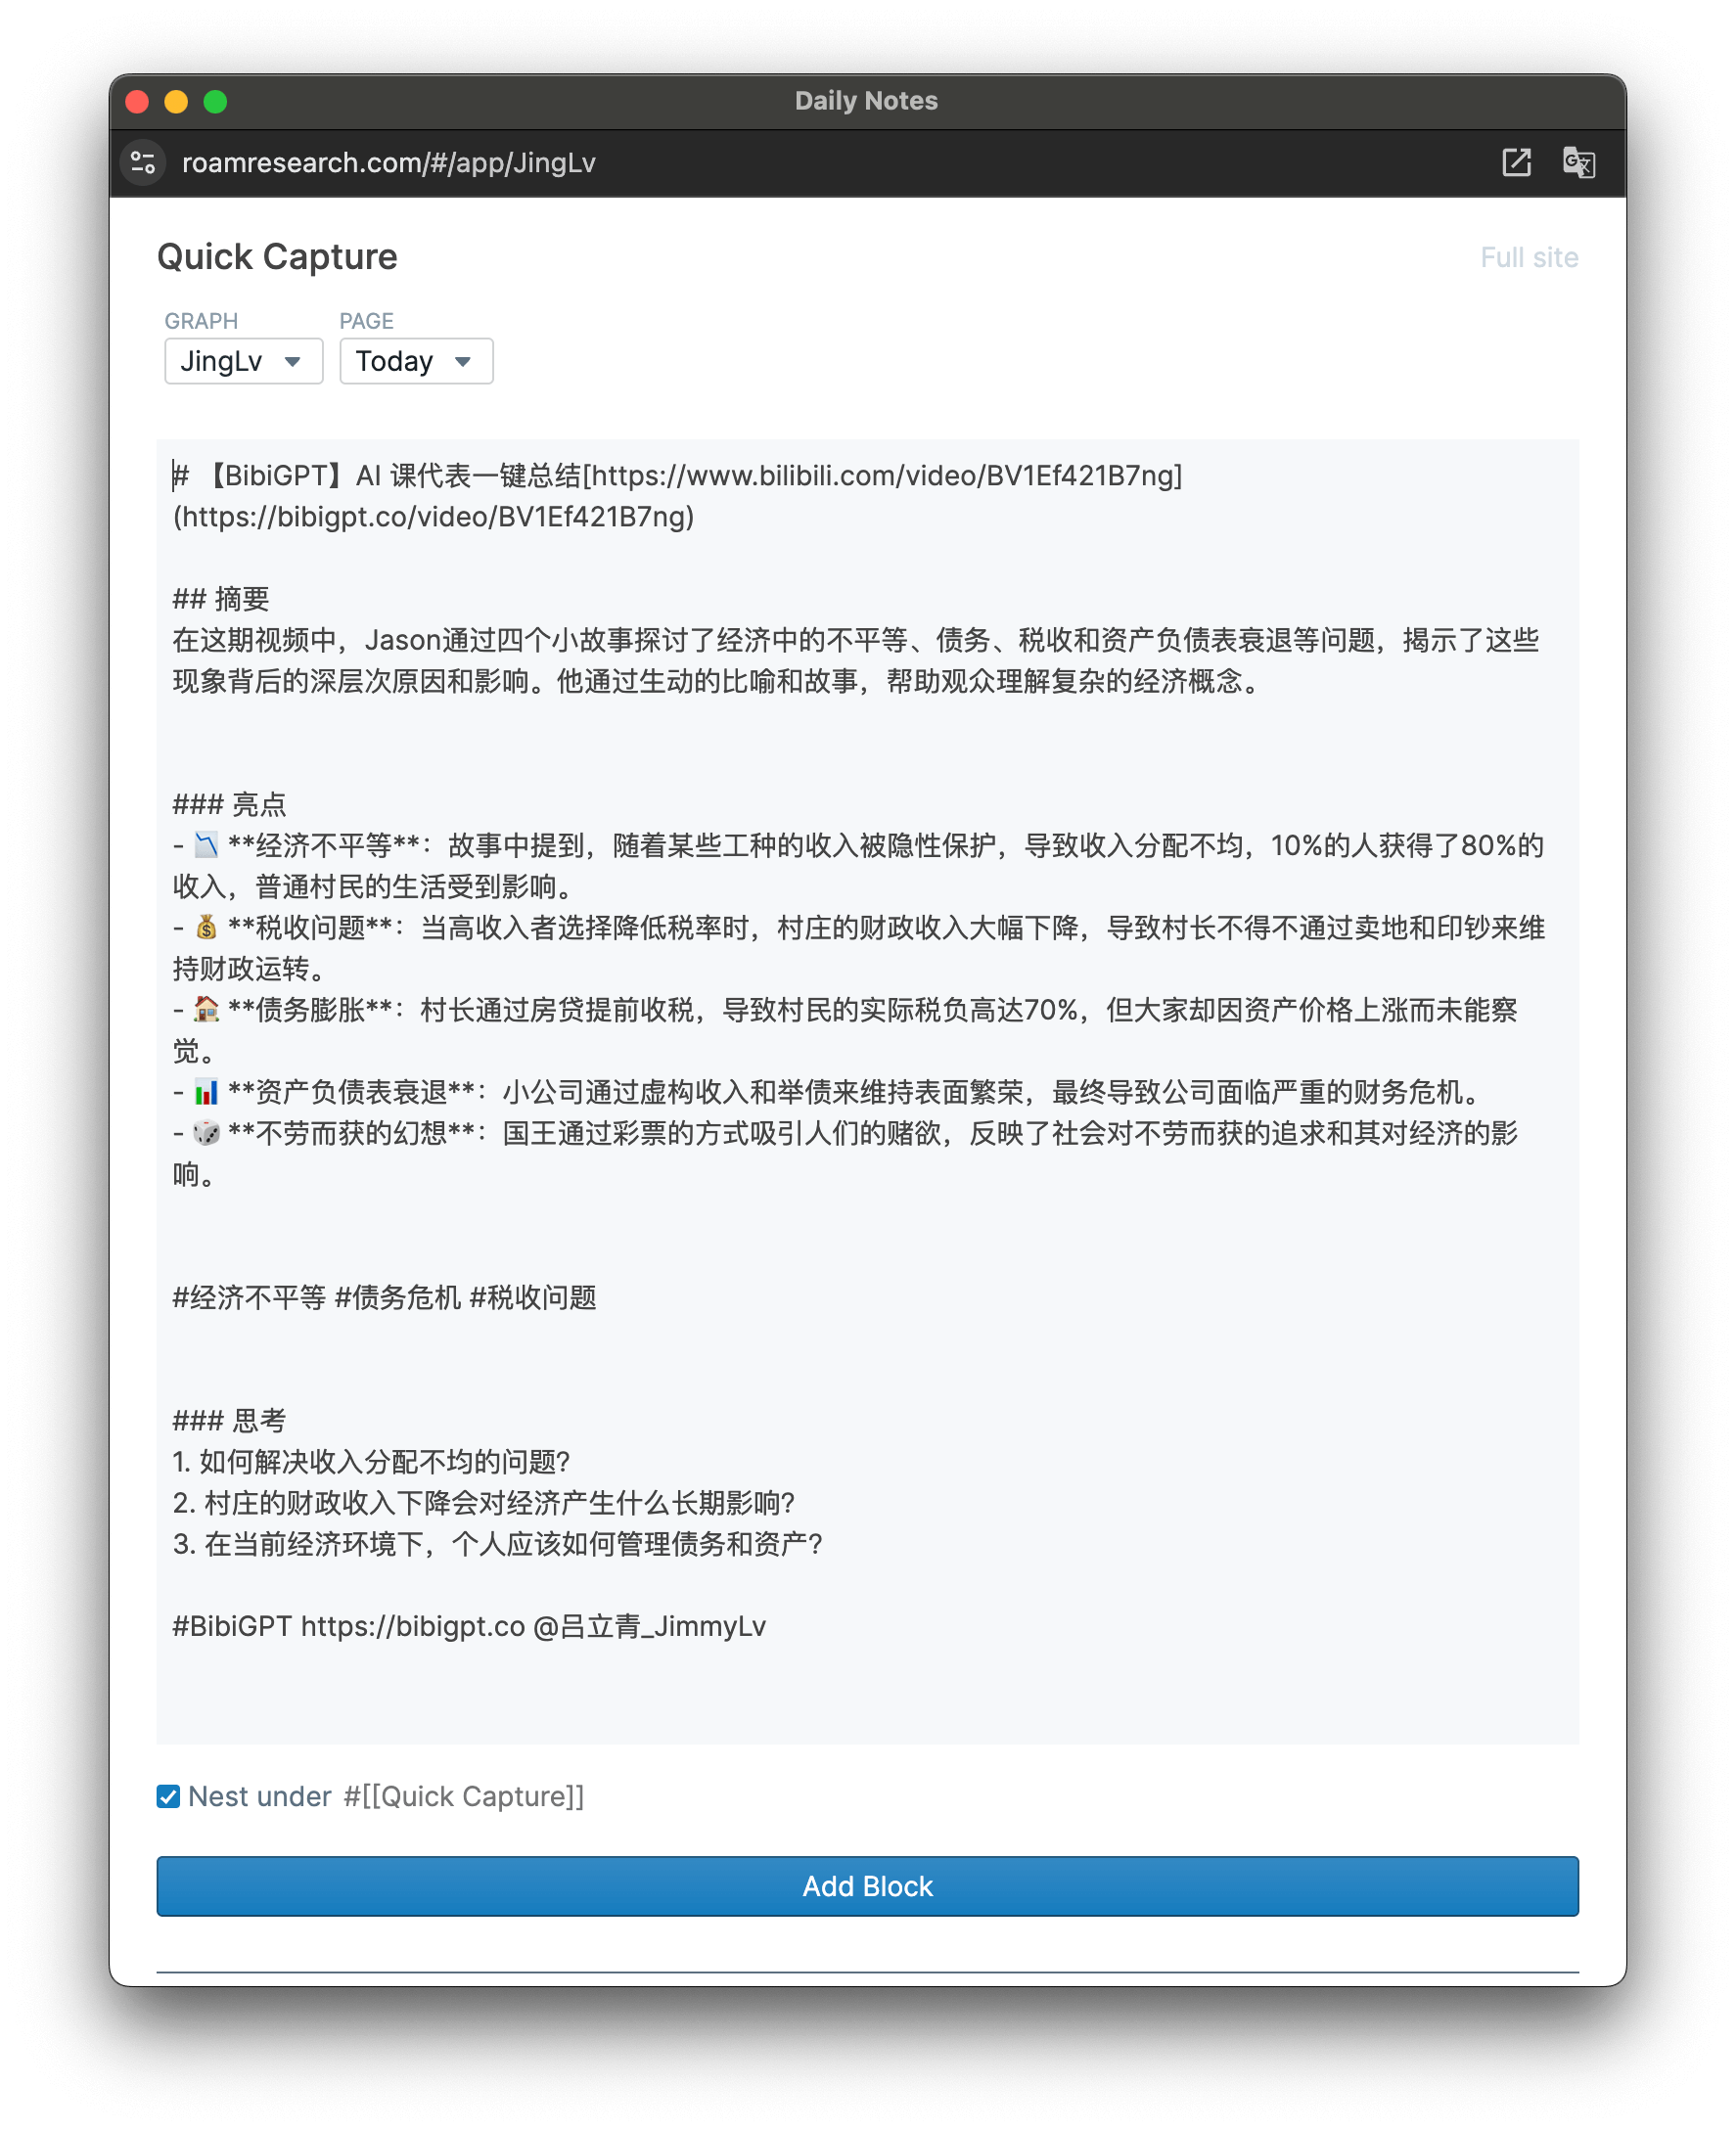
Through the above steps, you will be able to efficiently save the audio and video summaries generated by BibiGPT to Roam Research, which is convenient for you to carry out subsequent knowledge organization and management, and enhance the efficiency of work and the convenience of information access.
Tips & Best Practices
How to choose the right platform for synchronization
Choosing the right platform for AI summary content synchronization is critical and can significantly improve productivity and information management fluency.BibiGPT currently supports multiple platform synchronization capabilities including Email, Notion, Flomo, Flybook, Readwise, Roam Research, Roam Quick Capture, Tana, Obsidian, and Logseq. Here are a few key factors to consider when choosing a platform:
- Integration of AI summary content: Synchronization of summarized content through AI allows users to quickly access key information on different platforms, avoiding information silos and improving accessibility and utilization of information.
- Workflow requirements: Different platforms are adapted to different workflows. For example, Notion is well suited for structured note-taking and project management, while Readwise focuses on knowledge review and reading management, making information extraction and review more efficient.
- Teamwork: For scenarios that require teamwork, Flybook and Notion provide powerful collaboration features that enable team members to share and edit AI-summarized information in real time on a single platform, improving collaboration efficiency.
© Copyright notes
Article copyright AI Sharing Circle All, please do not reproduce without permission.
Related posts

No comments...


