AutoGen Studio: Easy-to-Use Interface Version of the Multi-Agent System AutoGen
General Introduction
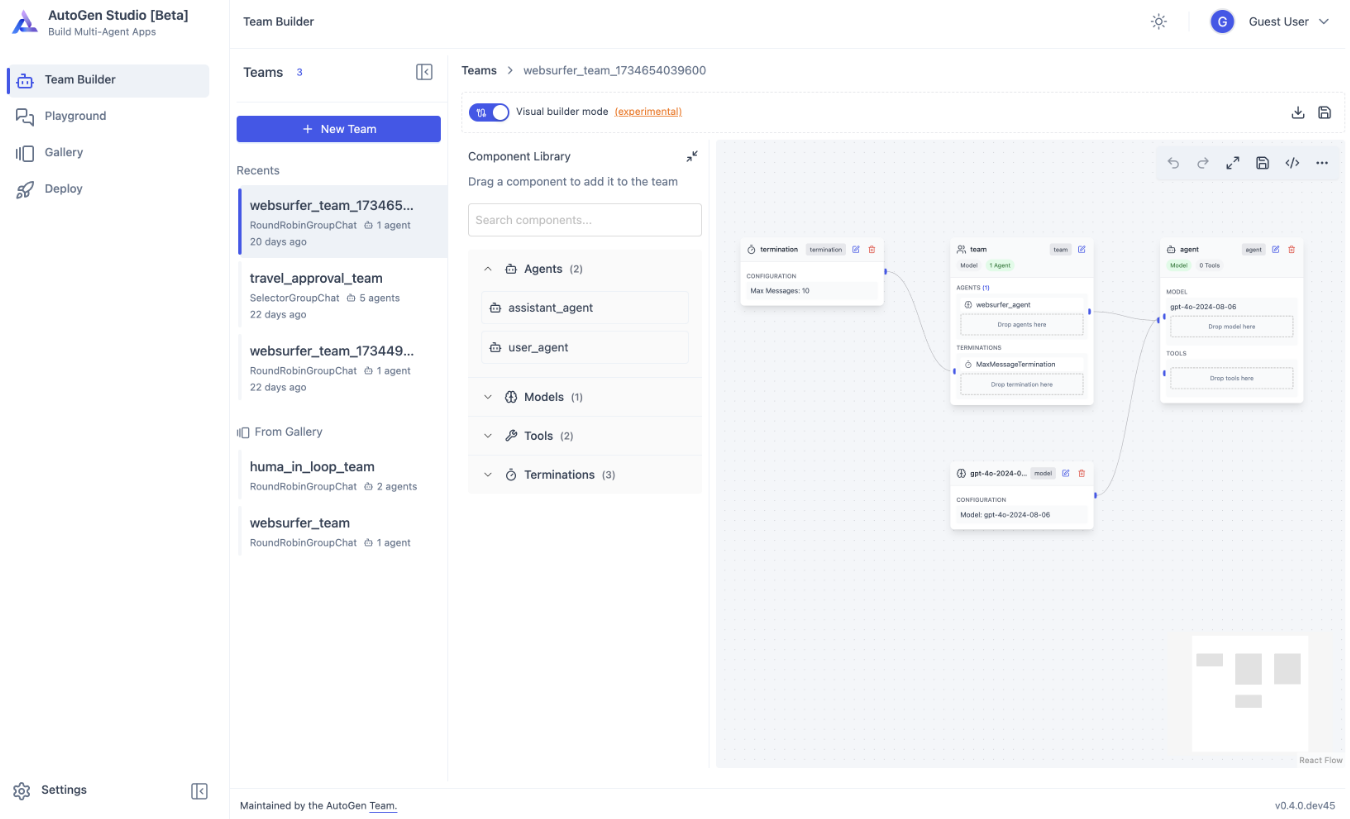
AutoGen Studio 2.0 is a user interface powered by AutoGen designed to simplify the process of creating and managing multi-agent solutions. The platform enables users to declaratively define and modify agents and their workflows through an intuitive interface that makes it easy for even beginners to get started.AutoGen Studio 2.0 relies on Python 3.11 and Conda environments and uses API keys from LLM providers to access the language model.
Original Microsoft AutoGen project address: https://github.com/microsoft/autogen

New version: https://github.com/microsoft/autogen/tree/main/python/packages/autogen-studio

Function List
- Create and manage multi-agent solutions
- Intuitive user interface for beginners
- Support for Python 3.11 and Conda environments
- Integrate LLM Provider API Keys
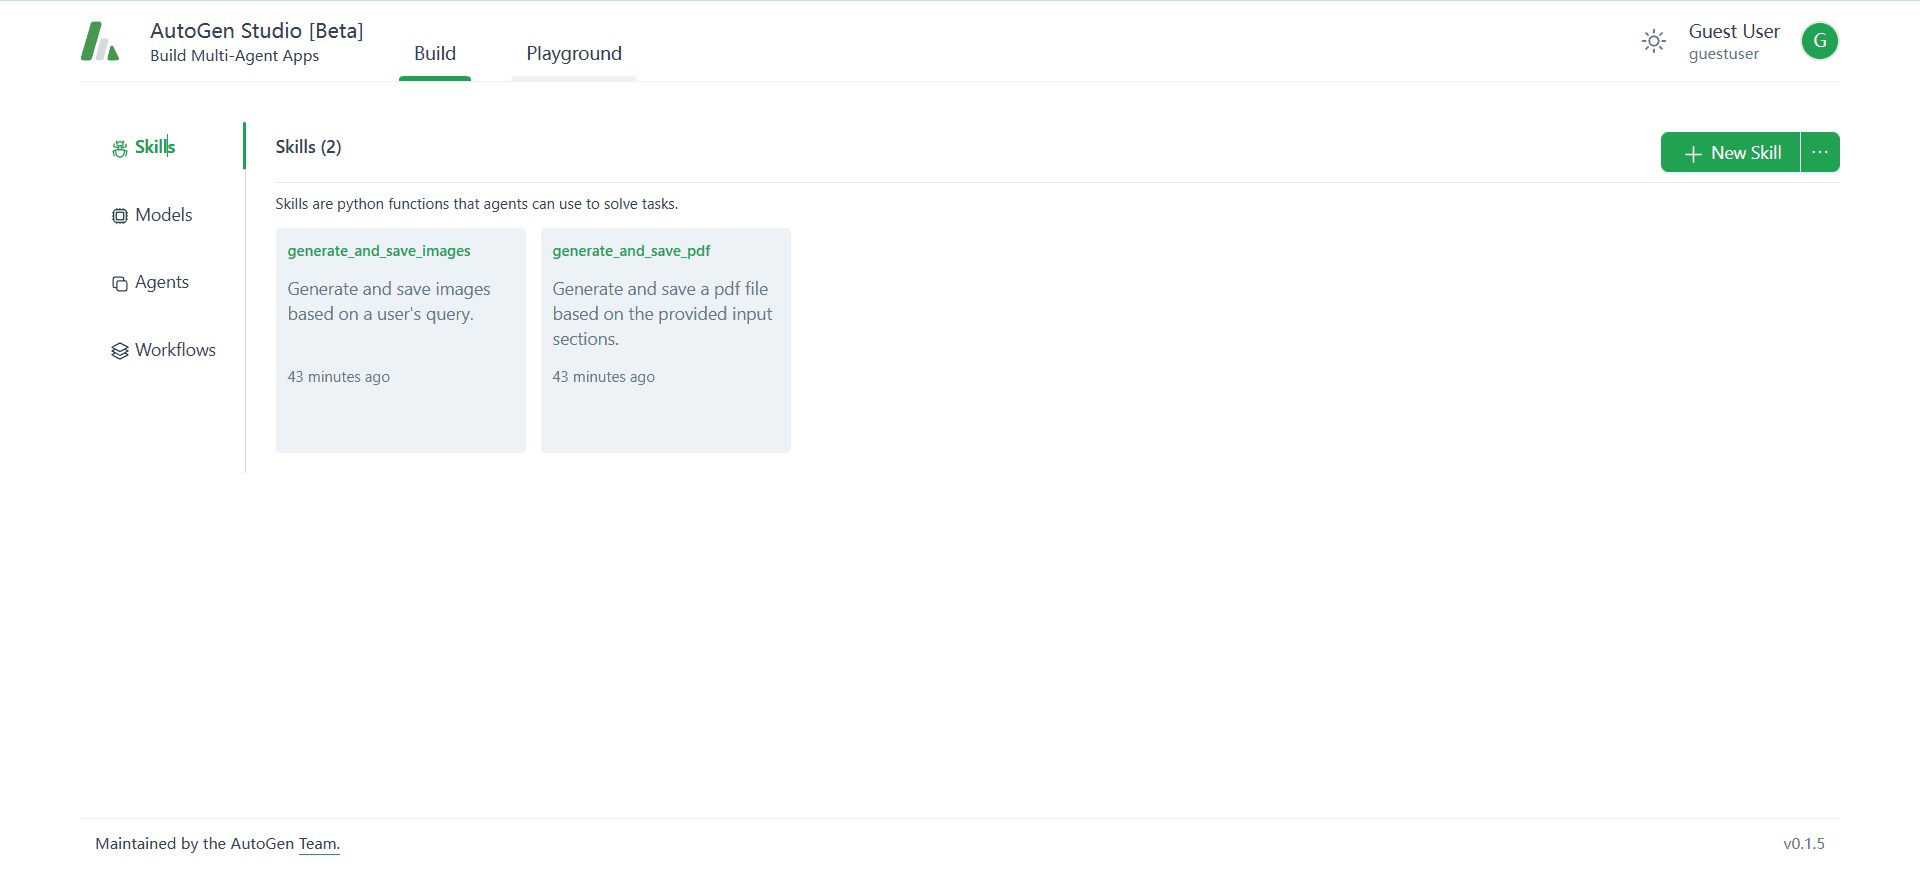
- Offers three main sections: build, playground and gallery
- Powerful Python API for detailed workflow control
Using Help
Installation process
- system requirements::
- Python 3.11: Make sure to install this version to avoid compatibility issues.
- Conda environment: Conda is recommended for managing project dependencies.
- Creating and Activating Conda Environments::
- Open a terminal and enter the following command to create the environment:
conda create -n autogenstudio python=3.11 - Activate the environment:
conda activate autogenstudio
- Open a terminal and enter the following command to create the environment:
- Installing AutoGen Studio::
- In an activated Conda environment, run the following command to install AutoGen Studio:
pip install autogenstudio
- In an activated Conda environment, run the following command to install AutoGen Studio:
- Start AutoGen Studio::
- Run the following command to start the application:
autogenstudio ui --port 8081 - Open your browser and visit
http://localhost:8081Getting Started.
- Run the following command to start the application:
Simplified installation process
1. The terminal confirms that python is installed.
2. The terminal executes the command:pip install autogenstudio -i https://mirrors.aliyun.com/pypi/simple
(Error message appears, referred to CHATGPT for resolution)
3. The terminal executes the command:autogenstudio ui --port 8081
4. Open your browser: http://127.0.0.1:8081
5. Query the installation location: pip show autogenstudio
Functional operation flow
- building block::
- In the build section, users can create AI agents, define skills and set up workflows.
- Easily add and configure agents through a drag-and-drop interface.
- Playground section::
- The playground section is a dynamic platform for testing and observing the behavior of the AI agent.
- Users can perform real-time debugging and optimization in this section.
- Gallery section::
- The Gallery section saves the user's AI development sessions for future reference and inspiration.
- Users can view and manage previous development projects.
- API Functions::
- AutoGen Studio provides a powerful Python API that allows users to have detailed control over the agent workflow.
- Users can perform advanced configuration and integration through the API.
usage example
- Create a simple chatbot::
- In the Build section, add a new agent and name it "ChatBot".
- Define ChatBot skills such as natural language processing and conversation management.
- Set up a workflow that enables ChatBot to receive user input and generate a response.
- Test ChatBot's behavior in the playground section and make any necessary adjustments.
- Integration with external APIs::
- Get an API key for OpenAI or Azure. (Free large model API compatible with OpenAI format)
- Configure the API key in Settings to enable AutoGen Studio to access the language model.
- Use the API for advanced feature development, such as text generation and sentiment analysis.
© Copyright notes
Article copyright AI Sharing Circle All, please do not reproduce without permission.
Related articles

No comments...


