AI face swap the strongest tool: FaceFusion detailed use tutorial (with a key integration package)
Hello everyone, today I'd like to share with you a face changing tool - FaceFusion, the new version of this tool has increased a lot of models and HD algorithms compared to the old version, which greatly improves the face changing effect in pictures and videos. It also adds three kinds of mask function, which solves the problem of poor fusion effect and jump flash when the face is covered by objects. The first part introduces how to install it locally, and then demonstrates the most commonly used face changing process and settings. The third part introduces the mask function in detail and demonstrates the usage of different masks.

mounting
One-click integration package to get it:FaceFusion: Video Face Swap Enhancement Tool | Voice Synchronized Video Mouth Moves
Tutorials
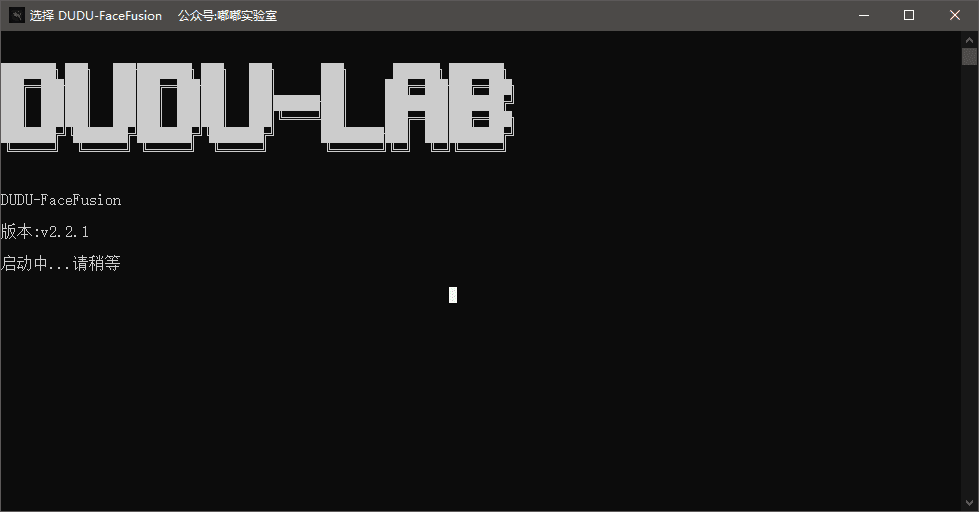
To demonstrate the "Doodle Labs" integration package, unzip the package and double-click the启动整合包.exe

Enter the CMD interface and wait for a while.
When the program opens this is the main screen
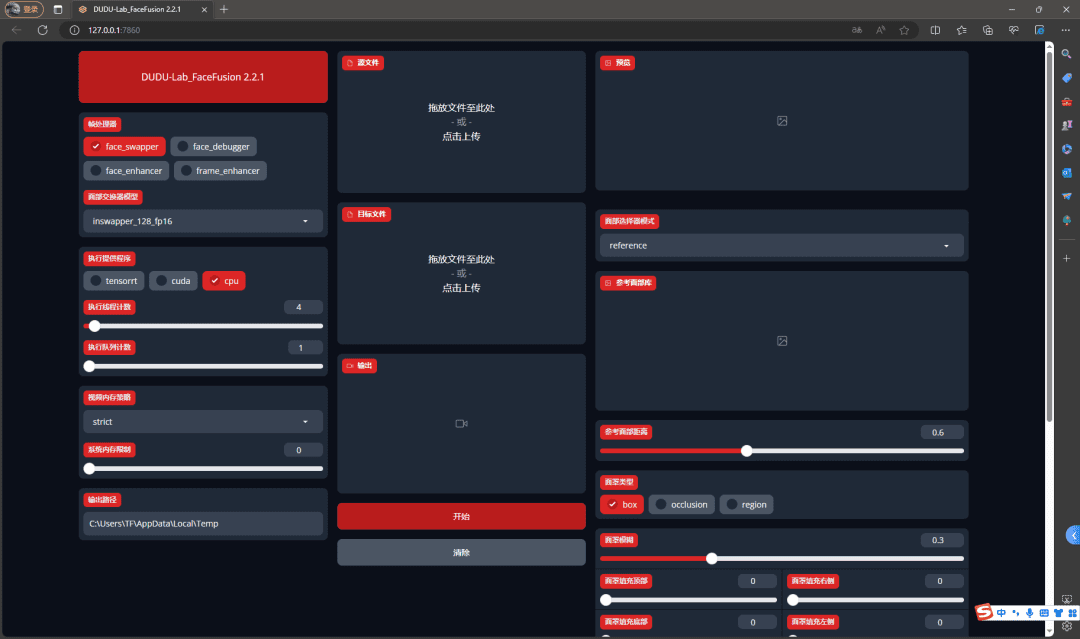
Let's start with a brief overview of a few common settings.
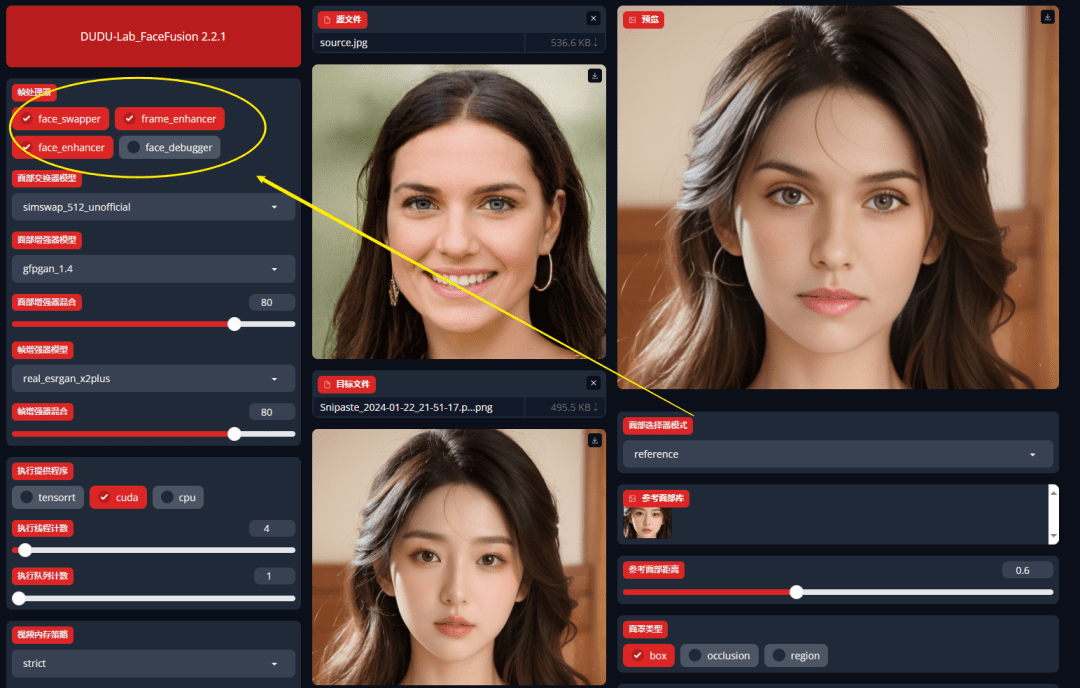
frame processor

Coming to the frame processor, we can see four options:
The first option isface_swapper(Face Swap Mode) is checked by default, otherwise face swapping is not possible.
The second option isface_debugger(Debug Mode) Used for debugging when you turn on the mask. You don't need to check it when you change face normally.
The third one isface_enhancer(Face Enhancement) is more commonly used, and when turned on, it can enhance the clarity of people's faces in the converted video.
The fourth one isframe_enhancer(Screen Enhancement) is more commonly used, when turned on, it can improve the overall clarity of the converted video. (This option will greatly increase the processing time, check it according to your hardware)
Facial Exchanger Model

The drop-down list is to select the face swap model.
- inswapper_128 and inswapper_128_fp16
The default isinswapper_128_fp16This model can already handle most of the face-swapping scenarios.128This refers to the processing of images with a resolution of 128x128 pixels.fp16This refers to the model's use of 16-bit floating point numbers (FP16) for computation, which generally means that it can reduce the need for computational resources and speed up processing while maintaining sufficient accuracy, making it particularly suitable for resource-limited environments or applications that require real-time processing.
- blendswap_256
This model may focus on blending and swapping faces in two images that256The image resolution or output resolution that indicates the model is working is 256x256 pixels. This resolution is suitable for smaller images and applications that require fast processing.
- simswap_256
This model uses a similarity exchange algorithm that256It refers to the model processing with a resolution of 256x256 pixels. This model is able to achieve a high quality facial exchange effect while maintaining the quality of the original image.
- simswap_512_unofficial
This model is similar to thesimswap_256Similar.512It is shown that this version of the model supports higher resolution, i.e. 512x512 pixels, and is capable of generating higher definition facial exchange results.unofficialIndicates that this version is not an official release, but is a modification or extension by community members based on the original model.
Choose a different model in the context of your own project. Use 16-bit floating point numbers (such asinswapper_128_fp16) is an optimization technique that accelerates model runs without significantly affecting the quality of the output. Higher resolutions (e.g.simswap_512) can provide finer detail, but it also requires more computational resources and processing time.
Execute program mode selection

There are three options here, if you have an N-card, select theCuda, if you have an A-card or integrated graphics, select CPU.
Number of threads of execution

This is adjusted according to your GPU hardware, if you have less than 8G of video memory, keep the default. If you have more than 8G of video memory, you can adjust it up to 8-10. (Depending on the situation, this is just a reference)
Number of execution queues

This parameter is only used when you use script to perform batch face changing, you don't need to set it on the webpage, just keep the default here.
Video Memory Policy, System Memory Limits
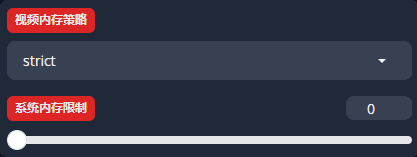
No adjustments need to be made here either, leave it as default and let the program control itself.
output path

This path is the location where the program stores the temporary image during the face change process, the program will automatically clear it after the change, no need to change it.
Common Options

- keep-temp
It is not recommended to check this box. After this is checked, the temporary pictures generated after the face change will be saved to the temporary directory set above, which takes up a lot of hard disk space.
- skip-audio
Skips audio processing and outputs a video without audio.
- skip-download
Recommended to check. Skip Download, our models are already downloaded, you can check this option to skip the download checking step.
simple face transplant
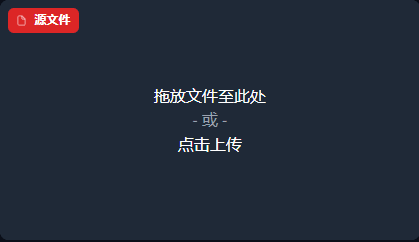
strike (on the keyboard)源文件, choose a photo of a person's face, preferably a frontal shot, and a clear face that cannot be obscured.
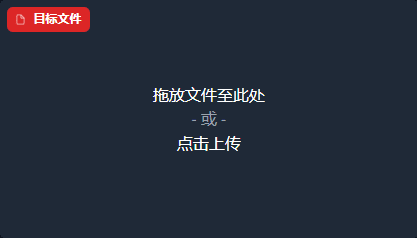
click again目标文件Select the image or video you want to replace.
The top of the right side is the preview area, the following settings will be described in detail in a moment, a single picture for the face is basically not used, click the start button to replace, replace the good click here to download will be able to save to the computer.
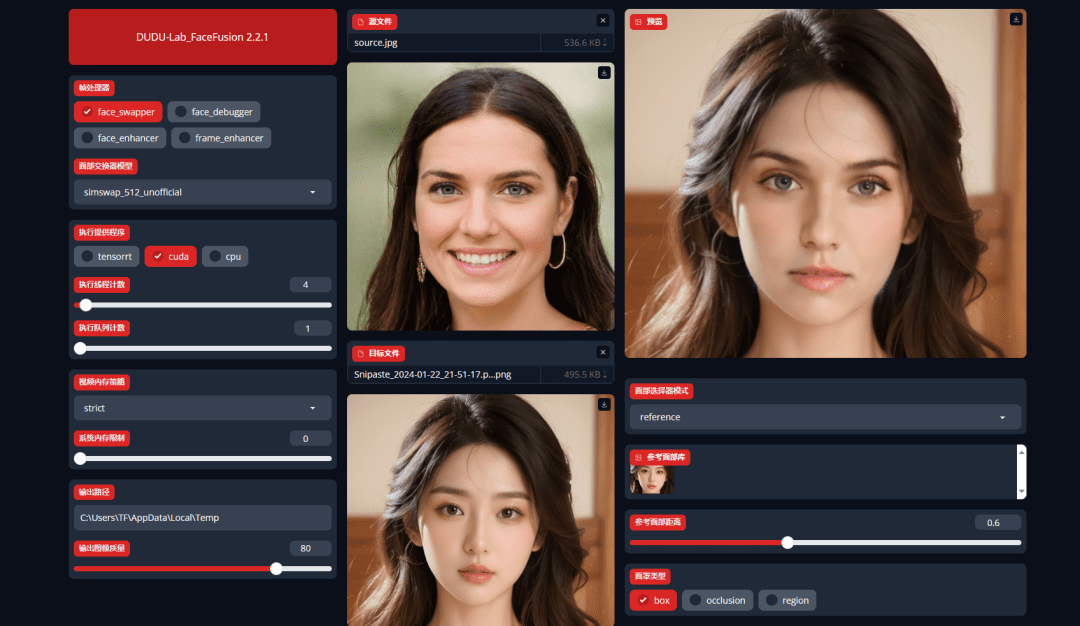
If you want a sharper effect, check Face Enhancement and click start again to replace it once.
This is the simplest single face replacement process.
multiple face-swapping (e.g. gay)
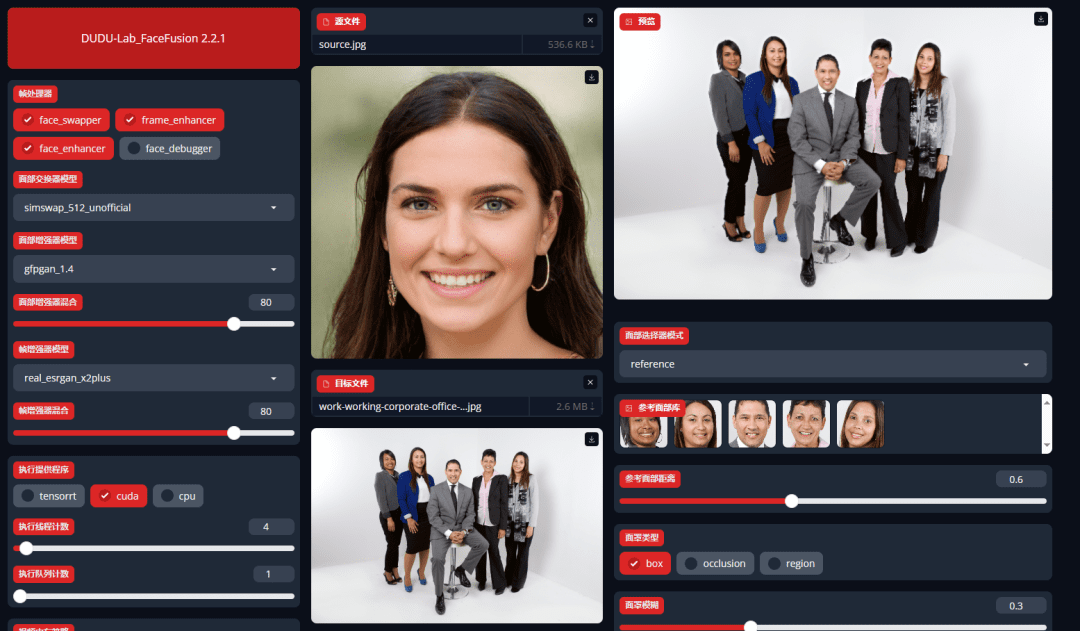
Face Selector Mode

- reference
In default mode, detect faces from left to right and replace the first detected face will be listed here. If you want to change the replacement, just click the corresponding face icon.
- one
The one mode will only replace the first face detected.
- many
Many mode replaces all detected faces.
Reference Face Distance Parameter

In most cases, the default value of 0.6 is fine. Except when you can't recognize the face, for example, if there are some shots of low head and side face with big angle in the video, the detected face match is very low, you can turn it up.
mask-for-face (computing)
For example, in this picture, where the face is obscured by an object, you need to choose the proper mask mode to achieve a better facial blending effect.
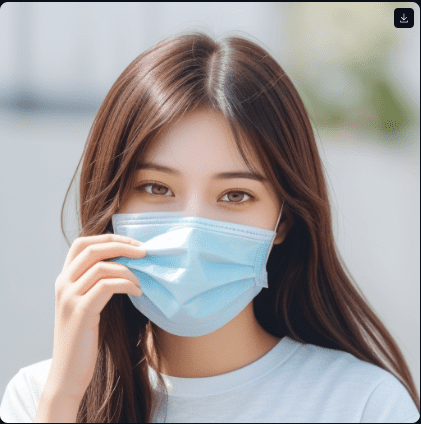
It is recommended to enable debug mode when using masks. The red box in the preview screen is the program's default box mode mask.
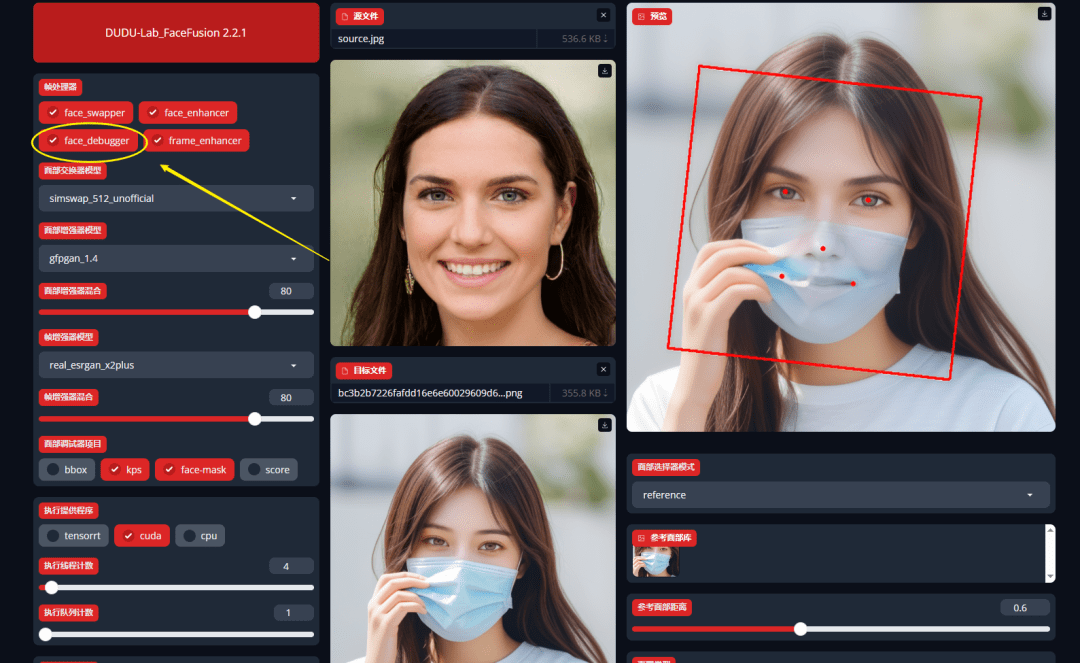
You can see that the mask part will show the face, we need to do something about this. Check the second mask mode

can be seen
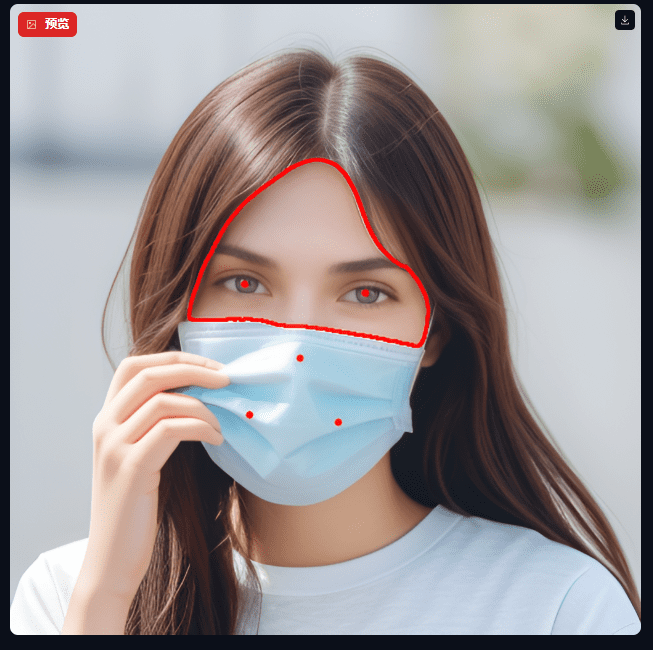
This model calculates the remaining facial range (the part in red)
Mask Blur

Default is 0.3, it adjusts the transparency of the masked object, if it is not a transparent object, you can adjust it above 0.5. Be sure to close theface_debuggerDebugging options to prevent the face from masking to the curves right after changing the video. As a reminder, using the closed mask mode, the mask blur value is set to how much appropriate, may need several attempts to do so. However, this value is not the larger the better, for transparent objects, such as glasses, glasses, turn down this value instead of a more realistic blend effect.
regionFace Area Mode

Check hereregionLater, two rows of parameters will appear below, including eyebrows, nose, eyes, mouth and other parts, the default is all checked on, that is, these parts will be replaced by default, if you do not want to replace a part of the face in the original video can not be checked.
This is how to use FaceFusion, thanks for reading.
© Copyright notes
Article copyright AI Sharing Circle All, please do not reproduce without permission.
Related posts

No comments...

