Recentemente, assumi um projeto que precisa usar o Stable Diffusion, e preciso reimplantar um conjunto de ambientes SD. Não é exatamente igual à minha implantação anterior de SD, e encontrei alguns problemas durante o processo de implantação e concluí um plano de instalação mais perfeito, que gostaria de compartilhar com você aqui.
Endereço do projeto: https://github.com/AUTOMATIC1111/stable-diffusion-webui
Preparação ambiental
Antes de iniciar a implementação, uso o seguinte ambiente:
- Python 3.10.6 (essa versão é recomendada para evitar alguns problemas de compatibilidade)
- NVIDIA RTX 4090 24GB
- Windows 11
- CUDA nativo 12.4
processo de implantação
No início, eu instalava as dependências uma a uma, passo a passo, mas achava tedioso trocar de diretório muitas vezes. Então, escrevi um script simples para automatizar o processo.
Primeiro, clone o projeto principal:
git clone https://github.com/AUTOMATIC1111/stable-diffusion-webui.git
cd stable-diffusion-webui
Criação do ambiente Conda
conda create -p .Dlab python=3.10.6 -y
Em seguida, crie um diretório de biblioteca de dependências:
mkdir -p repositories && cd repositories
Aqui está o script de instalação automática que escrevi para instalar todas as dependências de uma só vez:
repos=(
    "Stability-AI/stablediffusion:stable-diffusion-stability-ai"
    "CompVis/taming-transformers:taming-transformers"
    "sczhou/CodeFormer:CodeFormer"
    "salesforce/BLIP:BLIP"
    "Stability-AI/generative-models:generative-models"
)
for repo in "${repos[@]}"; do
IFS=':' read -r github_path local_path <<< "$repo"
echo "Clonando e instalando $github_path..."
git clone "https://github.com/$github_path.git" "$local_path"
cd "$local_path"
pip install -e .
cd ...
feito
A próxima etapa é instalar as outras dependências necessárias. Essas são as versões que eu consegui depois de passar pelos boxes, e elas funcionam perfeitamente:
O # instala as dependências básicas
pip install transformers==4.19.2 diffusers invisible-watermark --prefer-binary
# O k-diffusion deve ser instalado a partir do git.
pip install git+https://github.com/crowsonkb/k-diffusion.git --prefer-binary
# Volte ao diretório inicial e instale as dependências do projeto
cd ...
pip install -r requirements.txt --prefer-binary
# Essas são as versões que testei várias vezes, e é recomendável que você as instale adequadamente.
pip install pytorch_lightning==1.9
pip install -U xformers==0.0.28.post2 torchvision==0.20.0 torchaudio==2.5.0 --index-url https://download.pytorch.org/whl/cu124
pip install pydantic==1.10.11
pip install wandb==0.15.12
Por fim, inicie o serviço:
python launch.py --xformers --no-gradio-queue
Registro de buracos
- Conflito de versão de dependência
A armadilha é a questão do controle de versão da dependência, em particular as versões do PyTorch e do xformers precisam corresponder. As combinações de versões que listei acima foram testadas várias vezes e funcionam perfeitamente. - problema de rede
Acesso científico à Internet. Se você realmente não conseguir fazer o download, recomendamos o uso de uma fonte espelho.
Localização em chinês
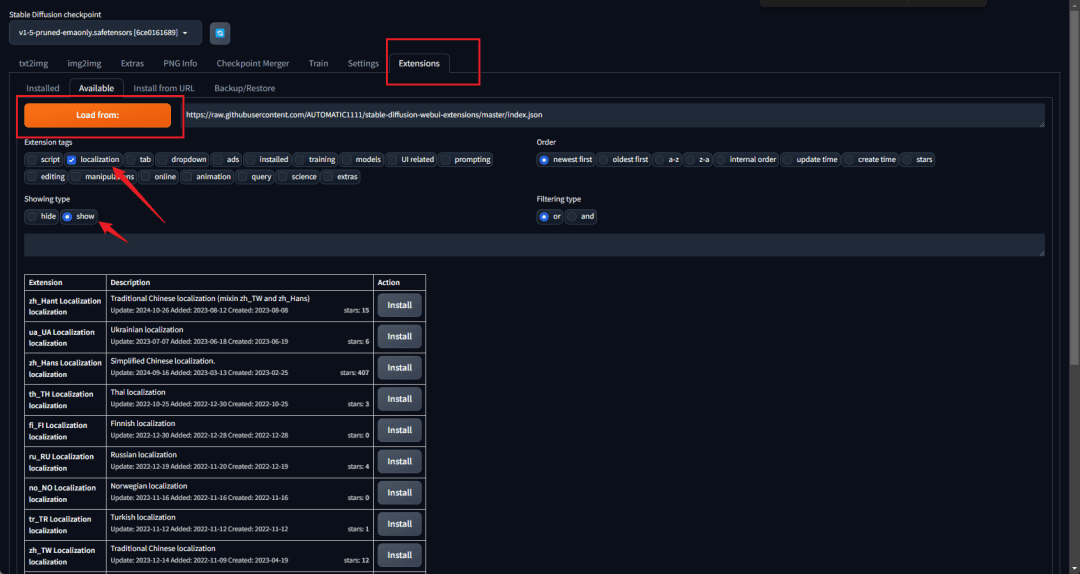
Entre na interface e selecioneExtensõesClique emCarregar de(de carga etc.) carga
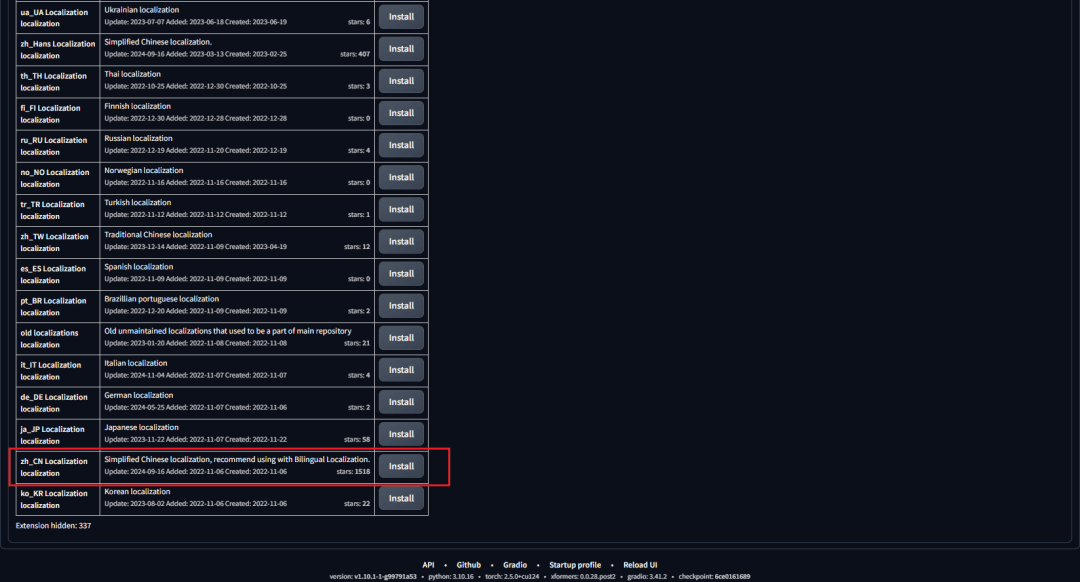
localizarLocalização zh_CNstrike (no teclado)Instalar
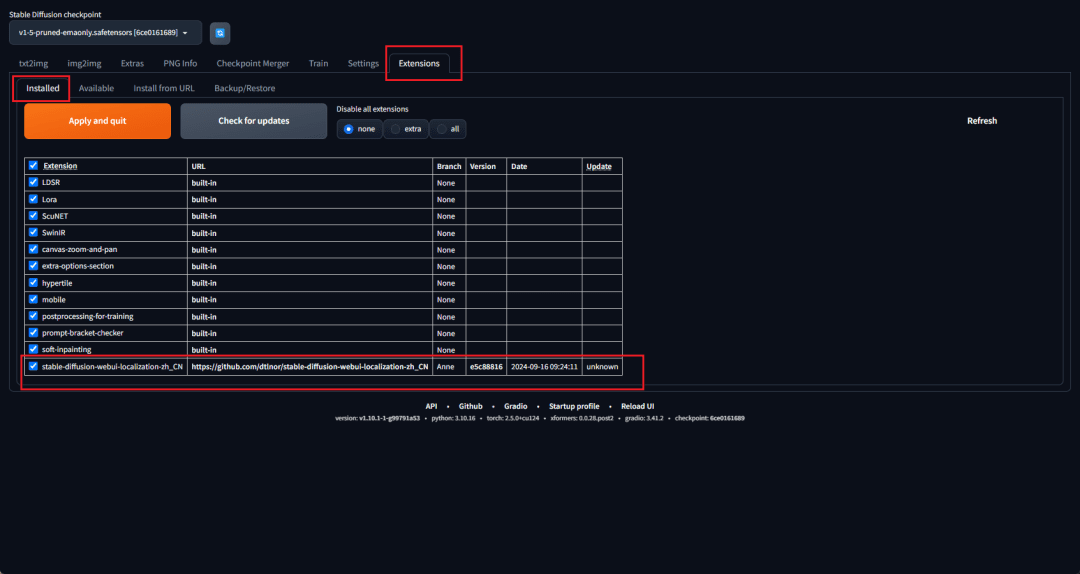
Depois de instalado, você poderá ver na tela de plug-ins instalados o
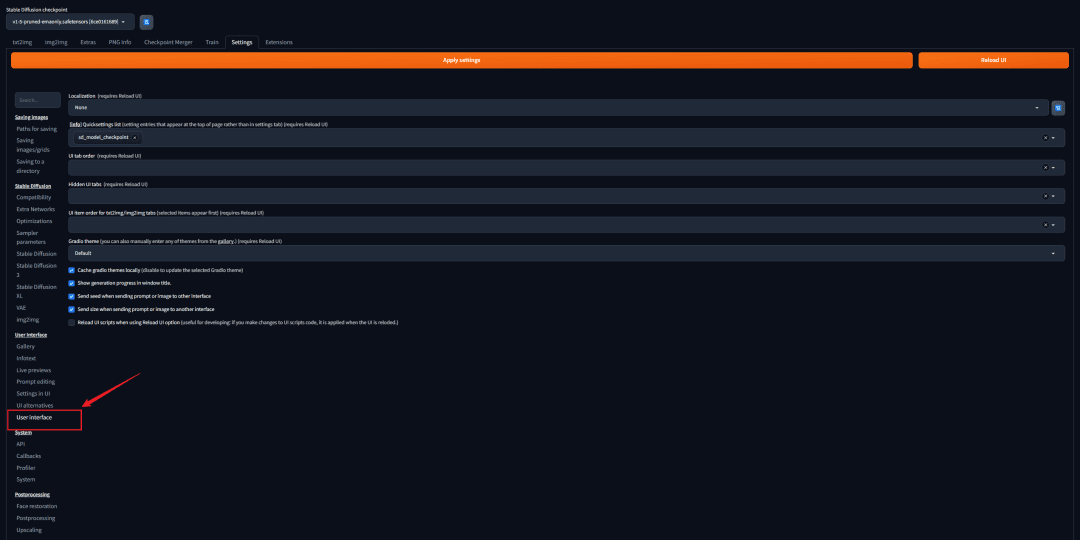
Então venha.Interface do usuáriointerfaces
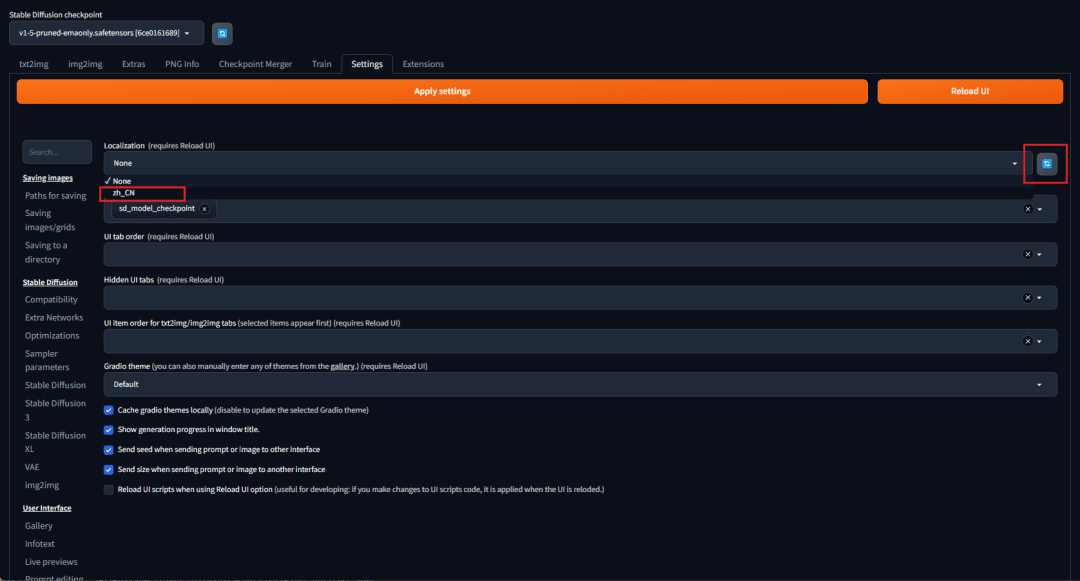
opçãozh_CN
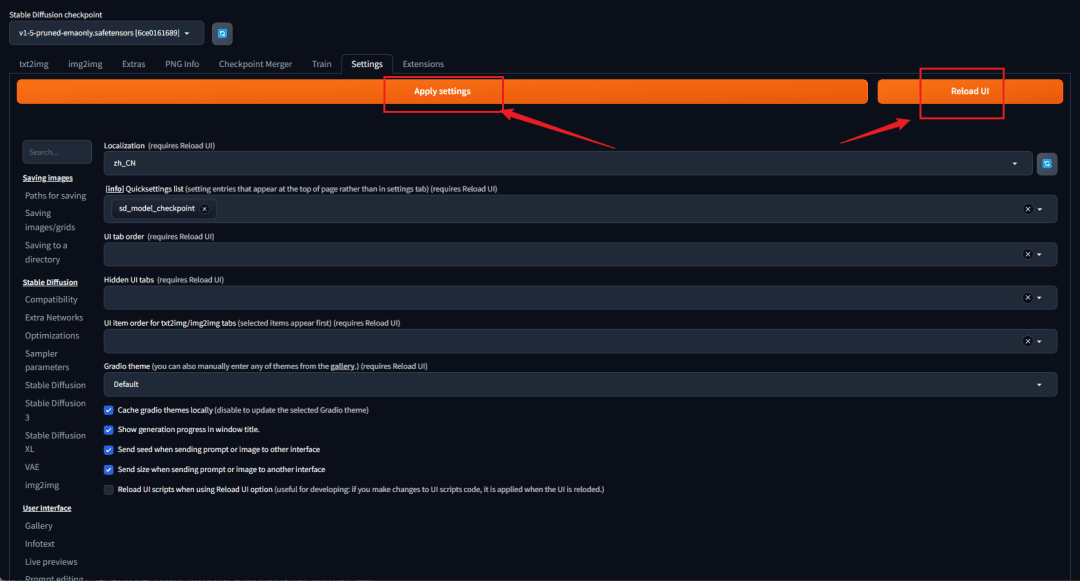
Aplicar as configurações e reiniciar a interface do usuário
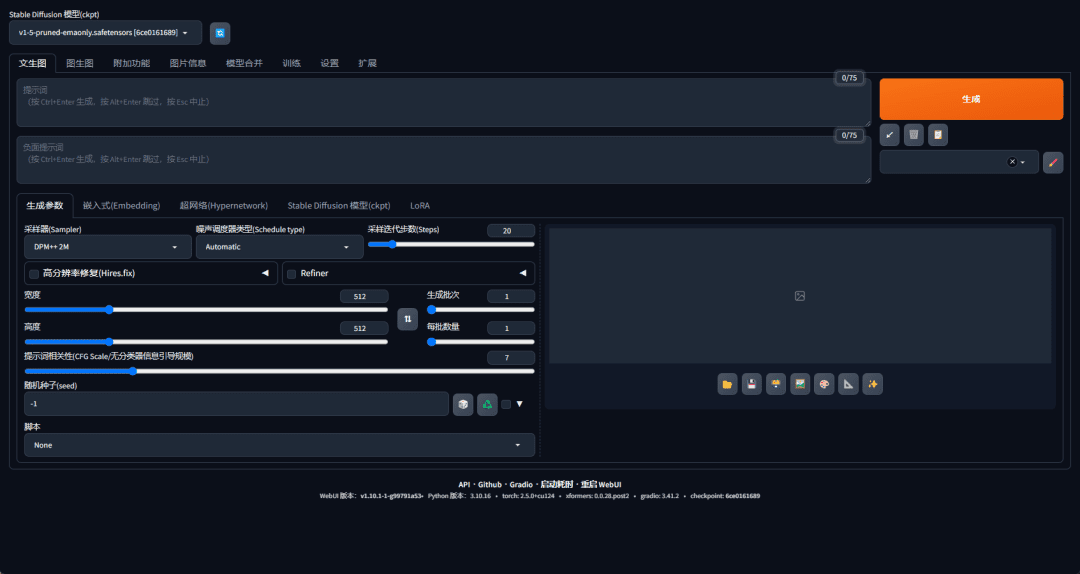
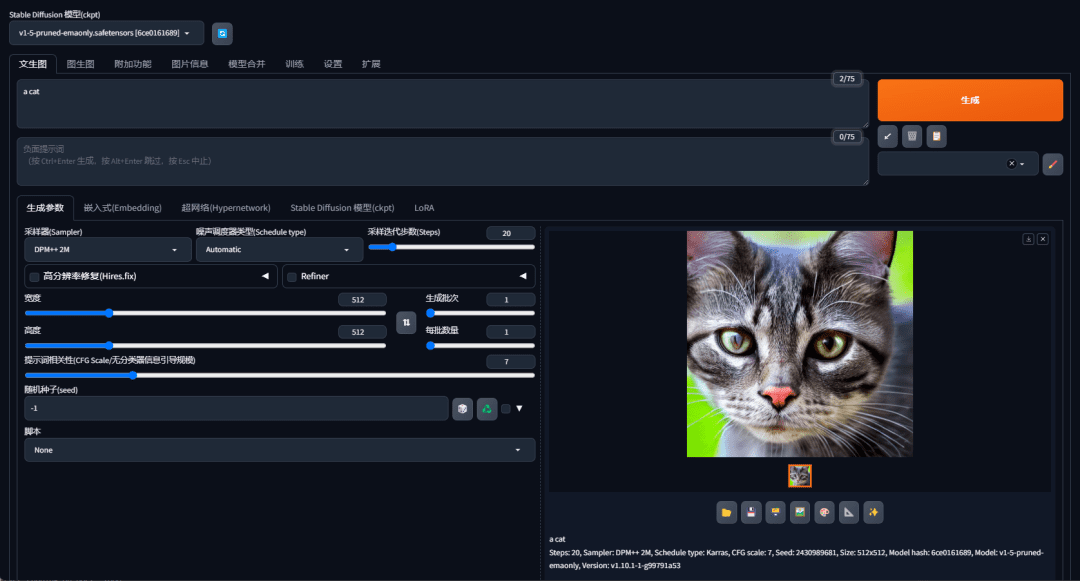
Após reiniciar o webui, a interface já está em chinês.
Imagens geradas para teste e executadas com sucesso!


