General Introduction
GenXD is an open source project developed by the National University of Singapore (NUS) and Microsoft team. It focuses on generating arbitrary 3D and 4D scenes, solving the challenges of real-world 3D and 4D generation due to insufficient data and complex model design. The project builds a flexible generation framework by analyzing camera and object motion and combining it with large-scale real-world data.GenXD provides the first open-source 4D dataset, CamVid-30K, which contains camera pose and motion information from more than 30,000 videos. Users can use it to generate videos or consistent 3D views that match the camera's trajectory. The project has been accepted by ICLR 2025 in January 2025 and has gained widespread interest on GitHub for researchers and developers.

Function List
- Generate arbitrary 3D scenes and support consistent 3D view output from multiple viewpoints.
- Generate 4D motion scenes to create videos that change over time.
- Decompose camera and object motion to ensure a natural flow of generated content.
- The CamVid-30K dataset is available to support dynamic 3D and 4D mission studies.
- Supports multiple conditional inputs (e.g., images or a small number of views) to flexibly adjust the generated results.
- Convert 3D views into editable digital assets.
- Integrated multi-view time module to optimize 3D and 4D data fusion.
Using Help
GenXD is a research open source framework, users need to build the environment locally to use it. The following is a detailed installation and operation guide to help users get started quickly.
Installation process
GenXD requires programming environment support and is suitable for users with some technical foundation. The installation steps are as follows:
- Preparing the base environment
- Make sure Python 3.10 or later is installed on your computer.
- Install Git for downloading code. Run it in the terminal:
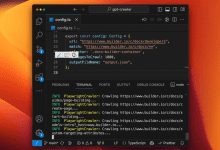
git clone https://github.com/HeliosZhao/GenXD.git - Go to the project catalog:
cd GenXD
- Installing core dependencies
- Install PyTorch (recommended version 2.1.2 with CUDA support). Run it:
pip install torch==2.1.2 torchvision==0.16.2 torchaudio==2.1.2 --index-url https://download.pytorch.org/whl/cu118 - Install other dependencies (e.g. diffusers 0.30.3). Run:
pip install -r requirements.txt - in the event that
requirements.txtNot provided, please refer to the official instructions to install NumPy, OpenCV and other libraries.
- Install PyTorch (recommended version 2.1.2 with CUDA support). Run it:
- Download pre-trained model
- Download the model from Hugging Face:
pip install -U "huggingface_hub[cli]" huggingface-cli download Yuyang-z/genxd --local-dir ./genxd-model - Place the model files in the project directory under the
genxd-modelFolder.
- Download the model from Hugging Face:
- Download Dataset
- The CamVid-30K dataset is available for download at Hugging Face:
- The VIPSeg subset and the OpenVid subset are available at https://huggingface.co/datasets/Yuyang-z/CamVid-30K.
- WebVid-10M subset is not available due to limitation, you need to get it by yourself.
- Download and unzip to
data/camvid-30kFolder.
- The CamVid-30K dataset is available for download at Hugging Face:
- Checking the environment
- Make sure you have an NVIDIA GPU running:
python -c "import torch; print(torch.cuda.is_available())"exports
TrueIndicates a normal environment.
- Make sure you have an NVIDIA GPU running:
Using the main functions
GenXD supports a variety of generation tasks, and the following is how to do it.
1. Customize images to generate 3D scenes
- Prepare to enter: Place an image (in PNG or JPG format) into the
example-imagesFolder. - Setting the camera mode: Support
forward(forward) andorbit(Surround) two modes. - Run command::
DATA_ROOT="example-images"
OUTPUT_DIR="outputs/example-images"
accelerate launch --main_process_port 1223 inference.py
diffusion.pretrain_unet="./genxd-model"
diffusion.output_dir="$OUTPUT_DIR"
+evaluator.data_name="static_cam_single"
+evaluator.data_root="$DATA_ROOT"
+evaluator.camera_info.mode="forward"
+evaluator.camera_info.elevation=0.
+evaluator.camera_info.azimuth_range=[-30,30]
+evaluator.focal=1.0938
+evaluator.camera_info.radius=2.0
- Results View: The generated multi-view 3D view is saved in the
outputs/example-imagesThe program can be opened with tools such as Blender.
2. Sample less 3D scene generation
- Prepare data: Download the ReconFusion dataset (https://huggingface.co/datasets/Yuyang-z/reconfusion-torch) and unzip it into the
data/reconfusion-torch/re10kThe - Step 1: Generate camera tracks::
python tools/pose_traj_generate.py -d data/reconfusion-torch/re10k -o outputs/pose_dataset --save_data_pose -sx 0.2 0.4 -0.2 -0.4 -sz 0.2 0.4 -0.2 -0.4 -n 18
- Step 2: Generate Views::
accelerate launch --main_process_port 1224 inference.py
diffusion.pretrain_unet="./genxd-model"
diffusion.output_dir="outputs/re10k-group"
+evaluator.data_name="reconfgroup"
+evaluator.data_root="data/reconfusion-torch/re10k"
+evaluator.pose_dir="outputs/pose_dataset/re10k"
+evaluator.num_context_views=3
+evaluator.n_views=3
+evaluator.save_target_only=True
+evaluator.pad_to_square=True
- Results View: The generated 3D view is displayed in the
outputs/re10k-groupThe
3. Generation of 4D dynamic scenes
- Prepare data: Use the video in the CamVid-30K dataset, put it into the
data/camvid-30kThe - Run command: You need to adjust the parameters according to the specific task, refer to the GitHub update for example commands.
- Results View: The generated video is saved in the specified output directory.
Featured Function Operation
Decomposing camera and object motion
- GenXD uses a multi-view time module to separate camera and object motion.
- running example::
python motion_decompose.py --input data/camvid-30k/sample_video --output outputs/motion_data
- use: The generated motion data can be used to adjust the 4D scene.
CamVid-30K dataset usage
- data structure: Unzipped, it contains images and COLMAP files (e.g.
cameras.bin). - Load data: Put in
data/camvid-30k, run the test script:
python test_dataset.py --dataset data/camvid-30k
caveat
- GPU memory needs to be 16GB or more, and generating 4D tasks takes a long time.
- Check the latest code update for the official March 26, 2025 release of the pre-trained model.
- For questions, contact .
application scenario
- research experiment
- The researchers used GenXD to test 3D and 4D generation algorithms and validate the new models.
- Virtual Content Creation
- Creators generate dynamic scenes for use in animation or virtual reality projects.
- Education and training
- Students learn computer vision and generative techniques using the CamVid-30K dataset.
QA
- Is GenXD free?
- Yes, it is an open source project under the Apache-2.0 license.
- Do I need an internet connection to use it?
- Not required, installed and ready to run locally.
- Are the generated results real?
- Not fully realistic, the model does not achieve a perfect sense of realism and is for research use only.